RSS

Archive for the ‘Electronics’ Category

Simulating the 74HC373

Thursday, January 2nd, 2014

In my last post on VHDL, I looked at simulating the 74HC373 using the Free Model Foundry std373 transparent latch component. This component simulated a single transparent latch and allowed the addition of timing information to give a more realistic simulation.

The 74HC373 contains eight of these transparent latches in a single DIP package with a single latch enable and single output enable line. This post builds on the earlier work and simulates the DIP package rather than the single latch.

Test Case

Before we progress we should remind ourselves of the test bench created for the single latch. This changed the data inputs (D, le and oe) to the single latched and verified the output traces against the output expected. The simulated output looked like this:

Simulation With Added Timing Data

Simulation With Added Timing Data

For this example we will use exactly the same sequence of events but use eight data bits rather than just a single bit. The sequence of events should look the same but the data (when present) will reflect the fact that more than one data line is being manipulated.

Implementing the 74HC373

Being new to VHDL and the design process using this language, the final solution took an hour or two to realise. I considered various options but all tended to be code related which is probably natural giving my software development background.

Then inspiration struck and I came up with the following code:

library IEEE;
use IEEE.STD_LOGIC_1164.ALL;

entity HC74373 is
    port ( dataIn : in  STD_LOGIC_VECTOR (7 downto 0);
           dataOut : out  STD_LOGIC_VECTOR (7 downto 0);
           le : in  STD_LOGIC;
           oe : in  STD_LOGIC);
end HC74373;

architecture Behavioral of HC74373 is
    component std373 is 
        port
        (
            Q : out std_logic;
            D, LE, OENeg : in std_logic
        );
    end component;
begin
    d0: std373 port map (LE => le, OENeg => oe, D => dataIn(0), Q => dataOut(0));
    d1: std373 port map (LE => le, OENeg => oe, D => dataIn(1), Q => dataOut(1));
    d2: std373 port map (LE => le, OENeg => oe, D => dataIn(2), Q => dataOut(2));
    d3: std373 port map (LE => le, OENeg => oe, D => dataIn(3), Q => dataOut(3));
    d4: std373 port map (LE => le, OENeg => oe, D => dataIn(4), Q => dataOut(4));
    d5: std373 port map (LE => le, OENeg => oe, D => dataIn(5), Q => dataOut(5));
    d6: std373 port map (LE => le, OENeg => oe, D => dataIn(6), Q => dataOut(6));
    d7: std373 port map (LE => le, OENeg => oe, D => dataIn(7), Q => dataOut(7));
end Behavioral;

No coding (as in conventional software development). All of the work is performed by the mapping of the ports from the std_logic_vector to the bits std_logic inputs and outputs to the std373 component.

Testing

As already mentioned, the sequence of events we will use as a test case will match tests for a single latch. The test bench becomes:

LIBRARY ieee;
USE ieee.std_logic_1164.ALL;

— Uncomment the following library declaration if using
— arithmetic functions with Signed or Unsigned values
–USE ieee.numeric_std.ALL;

ENTITY HC74373TestBench IS
END HC74373TestBench;

ARCHITECTURE behavior OF HC74373TestBench IS

— Component Declaration for the Unit Under Test (UUT)

COMPONENT HC74373
PORT(
dataIn : IN std_logic_vector(7 downto 0);
dataOut : OUT std_logic_vector(7 downto 0);
le : IN std_logic;
oe : IN std_logic
);
END COMPONENT;

–Inputs
signal dataIn : std_logic_vector(7 downto 0) := (others => ‘0’);
signal le : std_logic := ‘1’;
signal oe : std_logic := ‘1’;

–Outputs
signal dataOut : std_logic_vector(7 downto 0);
signal clock : std_logic := ‘0’;
BEGIN

— Instantiate the Unit Under Test (UUT)
uut: HC74373 PORT MAP
(
dataIn => dataIn,
dataOut => dataOut,
le => le,
oe => oe
);

— Clock process definitions
clockProcess: process
begin
clock <= '0'; wait for 125 ns; clock <= '1'; wait for 125 ns; end process; -- Stimulus process stim_proc: process begin -- -- Initial condition, latch should have stabilised and be high impedance. -- wait for 125 ns; -- -- Set data in to all zeroes, output should still be high impedance. -- le <= '0'; wait for 125 ns; -- -- Now enable the output. -- oe <= '0'; wait for 125 ns; -- -- Changing the data whilst LE is low does not change the output. -- dataIn <= "11110000"; wait for 125 ns; -- -- Now set the data in whilst latch and output enable are both allowed. -- Data output should become 11001100. -- le <= '1'; wait for 125 ns; -- -- Now set the data in whilst latch and output enable are both allowed. -- Data output should become 11110000. -- dataIn <= "10101010"; wait for 125 ns; -- -- Turn off the latch enable and set the data in bits. The data output -- should not change. -- le <= '1'; dataIn <= "00110011"; wait for 125 ns; -- -- Re-enable the output, should become 10101010 as 00110011 has not -- been latched yet. -- oe <= '1'; wait for 125 ns; -- -- Output is turned off, latch the data and enable the output. -- le <= '0'; wait for 125 ns; le <= '1'; oe <= '0'; wait for 125 ns; -- -- End of test. -- wait; end process; END; [/code]

The output from the simulator is:

74HC373 Simulation Output

74HC373 Simulation Output

As you can see, the sequence of events for the single latch matches those for the 74HC373 component.

Conclusion

Now I look at this solution it seems obvious. Something to bear in mind as I start to use more and more components from the Free Model Foundry library.

Next stop a buffer driver.

Why Do We Prototype?

Wednesday, January 1st, 2014

I’ve been playing with the TLC5940 for a few years now. I aim to eventually have it play a part in a larger project but I need to get a few things ironed out first. I’m currently on my second prototype board, well they are more proof of concept boards really.

This post is not really about the boards themselves but more about the mistakes I’ve made along the way. Hence the title of this post, Why do we prototype?

I think the simple answer is that we make mistakes.

Design Goals

The long term aim of this project is to use the TLC5940 to drive a grid of LEDs. The chip allows the connection of the LEDs directly to the chip but I want to use a transistor (or an equivalent) to turn the LEDs on and off and not the TLC5940 directly.

Breadboard

The breadboard circuit had all of the necessary components on the board and was pretty simple to get going. I started by connecting the LEDs directly to the TLC5940 and then built the software to run the circuit. The software runs on the STM8S103F3.

The next step is to connect one or more LEDs through a transistor. For this I used a PNP transistor and connected one of the LEDs using the transistor as a switch.

So far, so good. All is well with the world and I have some flashing LEDs.

The board (without the TLC5940s) looks like this:

OriginalBreadboardWithoutTLC5940

Next step, prototype.

TLC5940 – Rev A

At this point I had designed a few boards and thought I’d push my SMD skills a little. I decided to use iTeads 5cm x 5cm manufacturing service and with the exception of the external connectors I would use SMD components only.

To give you an idea of the scale of this, the circuit requires 2 ICs plus 6 supporting discrete components. Each LED (and there are 16 of them) requires three discrete components for the driver plus the LED itself.

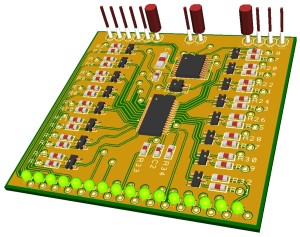
That is a pretty dense board for a beginner. Here is the 3D render of the board:

TLC5940 Rev A  Prototype 3D Render

TLC5940 Rev A Prototype 3D Render

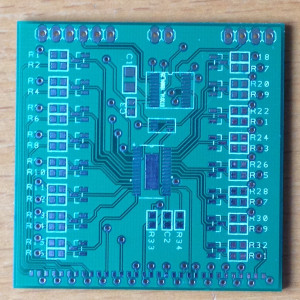
And the bare board itself:

TLC5940 Driver Board Rev A - Front

TLC5940 Driver Board Rev A – Front

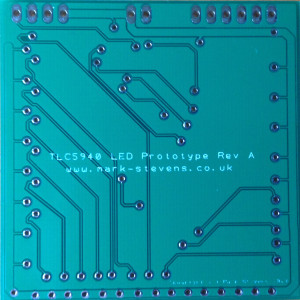
and the back:

TLC5940 Driver Board Rev A - Back

TLC5940 Driver Board Rev A – Back

Lesson 1 – Track Routing

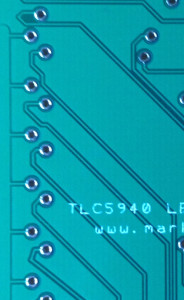
I’ve been using DesignSpark PCB for all of my designs and it’s a pretty good piece of software and I am very impressed. One feature I have only recently used in anger is the ability to turn off some of the layers. Have a look at the traces to the left of the board below:

TLC5940 Prototype Rev A Routed Traces

TLC5940 Prototype Rev A Routed Traces

This did not really cause an issue as there was no routing error but I could have routed these tracks more elegantly. The problem was caused by me having both the top and bottom traces visible at the same time. In my mind I had to route these tracks around the traces on the top layer as well as the artefacts on the bottom layer. Hence I took the traces around the via when I could have taken them directly from the via on the right (as viewed from below).

I would have spotted this more logical routing had I turned off the top copper view as soon as the trace passed through to the bottom copper layer.

Not really an error, more of a cosmetic nicety.

Lesson 2 – Use the Same Parts

Between the breadboard stage and the PCB stage I changed the part used in the driver. Not really too much of an issue except…

I did not get an equivalent PTH part and test it on the breadboard first.

As it stands the transistor driver circuit does not function and needs some more attention.

To enable testing of the remainder of the circuit you can use the following work around. Abandon the driver and change the value of the IREF resistor to allow a small enough current through the LED.

Lesson 3 – 0603 Parts Are Small Enough For the Hobbyist

Some of the parts I used in the design are 0402. These are small parts and really difficult to solder. It is especially difficult to see markings on the components.

In future I think 0603 is as small as I’ll go.

TLC5940 – Rev B

The Rev A board was a bit of a disaster. I never really managed to get the board working so it was time to go back to first principles and build a simpler board. Enter Revision B.

Revision B of the board will have a reduced brief. This board will use a mixture of SMD and PTH components. The STM8S and supporting components will be surface mount but the TLC5940’s will be PTH. I’m getting reasonably confident that I can get the STM8S on a board and working even in surface mount format.

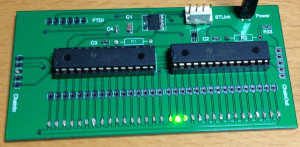
Boards ordered, arrived and assembled. Here’s is a photo of it working:

Lesson 3 – Vcc and Ground Are Not Interchangeable

In redesigning the circuit I had to replace the TLC5940 component and so added the new one and changed the resistor value for the LEDs I’d be working with. Except I connected the IREF resistor to Vcc instead of ground.

TLC5940 Prototype Rev B Working

TLC5940 Prototype Rev B Working

Notice that the places for R1 and R2 are empty. That’s because they are on the bottom of the board:

TLC5940 Prototype Rev B Resistors

TLC5940 Prototype Rev B Resistors

Lesson 4 – Plastic Melts At Low Temperatures

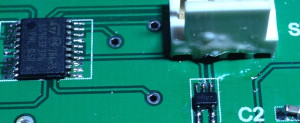
For this circuit I use a single AND gate to square off the CCO output from the STM8S. This small IC was placed onto the board after the connector for the ST-Link programmer. The only problem was that I was using a hot air rework station to fix this part to the board. The hot air from the rework station caused some bubbling on the plastic of the connector.

ST-Link Connector

ST-Link Connector

I suppose this brings me to the next lesson.

Lesson 5 – Use the Board Luke

OK, so there’s been too much Star Wars on TV over Christmas.

What I really mean is, when prototyping, use all of the board available to you. The manufacturing process I used allowed for a 10cm x 5cm board (or anything up to that size) for a fixed price. For this board there is a lot of spare real estate and I could, with ease, have put that connector and the IC where they would not have interfered with each other.

The final board may have to be compact and fit into a location determined by the rest of the project but when testing you might as well use all of the space to your advantage.

Conclusion

I have a working Revision B board which mean I can free up the breadboard for other work but there is still some way to go before I have the final project completed. As with all things in life, this is a learning experience.

Hope you found this useful.

Using the Free Model Foundry 373 Latch Model

Saturday, December 28th, 2013

The last post on VHDL/FPGA presented a naive implementation of a 74*373 latch and went as far as adding a little timing information to make the behavioural simulation a little more realistic. The post also hinted at the fact that there are some free VHDL libraries out on the net. This post uses a part from one of these libraries and shows how to add more accurate timing information to the behavioural simulation.

Free Model Foundry

The Free Model Foundry is an open source repository of VHDL and Verilog models. The models are freely available and the majority of the models are provided with timing information.

The 74xxxx series of chips can be located in the STD series of models. A quick check reveals that the library contains a 74*373 behavioural model in the file std373.vhd.

So let’s create a project and check out this model.

Creating a Project

First thing to do after starting Xilinx Webpack ISE is to create a new project to hold the circuit. From the startup screen select New Project:

ISE Project Navigator Start Up

ISE Project Navigator Start Up

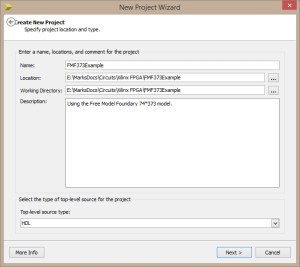
Now give the project a name. I selected FMF373Example, gave the project a short description and set the Top Level Source TYpe to HDL.

New Project Wizard Screen 01

New Project Wizard Screen 01

Next set the device information:

New Project Wizard Screen 02

New Project Wizard Screen 02

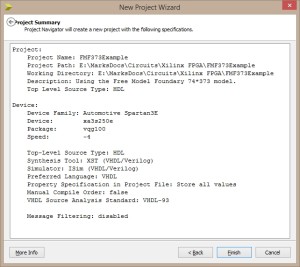
The final window displays a summary of the project information:

New Project Wizard Screen 03

New Project Wizard Screen 03

The next step is to add the model to the empty project we have just created. Right click on the project and select Add Copy of Source…. Now navigate to the directory containing the VHDL source files for the FMF models and select the file std373.vhd. This will copy the file from the directory containing the original model files and place a new copy in the project directory.

Opening the source file for this model shows that the Free Model Foundry implementation is vastly more complex than the model presented in the previous post.

One of the first things to notice at the top of the file is that this model uses a number of libraries not seen in the previous posts, namely:

  • IEEE.VITAL_timing
  • IEEE.VITAL_primitives
  • FMF.gen_utils
  • FMF.ff_pacakge

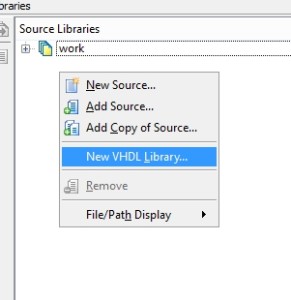
The FMF libraries are supplied by the Free Model Foundry we simply need to add them to the project. Select the Libraries tab:

Libraries Tab

Libraries Tab

and add a New VHDL Library:

Add New Library

Add New Library

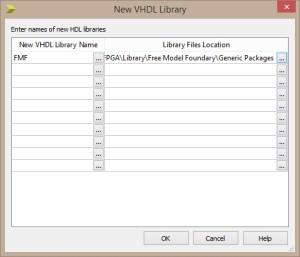
Name the library FMF and set the directory for the files to the location where the generic files are located on your machine:

FMF Library Properties

FMF Library Properties

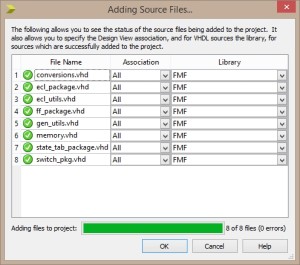
Next, add the files:

FMF Library Files

FMF Library Files

Next step, check that we can simulate the model we have so far. This will verify that all of the libraries are in place and the model compiles. Select Simulation and then open the simulator by right clicking on Simlate Behavioural Model and select run all. You should see something like the following:

Simulation Run Without Test Bench

Simulation Run Without Test Bench

Close the simulator and return to the ISE Project Navigator.

Next step is to add a test bench. Follow the instructions in the previous post and add a new test bench. The system fails at this point with the message:

ERROR:HDLParsers:3014 – “E:/MarksDocs/Circuits/Xilinx FPGA/Library/Free Model Foundary/Generic Packages/gen_utils.vhd” Line 23. Library unit VITAL_primitives is not available in library IEEE.

To date I have still not been able to find a satisfactory answer to why this happens. Even Google is being of little help at the moment. To work around this I modified the code in the new test bench code window which was opened and created the following test bench:

LIBRARY ieee;
USE ieee.std_logic_1164.ALL;
 
-- Uncomment the following library declaration if using
-- arithmetic functions with Signed or Unsigned values
--USE ieee.numeric_std.ALL;
 
ENTITY LatchTest IS
END LatchTest;
 
ARCHITECTURE behavior OF LatchTest IS 
 
    -- Component Declaration for the Unit Under Test (UUT)
    component std373
    port
    (
         LE : in  std_logic;
         OENeg : in  std_logic;
         D : in  std_logic;
         Q : out  std_logic
    );
    end component;
    
    --
    --  Inputs
    --
    signal le : std_logic := '1';
    signal oe : std_logic := '1';
    signal dataIn : std_logic := '0';
    --
 	--  Outputs
    --
    signal dataOut : std_logic;
    --
    --  Clock signal.
    --
    signal clock : std_logic := '0';
begin
 
	-- Instantiate the Unit Under Test (UUT)
    uut: std373 PORT MAP
    (
        LE => le,
        OENeg => oe,
        D => dataIn,
        Q => dataOut
    );
    
    --
    --  Provide an 8 MHz reference clock signal.
    --
    clockProcess: process
    begin
        clock <= '1';
        wait for 125 ns;
        clock <= '0';
        wait for 125 ns;
    end process;
    
    process
    begin		
        --
        --  Initial condition, latch should have stabilised and be high impedance.
        --
        wait for 125 ns;
        
        le <= '0';
        wait for 125 ns;
        
        oe <= '0';
        wait for 125 ns;
        
        dataIn <= '1';
        wait for 125 ns;
        
        le <= '1';
        dataIn <= '1';
        wait for 125 ns;
        
        dataIn <= '0';
        wait for 125 ns;

        le <= '1';
        dataIn <= '1';
        wait for 125 ns;

        oe <= '1';
        wait for 125 ns;

        le <= '0';
        wait for 125 ns;

        le <= '1';
        oe <= '0';
        wait for 125 ns;
        --
        --  End of test.
        --
        wait;
    end process;
end;

Once entered, go back to the process window in the ISE Project Explorer, select Simulate Behavioural Model, right click and select ReRun All. The simulator windows should not open and show the following view when the global (full run) view has been selected:

Zoomed In Starting Simulation

Zoomed In Starting Simulation

Now if we zoom in on the trace to the 250ns section of the simulation you can see that there is a 1ns gap between the OE line dropping from 1 to 0 and the data on the dataOut line changing from high impedance to 0:

ZoomedIn At 250ns

ZoomedIn At 250ns

We will now have a closer look at the code and examine why this happens.

STD373 – Transparent Latch

One of the first things to note about the STD373 implementation is that this file only contains a behavioural model for a single latch.

The 74*373 is actually an octal transparent latch where each latch has it’s own distinct data input and out put lines but all share a common latch enable and output enable line. eight of these latches are required in order to simulate a single 74*373 chip.

The second pint is that this file contains the abstracted behavioural model for a latch only. This does not include any additional implementation code for a synthesis-able model.

STD373 Entity Declaration

At the top of the std373.vhd file is the following code:

--------------------------------------------------------------------------------
-- ENTITY DECLARATION
--------------------------------------------------------------------------------
ENTITY std373 IS
    GENERIC (
        -- tipd delays: interconnect path delays
        tipd_D              : VitalDelayType01 := VitalZeroDelay01;
        tipd_LE             : VitalDelayType01 := VitalZeroDelay01;
        tipd_OENeg          : VitalDelayType01 := VitalZeroDelay01;
        -- tpd delays
        tpd_D_Q             : VitalDelayType01 := UnitDelay01;
        tpd_LE_Q            : VitalDelayType01 := UnitDelay01;
        tpd_OENeg_Q         : VitalDelayType01Z := UnitDelay01Z;
        -- tsetup values: setup times
        tsetup_D_LE         : VitalDelayType := UnitDelay;
        -- thold values: hold times
        thold_D_LE          : VitalDelayType := UnitDelay;
        -- tpw values: pulse widths
        tpw_LE_posedge      : VitalDelayType := UnitDelay;
        tpw_LE_negedge      : VitalDelayType := UnitDelay;
        -- tperiod_min: minimum clock period = 1/max freq
        tperiod_LE_posedge  : VitalDelayType := UnitDelay;
        -- generic control parameters
        TimingChecksOn      : Boolean  := DefaultTimingChecks;
        MsgOn               : BOOLEAN := DefaultMsgOn;
        XOn                 : Boolean  := DefaultXOn;
        InstancePath        : STRING   := DefaultInstancePath;
        -- For FMF SDF technology file usage
        TimingModel         : STRING   := DefaultTimingModel
    );
    PORT (
        Q       : OUT   std_logic := 'U';
        D       : IN    std_logic := 'X';
        LE      : IN    std_logic := 'X';
        OENeg   : IN    std_logic := 'X'
    );

    ATTRIBUTE VITAL_LEVEL0 of std373 : ENTITY IS TRUE;
END std373;

This declaration details the port specifications for the model along with the timing information.

Port Specification

The port specification tells us that this model has only three inputs and one output and that these are of type std_logic. This tells us that this is a single latch as all of the ports are single signals.

Timing Information

The upper section of the declaration contains the timing information. This information is used throughout the model and these values influence the timing of the signals in the simulation. Remember the 1 ns delay in the above trace. This comes from the UnitDelay01 delays set in this timing block.

A little digging around the internet lead me to the file timing_p.vhd (on my machine this was installed in the directory C:\Xilinx\14.3\ISE_DS\PlanAhead\scripts\rt\data\vhdl\pkgs). This file contains the types, attributes, constants and functions/procedures for the timing models. Opening this file gives the definitions for the types and constants used in the generic code block above. The top of the file looks like this:

TYPE VitalTransitionType IS ( tr01, tr10, tr0z, trz1, tr1z, trz0,
                              tr0X, trx1, tr1x, trx0, trxz, trzx);

SUBTYPE VitalDelayType     IS TIME;
TYPE VitalDelayType01   IS ARRAY (VitalTransitionType   RANGE tr01 to tr10)
     OF TIME;
TYPE VitalDelayType01Z  IS ARRAY (VitalTransitionType   RANGE tr01 to trz0)
     OF TIME;
TYPE VitalDelayType01ZX IS ARRAY (VitalTransitionType   RANGE tr01 to trzx)
     OF TIME;

TYPE VitalDelayArrayType     IS ARRAY (NATURAL RANGE <>) OF VitalDelayType;
TYPE VitalDelayArrayType01   IS ARRAY (NATURAL RANGE <>) OF VitalDelayType01;
TYPE VitalDelayArrayType01Z  IS ARRAY (NATURAL RANGE <>) OF VitalDelayType01Z;
TYPE VitalDelayArrayType01ZX IS ARRAY (NATURAL RANGE <>) OF VitalDelayType01ZX;
-- ----------------------------------------------------------------------
-- **********************************************************************
-- ----------------------------------------------------------------------

CONSTANT VitalZeroDelay     : VitalDelayType     :=   0 ns;
CONSTANT VitalZeroDelay01   : VitalDelayType01   := ( 0 ns, 0 ns );
CONSTANT VitalZeroDelay01Z  : VitalDelayType01Z  := ( OTHERS => 0 ns );
CONSTANT VitalZeroDelay01ZX : VitalDelayType01ZX := ( OTHERS => 0 ns );

---------------------------------------------------------------------------
-- examples of usage:
---------------------------------------------------------------------------
-- tpd_CLK_Q : VitalDelayType  := 5 ns;
-- tpd_CLK_Q : VitalDelayType01  := (tr01 => 2 ns, tr10 => 3 ns);
-- tpd_CLK_Q : VitalDelayType01Z := ( 1 ns, 2 ns, 3 ns, 4 ns, 5 ns, 6 ns );
-- tpd_CLK_Q : VitalDelayArrayType(0 to 1)
--                          := (0 => 5 ns, 1 => 6 ns);
-- tpd_CLK_Q : VitalDelayArrayType01(0 to 1)
--                          := (0 => (tr01 => 2 ns, tr10 => 3 ns),
--                              1 => (tr01 => 2 ns, tr10 => 3 ns));
-- tpd_CLK_Q : VitalDelayArrayType01Z(0 to 1)
--                        := (0 => ( 1 ns, 2 ns, 3 ns, 4 ns, 5 ns, 6 ns ),
--                            1 => ( 1 ns, 2 ns, 3 ns, 4 ns, 5 ns, 6 ns ));
---------------------------------------------------------------------------

The key to the problem for me was the comment block at the bottom of the block as this gives examples of how to use the types.

Setting The Timing Information

Some of the Free Model Foundry libraries contain timing information along with some tools detailing how the timing information can be used. At the moment I have been unable to work out how to use these tools and the timing information.

What I believe I have been able to do is to take the timing information in the data sheet for the 74HC373 and combine this with the model to adjust the behaviour of the code above. Here’s how I did it.

Looking at the VitalTransitionType there are eight types defined:

TYPE VitalTransitionType IS ( tr01, tr10, tr0z, trz1, tr1z, trz0,
                              tr0X, trx1, tr1x, trx0, trxz, trzx);

A little thought lead me to believe that the types are symbolic names for the transitions of the digital signals. So tr01 represents the transition from 0 to 1, tr0z represents a transition from 0 to high impedance etc.

Next we have the following code:

TYPE VitalDelayType01 IS ARRAY (VitalTransitionType RANGE tr01 to tr10) OF TIME;

This line of code defines a type containing two time elements. I believe that these represent the time delays for signals changing from 01 to 1 and also from 1 to 0.

If we combine this information with the following code from the entity definition of the std373 component:

-- tpd delays
tpd_D_Q             : VitalDelayType01 := UnitDelay01;

Here tpd_D_Q represents the time it takes for the input data (D) to be reflected on the output (Q). From the data sheet for the 74HC373 this is 18ns. Changing the above line to:

tpd_D_Q             : VitalDelayType01 := (tr01 => 18 ns, tr10 => 18 ns);

Making a few more changes using the information in the data sheet gives the following timing code:

-- tipd delays: interconnect path delays
tipd_D              : VitalDelayType01 := VitalZeroDelay01;
tipd_LE             : VitalDelayType01 := VitalZeroDelay01;
tipd_OENeg          : VitalDelayType01 := VitalZeroDelay01;
-- tpd delays
tpd_D_Q             : VitalDelayType01 := (tr01 => 18 ns, tr10 => 18 ns);
tpd_LE_Q            : VitalDelayType01 := (tr01 => 30 ns, tr10 => 30 ns);
tpd_OENeg_Q         : VitalDelayType01Z := (tr01 => 12 ns, tr10 => 12 ns, tr0z => 12 ns, trz1 => 15 ns, tr1z => 9 ns, trz0 => 18 ns);
-- tsetup values: setup times
tsetup_D_LE         : VitalDelayType := 10 ns;
-- thold values: hold times
thold_D_LE          : VitalDelayType := 10 ns;
-- tpw values: pulse widths
tpw_LE_posedge      : VitalDelayType := 6 ns;
tpw_LE_negedge      : VitalDelayType := 7.3 ns;
-- tperiod_min: minimum clock period = 1/max freq
tperiod_LE_posedge  : VitalDelayType := 10 ns;

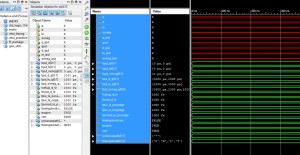
Running this through the simulator using the test bench gives the following trace:

Simulation With Added Timing Data

Simulation With Added Timing Data

The trace shows that there is a delay between the data appearing on the data input and the same data appearing on the output pin. This appears to simulate the expected behaviour of a single latch using the timing parameters from the data sheet.

Conclusion

I am sure that there is a much better way to use timing information and further research is required into the simulation tools and the data from the models. The techniques presented here allow the use of the timing information from the data sheet in order to simulate the behaviour of the desired component.

This post was challenging to write as there is very little information easily available on the IEEE VITAL library. Even Google was of little help in this area. I have presented my understanding of the topic from the little information I was able to obtain. Looking at the results in the simulator it does appear that this technique is valid even if it is a little long winded. Hopefully I will find a way of using this information in a more efficient method once I am more familiar with the tools.

Next steps, combine eight of these to form a 74*373 latch and more research into the tools.

Simulating A 74HC373 Latch

Wednesday, December 25th, 2013

Some of my current projects are starting to require the use of 7400 series logic chips. Prototyping circuits with these chips gives me two obvious options:

  1. Breadboarding
  2. FPGA, simulation and implementation

Both of these will allow a prototype to be build but the only way to ensure the FPGA circuit works will be to implement the circuit on breadboard. The simulation option does offer two advantages over breadboarding, namely the ability to simulate and most importantly the chance to work out how to use FPGAs and the associated software.

Given the choice there is really only one option as I need to gain experience of VHDL, bring on the FPGA.

74*373 – Octal Transparent Latch with Three State Output

This is an interesting choice for simulation as the Xilinx software issues a warning about the creation of a latch when clocks are not used for synchronisation of signals. The reason for choosing this chip is simply the fact that this is one of the first chips I will be using in a larger project.

First Implementation

This first implementation concentrated on the functional definition of the latch. Examination of the data sheet for the chip describes the function as follows:

OE (active low)LE (active low)DataOutput
LHHH
LHLL
LLlL
LLhH
HXXZ

Where L = Low, H = High, Z = High impedance, X = Don’t care, l = low (h = high) as the signal appeared one setup period ago.

A quick implementation of this could be something like the following:

library ieee;
use ieee.std_logic_1164.all;

--
--  Define the interface for this module.
--
entity HC74373 is
    port
    (
        signal le : in  std_logic;
        signal oe : in  std_logic;
        signal dataIn : in  std_logic_vector (7 downto 0);
        signal dataOut : out  std_logic_vector (7 downto 0)
    );
end HC74373;

--
--  Behaviour of the model.
--
architecture Behavioral of HC74373 is
    --
    --  Store the data in the latch for output.
    --
    signal data : std_logic_vector (7 downto 0) := "00000000";
    --
    --  Temporary store for this model.  This will eventually be
    --  the output.
    --
    signal output : std_logic_vector (7 downto 0) := "ZZZZZZZZ";
begin
    process (le, oe, dataIn, data) is
    begin
        --
        --  When LE is low, the data on the input is stored in the latch.
        --
        if (le = '0') then
            data <= dataIn;
        end if;
        --
        --  When OE is low, the data in the latch is output, 
        --  otherwise the output is high impedance.
        --
        if (oe = '0') then
            if (le = '1') then
                output <= dataIn;
              else
                output <= data;
            end if;
          else
            output <= "ZZZZZZZZ";
        end if;
    end process;
    --
    --  Set the output to either the data in the latch or high impedance.
    --
    dataOut <= output;
end Behavioral;

A test bench is needed to simulate the behaviour of the latch.

library ieee;
use ieee.std_logic_1164.ALL;
 
-- Uncomment the following library declaration if using
-- arithmetic functions with Signed or Unsigned values
--USE ieee.numeric_std.ALL;
 
entity HC74373TestBench is
end HC74373TestBench;
 
architecture behavior OF HC74373TestBench is 
    component HC74373
    port
    (
         le : in  std_logic;
         oe : in  std_logic;
         dataIn : in  std_logic_vector(7 downto 0);
         dataOut : out  std_logic_vector(7 downto 0)
    );
    end component;
    
   --Inputs
   signal le : std_logic := '1';
   signal oe : std_logic := '1';
   signal dataIn : std_logic_vector(7 downto 0) := (others => '0');

 	--Outputs
   signal dataOut : std_logic_vector(7 downto 0);
begin
 
	-- Instantiate the Unit Under Test (UUT)
    uut: HC74373 PORT MAP
    (
        le => le,
        oe => oe,
        dataIn => dataIn,
        dataOut => dataOut
    );

    process
    begin		
        --
        --  Initial condition, latch should have stabilised and be high impedance.
        --
        wait for 100 ns;
        --
        --  Set data in to all zeroes, output should still be high impedance.
        --
        le <= '0';
        wait for 20 ns;
        --
        --  Now enable the output.
        --
        oe <= '0';
        wait for 20 ns;
        --
        --  Now set the data in whilst latch and output enable are both allowed.
        --  Data output should become 11110000.
        --
        dataIn <= "11110000";
        wait for 20 ns;
        --
        --  Turn off the latch enable and set the data in bits.  The data output 
        --  should not change.
        --
        le <= '1';
        dataIn <= "11001100";
        wait for 20 ns;
        --
        --  Re-enable the output, should become 11110000 as 11001100 has not
        --  been latched yet.
        --
        oe <= '1';
        wait for 20 ns;
        --
        --  Output is turned off, latch the data and enable the output.
        --
        le <= '0';
        wait for 20 ns;
        le <= '1';
        oe <= '0';
        wait for 20 ns;
        --
        --  End of test.
        --
        wait;
    end process;
end;

If we use the above test bench to simulate this then we get the following output:

74HC373 Simulated Output

74HC373 Simulated Output

The simulation above shows the circuit running at an equivalent 50 MHz (test bench delays of 20ns). I will be working at a lot slower speed. I anticipate the maximum clock speed to be around 8 MHz (125ns clock) and so the delays in the test bench will be adjusted accordingly.

Propagation Delay

From the simulation we can see that we have emulated the function of the latch with one minor exception, namely timing. In the above zoomed in trace we can see that the input of the latch is immediately reflected on the output pins. In reality this is not what happens as the circuit takes a small amount of time to respond to the input changes. This time is the propagation delay of the chip.

The propagation delay depends upon the change being made and the operating conditions of the circuit. The data sheets often quote several values for the delay. These will vary depending upon factors such as supply voltage and temperature. For the purpose of this post we will assume that the circuit is operating with a supply voltage of 4.5V and at room temperature. The values for the delays are also quoted as minimum, typical and maximum values.

The delays for the 74HC373 are:
ValueDelay (ns)
Data to Output30
LE to Output35
OE to Data30
tsetup12

If we are going to add these to the model then it may be better to consider breaking up the process into two or more processes each dealing with only a few signals.

The first process deals with latching the data:

process (le, dataIn) is
begin
    --
    --  When LE is low, the data on the input is stored in the latch.
    --
    if (falling_edge(le) or (le = '0')) then
        data <= dataIn after 12 ns;
    end if;
end process;

The above code will store the data in the internal buffer (the latch) if the latch enable pin changes or the data changes and the latch enable pin is low. The data is stored 12ns after the change (as defined in the data sheet).

The second process deals with the output from the latch:

[code=’c’] process (oe, dataIn, data) is begin — — When OE is low, the data in the latch is output, — otherwise the output is high impedance. — if (oe = ‘0’) then if (le = ‘1’) then output <= dataIn after 30 ns; else output <= data after 30 ns; end if; else output <= "ZZZZZZZZ" after 30 ns; end if; end process;

This code uses a default 30ns propagation delay for all signals. This is not exactly right but should be good enough for our purposes.

Running the simulation generates the following output (Remember, the delays in the test bench have been adjusted to 125ns):

74HC373 Simulated Output With Propagation Delays

74HC373 Simulated Output With Propagation Delays

We should perhaps look at the delay times in the above process as when that data is latched and also then output through dataOut the code will actually delay the output of the data for 42ns (12 from the latch process and 30 from the output process) when we are actually aiming for a 30ns delay. An exercise for another time.

Conclusion

I now have a latch which will operate at speeds of 8 MHz and I can now start to use this as a component in larger circuits. All that is needed now is a few more components and I can start to simulate larger circuits.

Along the way I have also found a few component libraries at least one of which contained a simulation of this component. Creating this component rather than use a standard library has allowed me to explore and understand more about the Xilinx software. Next step is to look at these libraries and compare this component.

1-Bit Full Adder With Carry

Saturday, November 16th, 2013

Last year I was given the Elektor FPGA board as a present. I had been wanting to work with FPGA as it presented a quick way of prototyping digital circuits and exploring the world of digital electronics. The board has been sitting in my parts collection for about 10 months. I have followed the tutorials in the magazine and decided that VHDL is probably the best way for me to start and use this board.

This post looks at my first attempt to simulate a 1-bit full adder with carry using binary logic implemented in VHDL.

I should also say that this is an early (i.e. inexperienced) project for me.

Software

Elektor recommended the Xilinx WebPack ISE software package for use with their board. It is free to use and all of their tutorials use this software. The version 14.7 download comes in at a heavy 6.17GB so make sure you have a good connection to the web or plenty of time to spare.

Project Specification

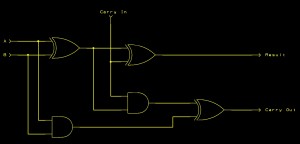
For the purpose of this exercise we will be implementing a 1-bit full adder with carry. For those not familiar with this circuit the schematic is as follows:

1-Bit Full Adder Schematic

1-Bit Full Adder Schematic

The circuit takes three bits, A, B and a carry bit. The three bits are added and two bits are output from the adder, the result bit and a carry bit. The logic table for the circuit is:

ABCarry InResultCarry Out
00000
01010
10010
11001
00110
01101
10101
11111

Time for start Webpack ISE.

ISE Project

First thing to do after starting Webpack ISE is to create a new project to hold the circuit. From the startup screen select New Project

ISE Project Navigator Start Up

ISE Project Navigator Start Up

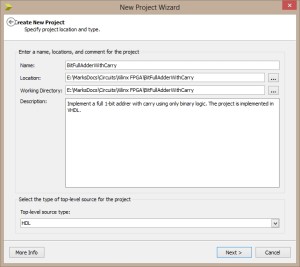
Now give the project a name. I selected BitFullAdderWithCarry. I actually wanted 1-Bit but ISE does not seem to like projects containing non-alpha characters. I provided a short description of the project in the Descriptionbox. Finally ensure that the project source type is set to HDL:

New Project Name And Properties

New Project Name And Properties

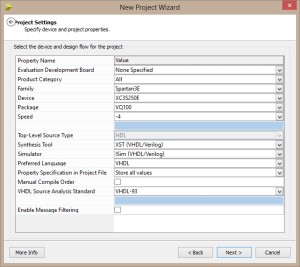
The next step is hardware specific. Here we define the target hardware characteristics. For the Elektor board we need to change the following parameters:

  • Device: XC3S250E
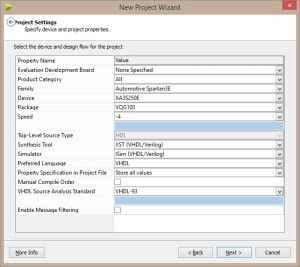
  • Package: VQ100
  • Speed: -4
Device Properties

Device Properties

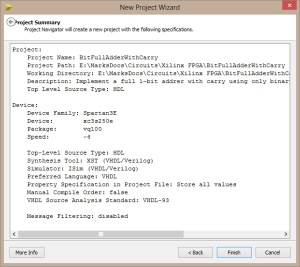
The next form simply shows the project details for review before the project is finally created.

New Project Summary

New Project Summary

The project will now be created and is ready for the addition of files.

Empty Hierarchy

Empty Hierarchy

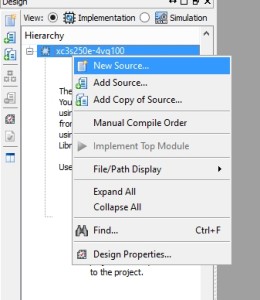
Right clicking on the device in the Hierarchy brings up the context menu which will allow the addition of new or existing files:

New File Menu

New File Menu

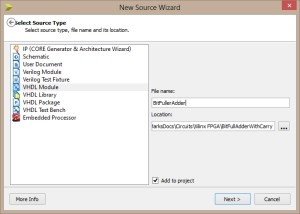
Select New Source option and a wizard will appear. In the New Source Wizard select VHDL Module and add a file name which will hold the source code for the module:

Module Type

Module Type

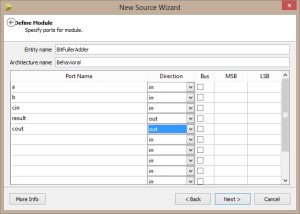
The next step is to define the ports for the module. The adder has three inputs (a, b and carry in) and two output (result and carry out). This dialog gives the option of defining the ports and their direction:

Specify Ports

Specify Ports

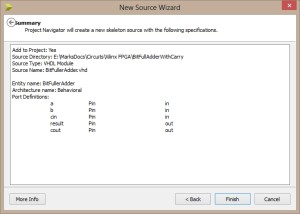
Finally a summary dialog is displayed where you can confirm the module and port information.

New Source Summary

New Source Summary

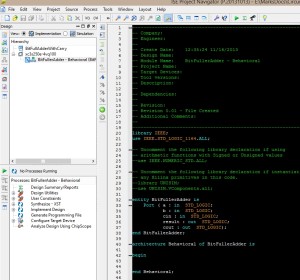
After clicking on the Finish button the new file will be added to the project along with a template for the module. The new template contains the port definitions entered in the previous dialogs, some comments and space to start entering the code to implement the module.

New Project Source Code

New Project Source Code

I must admit I find it slightly annoying that although VHDL is case insensitive, the system uses mixed case and it not consistent in it’s use. You will see what I mean when we get to testing the code.

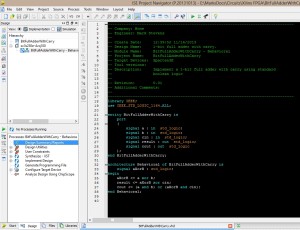
A little editing is required to get the code into a form I prefer. It is also time to add the code which implements the hardware for the full adder.

Adder Source Code

Adder Source Code

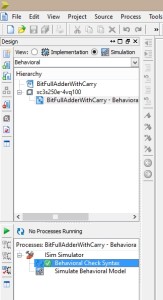
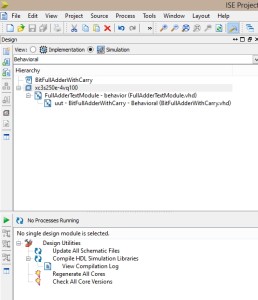
Once the code has been entered we need to perform a syntax check. Change the view in the top panel from Implementation to Simulation. Now turn your attention to the lower panel. Expand the ISIM Simulator, select Behavioural Check Syntax and click on the green triangle to start the syntax check. After a short while a green tick will appear to indicate that the the check was successful.

Simulate Selected

Simulate Selected

If you right click on the Simulate Behavioral Model entry the system will prepare the implementation for simulation and then launch the simulator.

Simulated Adder

Simulated Adder

At this point there is little to see as we have not defined any simulation parameters. Close the simulator. You will need to do this as there does not appear to be any bidirectional communication between the simulator and the designer. If you simply switch tasks and go back to the designer, make a change and then launch the simulator again you will receive an error message.

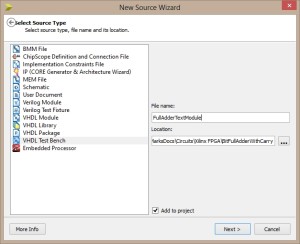
Once back in the Designer, add a new source module as before but this time select VHDL Test Bench for the source type.

New Test Module

New Test Module

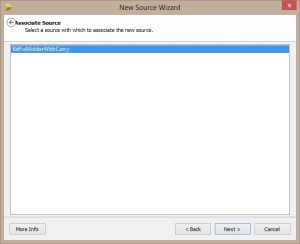
Next select the source file test test code will be associated with. We only have one file in our project so you must select that.

Associate With Source File

Associate With Source File

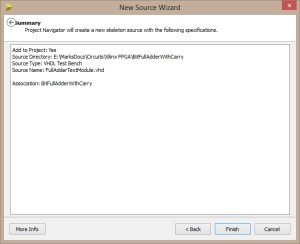
As with the previous cases, the next dialog in the wizard presents a summary for us to confirm the options we have selected.

New Test Module Summary

New Test Module Summary

The Hierarchy will now show a new source file inserted between the device name and the source module we had previously created. This new file contains the test code for out module. The original code is also prefixed with uut which stands for Unit Under Test.

Project After Adding Test Module

Project After Adding Test Module

Select the file containing the source code for the test module. This will have the default code for a test module.

--------------------------------------------------------------------------------
-- Company: 
-- Engineer:
--
-- Create Date:   13:01:13 11/16/2013
-- Design Name:   
-- Module Name:   BitFullAdderWithCarry/FullAdderTextModule.vhd
-- Project Name:  BitFullAdderWithCarry
-- Target Device:  
-- Tool versions:  
-- Description:   
-- 
-- VHDL Test Bench Created by ISE for module: BitFullAdderWithCarry
-- 
-- Dependencies:
-- 
-- Revision:
-- Revision 0.01 - File Created
-- Additional Comments:
--
-- Notes: 
-- This testbench has been automatically generated using types std_logic and
-- std_logic_vector for the ports of the unit under test.  Xilinx recommends
-- that these types always be used for the top-level I/O of a design in order
-- to guarantee that the testbench will bind correctly to the post-implementation 
-- simulation model.
--------------------------------------------------------------------------------
LIBRARY ieee;
USE ieee.std_logic_1164.ALL;
 
-- Uncomment the following library declaration if using
-- arithmetic functions with Signed or Unsigned values
--USE ieee.numeric_std.ALL;
 
ENTITY FullAdderTextModule IS
END FullAdderTextModule;
 
ARCHITECTURE behavior OF FullAdderTextModule IS 
 
    -- Component Declaration for the Unit Under Test (UUT)
 
    COMPONENT BitFullAdderWithCarry
    PORT(
         a : IN  std_logic;
         b : IN  std_logic;
         cin : IN  std_logic;
         result : OUT  std_logic;
         cout : OUT  std_logic
        );
    END COMPONENT;
    

   --Inputs
   signal a : std_logic := '0';
   signal b : std_logic := '0';
   signal cin : std_logic := '0';

 	--Outputs
   signal result : std_logic;
   signal cout : std_logic;
   -- No clocks detected in port list. Replace <clock> below with 
   -- appropriate port name 
 
   constant <clock>_period : time := 10 ns;
 
BEGIN
 
	-- Instantiate the Unit Under Test (UUT)
   uut: BitFullAdderWithCarry PORT MAP (
          a => a,
          b => b,
          cin => cin,
          result => result,
          cout => cout
        );

   -- Clock process definitions
   <clock>_process :process
   begin
		<clock> <= '0';
		wait for <clock>_period/2;
		<clock> <= '1';
		wait for <clock>_period/2;
   end process;
 

   -- Stimulus process
   stim_proc: process
   begin		
      -- hold reset state for 100 ns.
      wait for 100 ns;	

      wait for <clock>_period*10;

      -- insert stimulus here 

      wait;
   end process;

END;

Remember I mentioned an issue I had with the consistency of the source code generated by the Designer. Check out the keywords in the test module and compare to the template source code for a module. Take the library keyword. In the template module code the keyword is in lower case. In the test module template it is upper case.

The test module contains the component definitions we require to test our module. Note that the module also contains a default clock for the circuits which need it. Editing the file above to remove unused items (and also correct the case to make it consistent with the source module).

--------------------------------------------------------------------------------
-- Company: 
-- Engineer:
--
-- Create Date:   13:01:13 11/16/2013
-- Design Name:   
-- Module Name:   BitFullAdderWithCarry/FullAdderTextModule.vhd
-- Project Name:  BitFullAdderWithCarry
-- Target Device:  
-- Tool versions:  
-- Description:   
-- 
-- VHDL Test Bench Created by ISE for module: BitFullAdderWithCarry
-- 
-- Dependencies:
-- 
-- Revision:
-- Revision 0.01 - File Created
-- Additional Comments:
--
-- Notes: 
-- This testbench has been automatically generated using types std_logic and
-- std_logic_vector for the ports of the unit under test.  Xilinx recommends
-- that these types always be used for the top-level I/O of a design in order
-- to guarantee that the testbench will bind correctly to the post-implementation 
-- simulation model.
--------------------------------------------------------------------------------
library ieee;
use ieee.std_logic_1164.ALL;
 
entity FullAdderTextModule is
end FullAdderTextModule;

architecture behavior of FullAdderTextModule is
    --
    --  Component Declaration for the Unit Under Test (UUT)
    --
    component BitFullAdderWithCarry
    port (
         a : in  std_logic;
         b : in  std_logic;
         cin : in  std_logic;
         result : out  std_logic;
         cout : out  std_logic
        );
    end component;
    --
    --  Inputs
    --
    signal a : std_logic := '0';
    signal b : std_logic := '0';
    signal cin : std_logic := '0';
    --
 	--  Outputs
    --
    signal result : std_logic;
    signal cout : std_logic;
begin
    --
	-- Instantiate the Unit Under Test (UUT)
    --
    uut: BitFullAdderWithCarry port map
        (
            a => a,
            b => b,
            cin => cin,
            result => result,
            cout => cout
        );
    --
    --  Stimulus process
    --
    stim_proc: process
    begin		
        -- hold reset state for 100 ns.
        wait for 100 ns;	
        --
        --  0 + 1, carry in = 0
        --  Result should be 1 with no carry out.
        --
        a <= '0';
        b <= '1';
        cin <= '0';
        wait for 5 ns;
        --
        --  1 + 0, carry in = 0
        --  Result should be 1 with no carry out.
        --
        a <= '1';
        b <= '0';
        cin <= '0';
        wait for 5 ns;
        --
        --  1 + 1, carry in = 0
        --  Result should be 0 with carry out set to 1.
        --
        a <= '1';
        b <= '1';
        cin <= '0';
        wait for 5 ns;
        --
        --  0 + 1, carry in = 1
        --  Result should be 0 with carry out set to 1.
        --
        a <= '0';
        b <= '1';
        cin <= '1';
        wait for 5 ns;
        --
        --  1 + 1, carry in = 1
        --  Result should be 1 with carry out set to 1.
        --
        a <= '1';
        b <= '1';
        cin <= '1';
        wait;
   end process;
end;

The main work in the above code is performed in the stim_proc process. The first thing that happens is to pause. This 100ns pause is recommended by Xilinx to allow the system to stabilise after a reset.

The next code blocks set the input signals to known levels and then pause for 5ns. The pause allows us to examine the outputs in the simulator.

Now we have a test module we should re-run the simulator as before (right click on the Simulate Behavioral Module and select ReRun All). The simulator will launch again.

Simulated Full Adder Zoomed Out

Simulated Full Adder Zoomed Out

Notice that this time the traces to the right showing the signals are green and not brown. This is because the various ports have values assigned to them by the default test template. Previously there were no values assigned to the pins and they were undefined.

The default setting for the simulator is to run the simulation for 1us (1,000,000ps). The trace shows the final part of the simulation. Click on the Zoom to Full icon in the toolbar

Zoom To Full View Icon

to see the results of the fill run.

Full View of Trace

Full View of Trace

Looking at the far left of the trace you can see that all of the inputs are set to zero and the corresponding output levels are also zero. At 100ns the traces start to change as the test code changes the input values to the adder circuit.

Click on the zoom icon to zoom in on the traces. You can also use the scrollbar at the bottom of the trace to move around the output.

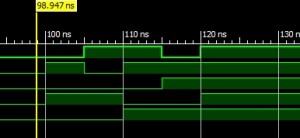
Zooming in until you can clearly see the signals between 100ns and 130ns shows the output from the test circuit generated by the code entered in the test module.

Zoomed In View Of Trace

Zoomed In View Of Trace

To the far left of the output window is a yellow cursor line. Grabbing this and dragging the cursor over the traces changes the values displayed for the various pins in the model. So just before 100ns into the simulation the output shows that all of the inputs are zero and so are the corresponding outputs:

97ns Into Simulation

97ns Into Simulation

Moving the cursor through the simulation changes the values. So 102.081ns into the simulation we should have just completed execution of the following code:

--
--  0 + 1, carry in = 0
--  Result should be 1 with no carry out.
--
a <= '0';
b <= '1';
cin <= '0';
wait for 5 ns;

From the truth table presented at the start of this post we should be expecting result to be 1 and carry out to be 0. This is verified by the following output:

10ns Into Simulation

10ns Into Simulation

Similarly, at 107.081ns into the simulation we are executing the following code:

--
--  1 + 0, carry in = 0
--  Result should be 1 with no carry out.
--
a <= '1';
b <= '0';
cin <= '0';
wait for 5 ns;

Again, double checking with the truth table we see that we are expecting result to be 1 and carry out to be 0.

25-107nsIntoSimulation

Once again the trace verifies this.

Deploying to the Board

This article was supposed to end with the deployment of the design to the Elektor FPGA board. The board has two LEDs which can be used for output and we can use jumper leads for the three inputs to the board.

Xilinx Software Problems

All was going well until I started to map the signals to the pins on the board using the Xilinx PlanAhead tool. At this point PlanAhead displayed the banner and then simply quit. The output in the console reported the fact that a log file had been generated. Opening the log file I found this:

****** PlanAhead v14.7 (64-bit)
  **** Build 321239 by xbuild on Fri Sep 27 19:29:51 MDT 2013
    ** Copyright 1986-1999, 2001-2013 Xilinx, Inc. All Rights Reserved.

INFO: [Common 17-78] Attempting to get a license: PlanAhead
INFO: [Common 17-290] Got license for PlanAhead
INFO: [Device 21-36] Loading parts and site information from C:/Xilinx/14.7/ISE_DS/PlanAhead/data/parts/arch.xml
Parsing RTL primitives file [C:/Xilinx/14.7/ISE_DS/PlanAhead/data/parts/xilinx/rtl/prims/rtl_prims.xml]
Finished parsing RTL primitives file [C:/Xilinx/14.7/ISE_DS/PlanAhead/data/parts/xilinx/rtl/prims/rtl_prims.xml]
start_gui
#
# A fatal error has been detected by the Java Runtime Environment:
#
#  EXCEPTION_ACCESS_VIOLATION (0xc0000005) at pc=0x000007fa87e21355, pid=64, tid=8124
#
# JRE version: 7.0_17-b02
# Java VM: Java HotSpot(TM) 64-Bit Server VM (23.7-b01 mixed mode windows-amd64 compressed oops)
# Problematic frame:
# C  [msvcrt.dll+0x1355]  free_dbg+0x5
#
# Failed to write core dump. Minidumps are not enabled by default on client versions of Windows
#
# An error report file with more information is saved as:
# E:\MarksDocs\Circuits\Xilinx FPGA\BitFullAdderWithCarry\hs_err_pid64.log
#
# If you would like to submit a bug report, please visit:
#   http://bugreport.sun.com/bugreport/crash.jsp
# The crash happened outside the Java Virtual Machine in native code.
# See problematic frame for where to report the bug.
#

Problems Solved

I have had the PlanAhead tool working in the past as I had completed the exercises in the Elektor magazines in the past. Time for some investigation. After several hours, and I do mean several hours, I uninstalled the 14.7 version of the tools and downloaded the 14.3 version from October 2012. Interestingly, this fixed the problem and PlanAhead launched as expected. So, on with the exercise.

On With the Exercise

The next step is to deploy the full-adder to the Elektor board connecting the ports to the pins on the board. We should be able to use jumper cables to represent the inputs to the full adder. The board contains two LEDs which we can use to show the output from the adder.

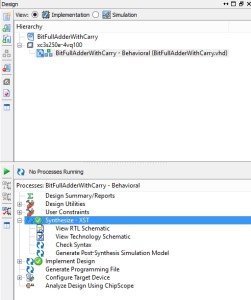
Firstly, we switch back to the Implementation view, expand Synthesise – XST and click on the green triangle to start the synthesis. This took a minute or so on my machine so expect to wait for the process to complete.

Getting Ready For Implementation

Getting Ready For Implementation

From the green tick in the processes panel above you can see that the synthesis completed with no errors.

The next step is to assign pins on the board to the input and output signals.

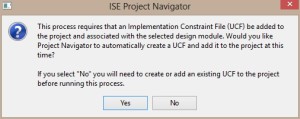
Double click on I/O Planning (PlanAhead) Post-Synthesis item in the User Constraints treeview. You will be presented with the following window:

User Constraints File Question

User Constraints File Question

Answer Yes to this question. After a while the PlanAhead tool should appear.

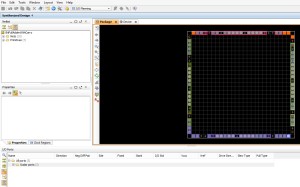
Plan Ahead Start Up

Plan Ahead Start Up

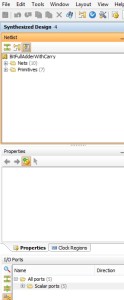
We now need to start assigning the pins on the board to the inputs/outputs in the design. So click on the Scalar Ports treeview item in the lower lefthand corner of the PlanAhead tool. PlanAhead will now show the inputs and outputs from the model.

Plan Ahead Left Hand Panel

Plan Ahead Left Hand Panel

We can not start to assign the ports used in the model to the physical pins on the chip (and hence the board). The Elektor board has two LEDs which are connected to pins 90 and 91 of the FPGA. So for the two output rows set the entry in the Site column to 90 and 91. The entry in the I/O Std column should be set to LVCMOS33 for all of the pins.

IO Ports Expanded

IO Ports Expanded

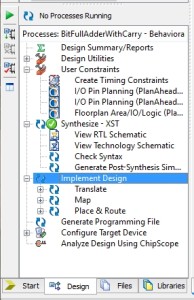
Once the pins have been selected and assigned, save the mapping in the PlanAhead tool and return to the Designer. Select Implement Design and either right click and select Run or click on the green triangle. After a short time the system should indicate that the implementation has completed without error:

Implement Design

Implement Design

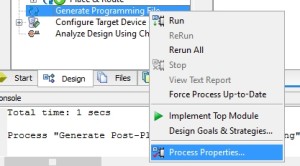
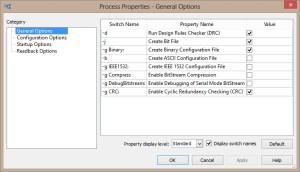
The final step is to generate the file which will be used by the FPGA. This is achieved by selecting Generate Programming File in the Designer, right clicking and selecting Process properties

Process Properties

Process Properties

This will present the Process Properties dialog.

Process Properties Dialog

Process Properties Dialog

Ensure that the following options are checked in the Process Properties dialog:

CategoryOptionValue
General OptionsCreate Binary Configuration FileTick this option
Configuration OptionsConfiguration Pin ProgramFloat
Configuration OptionsUnused IOB PinsFloat
Startup OptionsDrive Done Pin HighTick this option

Select OK and return to the Designer. You can now right click on the Generate Programming File entry in the Designer and select Run.

At the end of the process you will find a new file has been placed in the project directory, in this case bitfulladderwithcarry.bin.

We are now ready to transfer the file to the FPGA board. According to the Elektor specs this is a simple process of connecting the board to the PC via USB and a new drive should appear in the file explorer. I must admit I have had intermittent success with this. I have found the most reliable way of transferring the file to the FPGA board is to insert the SD card into the PC and copy the bin file to the SD card. Once the file has been copied it must be renamed to config.bin. Next plug the SD card into the FPGA board and power the board (I used USB for this example).

Testing

In order to test the application you will need to power the board and then connect a,b and carry in to the appropriate signal levels and observe the LED output.

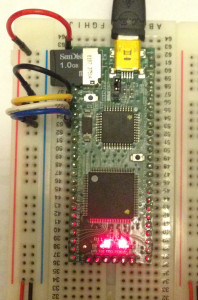
Grounding pins 7, 8 and 9 on the board should turn off both of the LEDs. In fact it turns both of the LEDs on.

a=0,b=0,cin=0

a=0,b=0,cin=0

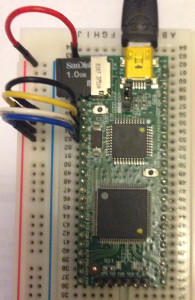
Connecting all of the pins to a high signal should turn both LEDs on.

a=1,b=1,cin=1

a=1,b=1,cin=1

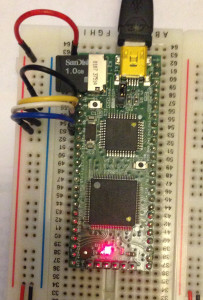
As you can see, it turns the LEDs off. I looks like the signals are being interpreted in reverse (negated). Testing with a=0, b=0, cin=1 gives the following:

a=0,b=0,cin=1

a=0,b=0,cin=1

The basic logic appears to be working although it is negated. A little more investigation is required.

Conclusion

It would have been nice to have completed the post with by deploying this to the FPGA board. Unfortunately to tools have let me down. Watch this space for future posts which will hopefully see this module deployed to the FPGA board.

The software swings between being amazing and buggy.

  • The simulator is quick and easy to use although this comment comes from my novice perspective.
  • The 64-bit editor quits every now and then when you try to copy text to the clip board. The 32-bit editor does not suffer from this problem.
  • I have had a problem every now and then adding a new file to a project using the 64-bit Designer. Again, the 32-bit version of the tools do not have this problem.
  • You cannot launch the simulator from the 32-bit tools. This works fine with the 64-bit tools.

This is the first step on the journey, a journey which I feel will take a while.

Update 17 Nov 2013

Version 14.7 of the software demonstrated the fact that new versions are not always better. In fact 14.7 proved to be a huge waste of time for me. I spent several hours trying to work out why PlanAhead didi not work only to revert back to version 14.3 of the software which looks to be working well.

Some future work:

  • Create a more convenient pin diagram for the Elektor board.
  • Follow up on the negated signals.

Work for another day I feel.

Nikon D70 remote Control PCB Assembly

Sunday, November 10th, 2013

A few days ago the bare PCBs arrived from China:

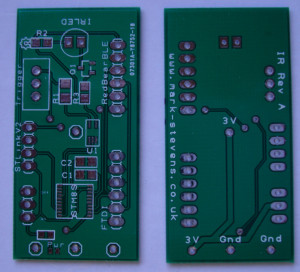
Nikon D70 Bare Boards

Nikon D70 Bare Boards

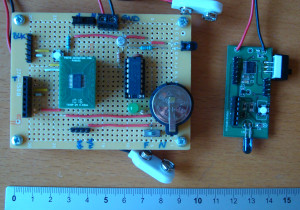
Work commitments meant that assembly has had to wait a while. I finally managed to get to put the boards together today. There is certainly a difference in size between the proto-board and the final (well nearly) PCB.

Proto-board and Assembled Board With Ruler

Proto-board and Assembled Board With Ruler

I’ve documented the assembly process of SMD boards in the past so in this post I’ll just be documenting the lessons learned from this assembly

Measure Twice, Cut Once

A carpenter friend of mine passed on this advice and it certainly rings true on this build. If you look at the back of the board there are a couple of options for connecting power to the board. The intention was to allow the board to be powered by 2 x AA batteries or a CR2032 coin cell. The connection points were supposed to be placed to allow the use of two battery holders I had purchased from Bitsbox. The measurements are a classic "off by one" case. The connections are both 2.54mm off.

Next time I’ll be double checking the footprint of the components.

Solder Paste is Opaque

I originally tried to apply solder paste to the pads for the STM8S and then position the chip on the pads. The theory is great but in practice the positioning is difficult as you cannot see the pads through the paste. Instead I found it easier to apply flux and then tack down one pin on he STM8S. This allowed the positioning of the pads and legs of the STM8S to be checked. Once I was happy with the alignment of the two I applied solder paste to the top of the legs on the chip and then heated the pins.

0402 Components are Small

A few of the components are small, very small. Most of these do not require any orientation but the LED indicating that the power is applied is small and does require a particular orientation. I found a cheap USB microscope useful to help ensure the orientation was correct.

Conclusion

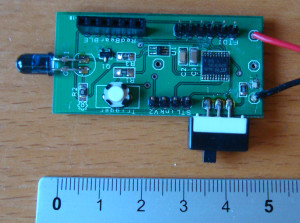
I always forget how small some of these components are but with a little practice you can work with surface mount components. The current board looks like this:

Assembled Board With Ruler

Assembled Board With Ruler

The Nikon D70 infra-red remote control prototype still triggers the camera using the trigger button. The next stage is to work on the software allowing the trigger of the remote control using the UART either by the FTDI and the RedBearBLE mini.

Nikon D70 Remote Control PCB Layout

Sunday, October 13th, 2013

Today, the Nikon D70 Remote control has passed another milestone in it’s evolution. The schematic has been polished and revision A of the PCB designed ready to send to manufacture.

Schematic Changes

The main changes to the schematic are as follows:

  • Addition of connection points for power (Bench power supply, Coin Cell, 2xAA battery)
  • Power LED to indicate if the board is powered or not
  • Added a new part for the SOT353 single AND gate component
  • Grounded unused pins

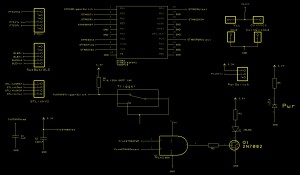
And here is the final version of the revision A schematic:

Nikon D70 Remote Schematic (Rev A)

Nikon D70 Remote Schematic (Rev A)

The main reason for this taking a while to complete is that I have had to create new components for the single AND gate. I have also take the time to tidy up my parts library in Designspark, something which is overdue.

PCB Layout

The number of components is small and so I will be using the iTead Studio 5cm x 5cm PCB production service. At the time of writing this is coming in at $9.99 for 10 boards. And here is the board:

Nikon D70 Remote Board Layout

Nikon D70 Remote Board Layout

And in 3D:

Nikon D70 Remote 3D Impression

Nikon D70 Remote 3D Impression

Bill of Materials

For this board I am intending to use two suppliers:

Bitsbox are a fantastic small business and are fantastic value for discrete parts but I have elected to use some surface mount components and for these I will have to use RS Components. The bill of materials (excluding the board) is:

Part Value Size Quantity Supplier Part Number Unit Price Board Price
STM8S TSSOP20 1 RS Components 724-9895 £0.91 £0.91
C1 1uF 1206 1 RS Components 264-4179 £0.05 £0.05
C2 100nF 1206 1 RS Components 766-1126 £0.01 £0.01
Header 4 x 1 1 Bitsbox CN202 £0.06 £0.06
Header 6 x 1 – Male 1 Bitsbox CN203 £0.21 £0.21
Header 6 x 1 – Female 1 Bitsbox CN259 £0.25 £0.25
R1 10K 1206 1 RS Components 223-2394 £0.02 £0.02
R2 1K 0805 1 RS Components 223-0427 £0.01 £0.01
R3 2K2 0805 1 RS Components 721-8508 £0.08 £0.08
R4 100 0402 1 RS Components 667-8602 £0.01 £0.01
LED 1 RS Components 654-5767 £0.05 £0.05
2N7002 SOT23 1 RS Components 780-0478 £0.02 £0.02
Single AND Gate SOT353 1 RS Components 751-2806 £0.04 £0.04
Power Switch 1 Bitsbox SW109 £0.88 £0.88
Reset Switch 1 Bitsbox SW08 £0.38 £0.38
IR LED 1 Bitsbox TOP022 £0.20 £0.20
Total £3.18

Conclusion

Now we sit back and wait for two weeks whilst the boards are manufactured.

Making the D70 Remote More Permanent

Sunday, September 29th, 2013

Now that we have the major components of the Nikon D70 Remote Control unit in place it is about time the unit moved from breadboard to a more permanent home. The last day or two has seen the unit move from breadboard to protoboard.

The layout is nothing too complex and at this point I am not too worried about the physical dimensions of the board. So the task at hand is to convert the following schematic into a working board:

Nikon D70 Remote Control Schematic

Nikon D70 Remote Control Schematic

There are plenty of resources out there discussing the techniques for putting together a prototype board from a schematic so we won’t cover these here. Only thing to do is dive in with some Photos starting with the top of the board with the IC’s in place:

Nikon D70 Protoboard Upper

Nikon D70 Protoboard Upper

The eagle eyed amongst you may have noticed that I used a 16-pin DIP socket for the AND gates when I should really have used a 14-pin socket. A little solder soon fixed that problem.

The connectors on the right hand side of the board provide the serial connections by FTDI (upper male connector) and RedBear BLE Mini (lower female connector). The connection at the bottom of the board is the STLink/V2 connector.

And the bottom of the board:

Nikon D70 Protoboard Lower

Nikon D70 Protoboard Lower

Conclusion

Building the board was not too difficult. The code for the STM8S needed a small modification to move the application from the STM8S105 on the Discovery board to the STM8S103F3 which I have on the DIP to protoboard converter.

Next steps:

  • Allow the EEPROM to be reprogrammed by UART
  • Add support for programmable intervals
  • Consider making the unit standalone (selectable intervals, status display)
  • iPhone application using the RedBear BLE Mini to control the unit

If all goes well it may even end up with a PCB being manufactured and a 3D printed case being made.

Forgot to mention, it still triggers the camera.

Nikon D70 Remote Control with a Button and EEPROM

Thursday, September 12th, 2013

A remote control which can only generate a signal when initially powered up is of limited use. The addition of a switch will allow the user to determine when the camera is triggered.

Adding a Button

The initial versions of the infra-red remote control for the Nikon D70 which have been discussed so far are limited in that the control sequence is transmitted when the STM8S starts and never again until the next time the STM8S is restarted/reset. Adding a button to the remote control will allow the user to select when the control sequence is transmitted.

One of the main problems with switches is that they are subject to switch bounce. You can see an example of this in the post regarding External Interrupts on the STM8S. There are two approaches to switch debouncing, software and hardware. The button on the infra-red remote control will be triggering a sequence of pulses which will typically last several milliseconds. This means that it lends itself to software debouncing using a simple state machine.

The state machine will put the infra-red remote control into two states, waiting for user input and running. When waiting for user input the interrupt handler for the switch will accept user input. When in the running mode the system will be generating the infra-red output for the camera and it will ignore any input from the switch. At the end of the infra-red sequence the switch input will be re-enabled.

So much for the theory, lets have a look at the code. The first thing which the application will need to do is to setup the appropriate pin as an interrupt port:

//--------------------------------------------------------------------------------
//
//  Now set up the ports.
//
//  PD3 - IR Pulse signal.
//  PD4 - Input pin indicating that the user wishes to trigger the camera.
//
void SetupPorts()
{
    PD_ODR = 0;             //  All pins are turned off.
    //
    //  PD3 is the output for the IR control.
    //
    PD_DDR_DDR3 = 1;
    PD_CR1_C13 = 1;
    PD_CR2_C23 = 1;
    //
    //  Now configure the input pin.
    //
    PD_DDR_DDR4 = 0;        //  PD4 is input.
    PD_CR1_C14 = 1;         //  PD4 is floating input.
    PD_CR2_C24 = 1;
    //
    //  Set up the interrupt.
    //
    EXTI_CR1_PDIS = 1;      //  Interrupt on rising edge.
    EXTI_CR2_TLIS = 1;      //  Rising edge only.
}

The modifications to the SetupPorts method keeps the infra-red output on PD3 but adds an input on PD4 with a rising edge interrupt.

The next step is to deal with the interrupt on PD4. Here we need to work out if we are waiting for an interrupt and if we are then the application needs to start the generation of the infra-red signal. If we are not waiting for a button press then we should ignore the user request as it is likely to be a result of switch bounce. The code starts to look like this:

//--------------------------------------------------------------------------------
//
//  Process the interrupt generated by the pressing of the button.
//
//  This ISR makes the assumption that we only have on incoming interrupt on Port D.
//
#pragma vector = 8
__interrupt void EXTI_PORTD_IRQHandler(void)
{
    if (_currentState != STATE_RUNNING)
    {
        //
        //  Set everything up ready for the timers.
        //
        
        //  TODO!
        
        //
        //  Now we have everything ready we need to force the Timer 2 counters to
        //  reload and enable Timers 1 & 2.
        //
        TIM2_CR1_URS = 1;
        TIM2_EGR_UG = 1;
        TIM1_CR1_CEN = 1;
        TIM2_CR1_CEN = 1;
    }
}

The exact code required for setting up the timer will be revealed following the EEPROM section of this post.

Using EEPROM

In the post Storing Data in the EEPROM on the STM8S we saw how we could save data into the EEPROM of the STM8S for later retrieval. The data used in the example should look familiar if you have been following this series on the Nikon D70 Remote Control as it is the timing and signal data which triggers the Nikon D70.

The first thing we should do is to modify the order in which the data is written into the EEPROM. In the above post, the timing data is written into the EEPROM low byte followed by high byte. By swapping the order we can store the data in the order required by the interrupt for Timer 2. So the first task is to modify the application which wrote and verified the timing information to the following:

//
//  Write a series of bytes to the EEPROM of the STM8S105C6 and then
//  verify that the data has been written correctly.
//
//  This software is provided under the CC BY-SA 3.0 licence.  A
//  copy of this licence can be found at:
//
//  http://creativecommons.org/licenses/by-sa/3.0/legalcode
//
#if defined DISCOVERY
    #include <iostm8S105c6.h>
#else
    #include <iostm8s103f3.h>
#endif

//
//  Data to write into the EEPROM.
//
unsigned int _pulseLength[] = { 2000U, 27830U, 400U, 1580U, 400U, 3580U, 400U };
unsigned char _onOrOff[] =    {   1,      0,     1,     0,    1,     0,    1 };
char numberOfValues = 7;

//--------------------------------------------------------------------------------
//
//  Write the default values into EEPROM.
//
void SetDefaultValues()
{
    //
    //  Check if the EEPROM is write-protected.  If it is then unlock the EEPROM.
    //
    if (FLASH_IAPSR_DUL == 0)
    {
        FLASH_DUKR = 0xae;
        FLASH_DUKR = 0x56;
    }
    //
    //  Write the data to the EEPROM.
    //
    char *address = (char *) 0x4000;        //  EEPROM base address.
    *address++ = (char) numberOfValues;
    for (int index = 0; index < numberOfValues; index++)
    {
        *address++ = (char) ((_pulseLength[index] >> 8) & 0xff);
        *address++ = (char) (_pulseLength[index] & 0xff);
        *address++ = _onOrOff[index];
    }
    //
    //  Now write protect the EEPROM.
    //
    FLASH_IAPSR_DUL = 0;
}

//--------------------------------------------------------------------------------
//
//  Verify that the data in the EEPROM is the same as the data we
//  wrote originally.
//
void VerifyEEPROMData()
{
    PD_ODR_ODR2 = 1;            //  Checking the data
    PD_ODR_ODR3 = 0;            //  No errors.
    //
    char *address = (char *) 0x4000;        //  EEPROM base address.
    if (*address++ != numberOfValues)
    {
        PD_ODR_ODR3 = 1;
    }
    else
    {
        for (int index = 0; index < numberOfValues; index++)
        {
            unsigned int value = (*address++ << 8);
            value += *address++;
            if (value != _pulseLength[index])
            {
                PD_ODR_ODR3 = 1;
            }
            if (*address++ != _onOrOff[index])
            {
                PD_ODR_ODR3 = 1;
            }
        }
    }
    PD_ODR_ODR2 = 0;        // Finished processing.
}

//--------------------------------------------------------------------------------
//
//  Setup port D for data output.
//
void SetupPorts()
{
    //
    //  Initialise Port D.
    //
    PD_ODR = 0;             //  All pins are turned off.
    PD_DDR = 0xff;          //  All bits are output.
    PD_CR1 = 0xff;          //  All pins are Push-Pull mode.
    PD_CR2 = 0xff;          //  Pins can run up to 10 MHz.
}

//--------------------------------------------------------------------------------
//
//  Main program loop.
//
void main()
{
    SetupPorts();
    SetDefaultValues();
    VerifyEEPROMData();
}

Create a new project for the above and execute the program on the STM8S Discovery board. This should set up the timing data ready for use to use.

Using the EEPROM Data

The above application has been tailored to write the byte data into the EEPROM in the order in which the bytes are required by the remote control application. Using this data should be a simple case of setting a pointer to the first byte and then consuming the bytes one after another. To do this we will need some pointers and a counter:

//
//  Define where we will be working in the EEPROM.
//
#define EEPROM_BASE_ADDRESS         0x4000
#define EEPROM_INITIAL_OFFSET       0x0000
#define EEPROM_DATA_START           (EEPROM_BASE_ADDRESS + EEPROM_INITIAL_OFFSET)

//
//  Data ready for the pulse timer ISR's to use.
//
int _numberOfPulses = 0;
int _currentPulse = 0;
char *_pulseDataAddress = NULL;

As part of the initialisation process we will need to set the pointer and also the number of pulses we have data for:

_pulseDataAddress = (char *) EEPROM_DATA_START;
_numberOfPulses = *_pulseDataAddress++;

So now we should have the initial state configured and we should revisited the button handler method. This method kicks off the timers by consuming the first three bytes of data:

//--------------------------------------------------------------------------------
//
//  Process the interrupt generated by the pressing of the button.
//
//  This ISR makes the assumption that we only have on incoming interrupt on Port D.
//
#pragma vector = 8
__interrupt void EXTI_PORTD_IRQHandler(void)
{
    if (_currentState != STATE_RUNNING)
    {
        //
        //  Set everything up ready for the timers.
        //
        _currentState = STATE_RUNNING;
        _currentPulse = 0;
        _pulseDataAddress = (char *) (EEPROM_DATA_START + 1);
        TIM2_ARRH = *_pulseDataAddress++;
        TIM2_ARRL = *_pulseDataAddress++;
        PD_ODR_ODR3 = *_pulseDataAddress++;
        //
        //  Now we have everything ready we need to force the Timer 2 counters to
        //  reload and enable Timers 1 & 2.
        //
        TIM2_CR1_URS = 1;
        TIM2_EGR_UG = 1;
        TIM1_CR1_CEN = 1;
        TIM2_CR1_CEN = 1;
    }
}

Finally, the interrupt for the Timer 2 interrupt needs to be modified in order to continue to process the data three bytes at a time until we have reached the total number of pulses:

//--------------------------------------------------------------------------------
//
//  Timer 2 Overflow handler.
//
#pragma vector = TIM2_OVR_UIF_vector
__interrupt void TIM2_UPD_OVF_IRQHandler(void)
{
    _currentPulse++;
    if (_currentPulse == _numberOfPulses)
    {
        //
        //  We have processed the pulse data so stop now.
        //
        PD_ODR_ODR3 = 0;
        TIM2_CR1_CEN = 0;
        TIM1_CR1_CEN = 0;           //  Stop Timer 1.
        _currentState = STATE_WAITING_FOR_USER;
    }
    else
    {
        TIM2_ARRH = *_pulseDataAddress++;
        TIM2_ARRL = *_pulseDataAddress++;
        PD_ODR_ODR3 = *_pulseDataAddress++;
        TIM2_CR1_URS = 1;
        TIM2_EGR_UG = 1;
    }
    TIM2_SR1_UIF = 0;               //  Reset the interrupt otherwise it will fire again straight away.
}

Conclusion

The addition of the button certainly makes the remote control more usable as the user can elect when to trigger the camera. At this stage, the EEPROM does not offer too many advantages over the use of the static data but it can allow the remote control to be fine-tuned at a later stage.

The acid test, does it still trigger the camera – Yes it does.

Storing Data in EEPROM on the STM8S

Thursday, September 12th, 2013

During a recent project it became desirable to store a small amount of data in some non-volatile memory in order that the system state could be restored following loss of power. This article demonstrates how to achieve this by writing a small amount of data to the data EEPROM of the STM8S105Cr micro-controller on the STM8S Discovery board.

Memory Layout, Access and Protection

The Data EEPROM area of the STM8S series of micro-controllers varies depending upon the specific unit being used. For this article the specific micro-controller being used is the STM8S105C6 on the STM8S Discovery board. This micro-controller has 1KByte of EEPROM in the address range 0x4000 – 0x43ff.

By default the data area is write protected and cannot be modified by the main program. The write protection is removed by using a key to unlock the EEPROM data area. The flash program area is similarly protected but we will only consider the data EEPROM area. In order to write to the EEPROM area the application will need to write two security keys called Memory Access Security System (MASS) keys to the FLASH_DUKR register. These keys will unlock the EEPROM area and allow the application to write data to the EEPROM until the application turns write protection back on.

The MASS keys for the data EEPROM area are:

  • 0xae
  • 0x56
  • The algorithm for enabling write access to the EEPROM data area is as follows:

    • Check the DUL bit of FLASH_IASPR. If this bit is set then the data area is writeable and no further action is required.
    • Write the first MASS key (0xae) to the FLASH_DUKR register.
    • Write the second MASS key (0x56) to the FLASH_DUKR register.

    At the end of the process of successfully writing the MASS keys the DUL bit of the FLASH_IASPR register will be set. This bit will remain set until either the application changes the bit or the micro-controller is reset. Resetting the DUL bit programatically reinstates the write protection for the EEPROM memory.

    Read-while-write (RWW)

    This feature is not available on all of the STM8S family of processors and you should consult the data sheet for the unit being used if you are interested in using this feature. The RWW feature allows the program memory to be read whilst the EEPROM memory is being written to.

    Byte Programming

    Byte level programming is available for both the program memory and the EEPROM memory. To use this feature the application simply needs to unlock the EEPROM using the MASS keys and then write individual bytes into the EEPROM memory. To erase a byte simply write 0x00 into the memory location.

    Word and Page Programming

    The STM8S also allows word (4 bytes) and block programming. Both of these are faster than byte programming and block programming is faster than word programming. These features will not be discussed further here and are mentioned simply for awareness.

    Interrupts

    The system can be configured to generate an interrupt for the following event:

    • Successful write operation.
    • Successful erase operation.
    • Illegal operation (writing to protected pages).

    Interrupts are enabled by setting FLASH_CR1_IE to 1. When this bit is set, an interrupt will be generated when the FLASH_IASPR_EOP or FLASH_IASPR_WR_PG_DIS bits are set.

    Software

    The original aim of the software was to write a small amount of data to the data EEPROM of the STM8S and use the ST Visual Programmer to verify that the memory contents had changed. As the project progressed it became apparent that we would also need some code to verify the data.

    Writing the Data

    The application to write data to the EEPROM is relatively simple:

    //
    //  Write a series of bytes to the EEPROM of the STM8S105C6.
    //
    //  This software is provided under the CC BY-SA 3.0 licence.  A
    //  copy of this licence can be found at:
    //
    //  http://creativecommons.org/licenses/by-sa/3.0/legalcode
    //
    #if defined DISCOVERY
        #include <iostm8S105c6.h>
    #else
        #include <iostm8s103f3.h>
    #endif
    
    //
    //  Data to write into the EEPROM.
    //
    unsigned int _pulseLength[] = { 2000U, 27830U, 400U, 1580U, 400U, 3580U, 400U };
    unsigned char _onOrOff[] =    {   1,      0,     1,     0,    1,     0,    1 };
    char numberOfValues = 7;
    
    //--------------------------------------------------------------------------------
    //
    //  Write the default values into EEPROM.
    //
    void SetDefaultValues()
    {
        //
        //  Check if the EEPROM is write-protected.  If it is then unlock the EEPROM.
        //
        if (FLASH_IAPSR_DUL == 0)
        {
            FLASH_DUKR = 0xae;
            FLASH_DUKR = 0x56;
        }
        //
        //  Write the data to the EEPROM.
        //
        char *address = (char *) 0x4000;        //  EEPROM base address.
        *address++ = (char) numberOfValues;
        for (int index = 0; index < numberOfValues; index++)
        {
            *address++ = (char) (_pulseLength[index] & 0xff);
            *address++ = (char) ((_pulseLength[index] >> 8) & 0xff);
            *address++ = _onOrOff[index];
        }
        //
        //  Now write protect the EEPROM.
        //
        FLASH_IAPSR_DUL = 0;
    }
    
    //--------------------------------------------------------------------------------
    //
    //  Main program loop.
    //
    void main()
    {
        SetDefaultValues();
    }
    

    The application simply enables writing to the EEPROM and then writes data to the memory. It also re-enables the write protection at the end of the write operation.

    Verifying the Data

    Testing this application should simply be a case of creating a new project, putting the above in main.c, setting some options and then running the code. The EEPROM data can then be read by ST Visual Develop and verified by hand. After compiling and executing the above code, start ST visual Programmer, connect it to the STM8S Discovery board and download the contents of the EEPROM:

    This does not look correct. Double checking the code against RM0016 – Reference Manual all looks good with the application. So try downloading the EEPROM data again:

    This time the data looks good and the values appear to be correct.

    Downloading the EEPROM data again gave the first set of results. Trying for a fourth thime gave the second set of results. It appears that the correct data is only retrieved every second attempt (for reference, I am using ST Visual Develop version 3.2.8 on Windows 8).

    At this point I decided that the only way to ensure that the data is in fact correct is to write a verification method into the code. The new application becomes:

    //
    //  Write a series of bytes to the EEPROM of the STM8S105C6 and then
    //  verify that the data has been written correctly.
    //
    //  This software is provided under the CC BY-SA 3.0 licence.  A
    //  copy of this licence can be found at:
    //
    //  http://creativecommons.org/licenses/by-sa/3.0/legalcode
    //
    #if defined DISCOVERY
        #include <iostm8S105c6.h>
    #else
        #include <iostm8s103f3.h>
    #endif
    
    //
    //  Data to write into the EEPROM.
    //
    unsigned int _pulseLength[] = { 2000U, 27830U, 400U, 1580U, 400U, 3580U, 400U };
    unsigned char _onOrOff[] =    {   1,      0,     1,     0,    1,     0,    1 };
    char numberOfValues = 7;
    
    //--------------------------------------------------------------------------------
    //
    //  Write the default values into EEPROM.
    //
    void SetDefaultValues()
    {
        //
        //  Check if the EEPROM is write-protected.  If it is then unlock the EEPROM.
        //
        if (FLASH_IAPSR_DUL == 0)
        {
            FLASH_DUKR = 0xae;
            FLASH_DUKR = 0x56;
        }
        //
        //  Write the data to the EEPROM.
        //
        char *address = (char *) 0x4000;        //  EEPROM base address.
        *address++ = (char) numberOfValues;
        for (int index = 0; index < numberOfValues; index++)
        {
            *address++ = (char) (_pulseLength[index] & 0xff);
            *address++ = (char) ((_pulseLength[index] >> 8) & 0xff);
            *address++ = _onOrOff[index];
        }
        //
        //  Now write protect the EEPROM.
        //
        FLASH_IAPSR_DUL = 0;
    }
    
    //--------------------------------------------------------------------------------
    //
    //  Verify that the data in the EEPROM is the same as the data we
    //  wrote originally.
    //
    void VerifyEEPROMData()
    {
        PD_ODR_ODR2 = 1;            //  Checking the data
        PD_ODR_ODR3 = 0;            //  No errors.
        //
        char *address = (char *) 0x4000;        //  EEPROM base address.
        if (*address++ != numberOfValues)
        {
            PD_ODR_ODR3 = 1;
        }
        else
        {
            for (int index = 0; index < numberOfValues; index++)
            {
                unsigned int value = *address++;
                value += (*address++ << 8);
                if (value != _pulseLength[index])
                {
                    PD_ODR_ODR3 = 1;
                }
                if (*address++ != _onOrOff[index])
                {
                    PD_ODR_ODR3 = 1;
                }
            }
        }
        PD_ODR_ODR2 = 0;        // Finished processing.
    }
    
    //--------------------------------------------------------------------------------
    //
    //  Setup port D for data output.
    //
    void SetupPorts()
    {
        //
        //  Initialise Port D.
        //
        PD_ODR = 0;             //  All pins are turned off.
        PD_DDR = 0xff;          //  All bits are output.
        PD_CR1 = 0xff;          //  All pins are Push-Pull mode.
        PD_CR2 = 0xff;          //  Pins can run up to 10 MHz.
    }
    
    //--------------------------------------------------------------------------------
    //
    //  Main program loop.
    //
    void main()
    {
        SetupPorts();
        SetDefaultValues();
        VerifyEEPROMData();
    }
    

    The application uses Port D, pins 2 and 3 to indicate how the verification is proceeding. Pin D2 goes high when the application is verifying the data. Pin D3 is used to indicate if an error is found. Compiling the above and connecting up a scope gives the following output:

    Pin D2 is connected to the yellow channel and pin D3 is connected to the blue channel. The above shows that the verification process starts and no errors are generated.

    Conclusion

    There may only be a small amount of EEPROM storage space available on the STM8S (640 bytes to be precise) but this offers a quick and simple method of storing data which may be needed between system resets/power loses.

    In it’s simplest form, the code required to store the data is trivial only requiring the developer to enable the write operations and then disable after the data has been written successfully.

    In addition to the above I would recommend that some form of checksum value is written into the EEPROM as it is possible that the power is lost as the data is being written into the EEPROM. In this case there are two arrays being written and we may only have written half of the data when the power is lost. This is left as an exercise for the reader.