Manchester Baby (SSEM) Emulator
Sunday, February 12th, 2017The Manchester Small Scale Experimental Machine (SSEM) or Manchester Baby as it became known, was the first computer capable of executing a stored program. The Baby was meant as a proving ground for the early computer technology having only 32 words of memory and a small instruction set.
A replica of the original Manchester Baby is currently on show in the Museum of Science and Industry in Castlefield, Manchester.
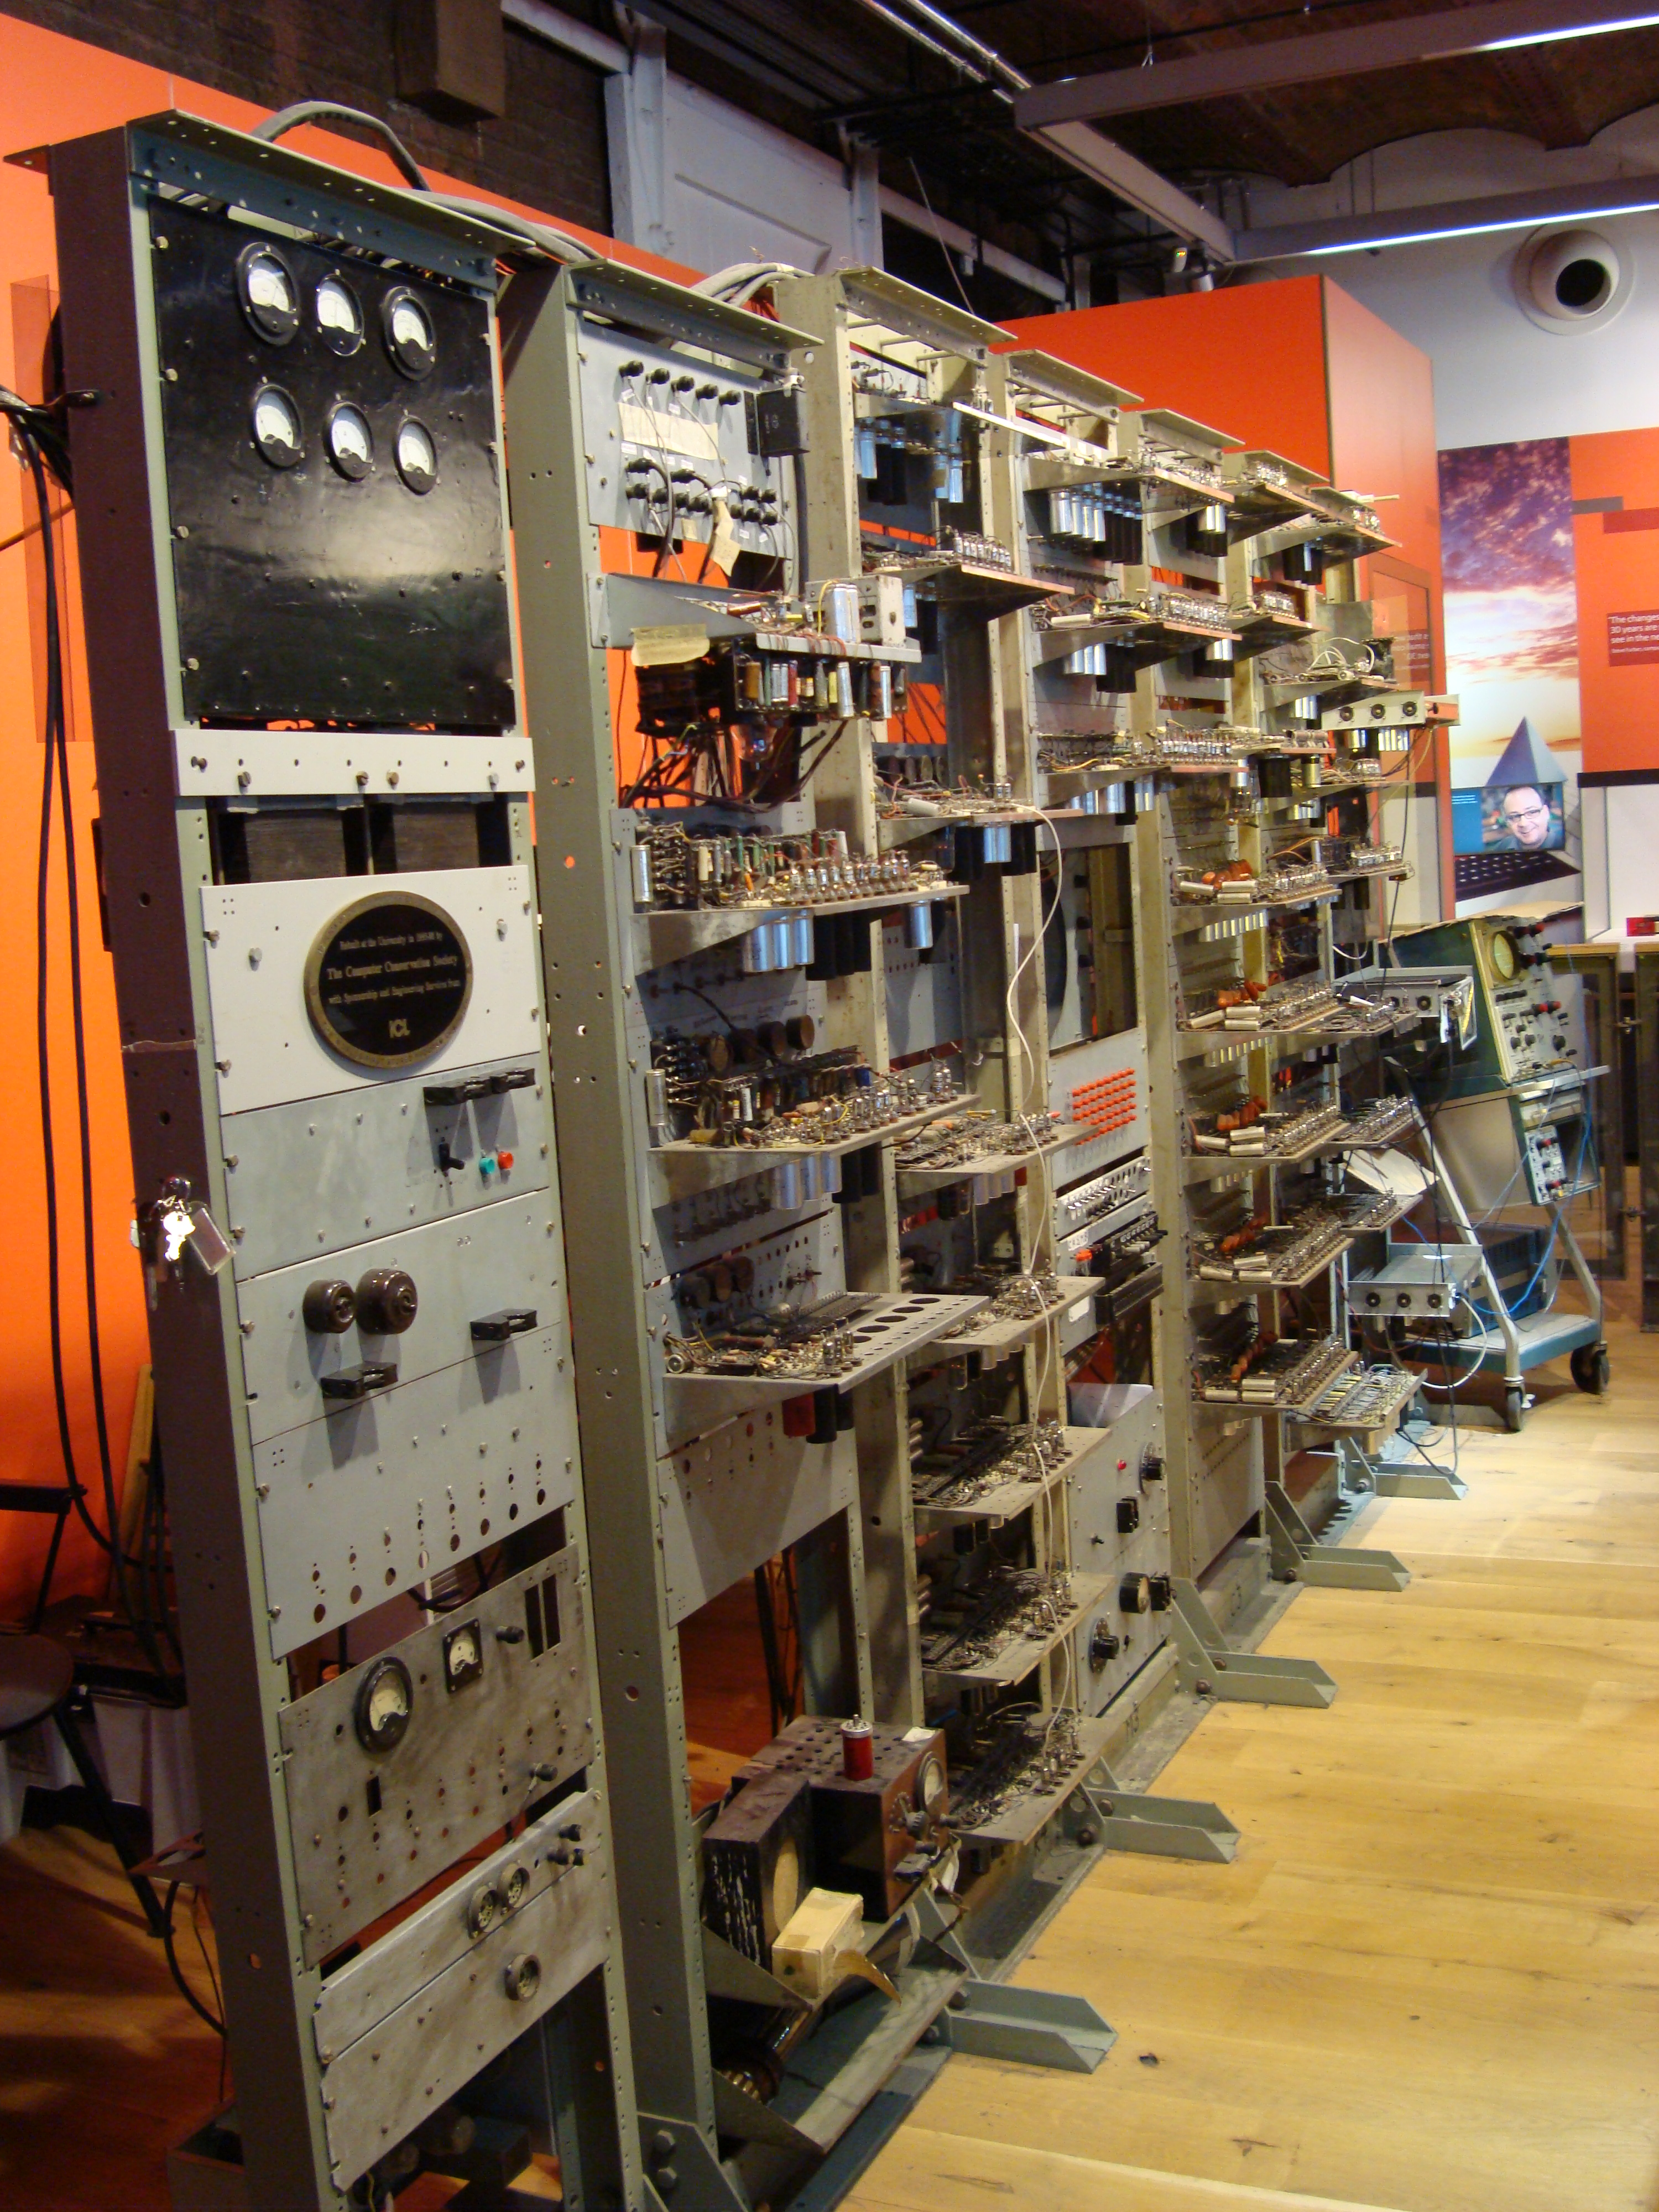
Manchester Baby at Museum of Science and Industry August 2012.
As you can see, it is a large machine weighing in at over 1 ton (that’s imperial, not metric, hence the spelling).
Manchester Baby Architecture
A full breakdown on the Manchester Baby’s architecture can be found in the Wikipedia article above as well as several PDFs, all of which can be found online. The following is meant as a brief overview to present some background to the Python code that will be discussed later.
Storage Lines
Baby used 32-bit words with numbers represented in twos complement form. The words were stored in store lines with the least significant bit (LSB) first (to the left of the word). This is the reverse of most modern computer architectures where the LSB is held in the right most position.
The storage lines are equivalent to memory in modern computers. Each storage line contains a 32-bit value and the value could represent an instruction or data. When used as an instruction, the storage line is interpreted as follows:
| Bits | Description |
|---|---|
| 0-5 | Storage line number to be operated on |
| 6-12 | Not used |
| 13-15 | Opcode |
| 16-31 | Not used |
As already noted, when the storage line is interpreted as data then the storage line contains a 32-bit number stored in twos complement form with the LSB to the left and the most significant bit (MSB) to the right.
This mixing of data and program in the same memory is known as von Neumann architecture named after John von Neumann. For those who are interested, the memory architecture where program and data are stored in separate storage areas is known as a Harvard architecture.
SSEM Instruction Set
Baby used three bits for the instruction opcode, bits 13, 14 and 15 in each 32 bit word. This gave a maximum of 8 possible instructions. In fact, only seven were implemented.
| Binary Code | Mnemonic | Description |
|---|---|---|
| 000 | JMP S | Jump to the address obtained from memory address S (absolute jump) |
| 100 | JRP S | Add the value in store line S to the program counter (relative jump) |
| 010 | LDN S | Load the accumulator with the negated value in store line S |
| 110 | STO S | Store the accumulator into store line S |
| 001 or 101 | SUB S | Subtract the contents of store line S from the accumulator |
| 011 | CMP | If the accumulator is negative then add 1 to the program counter (i.e. skip the next instruction) |
| 111 | STOP | Stop the program |
When reading the above table it is important to remember that the LSB is to the left.
Registers
Baby had three storage areas within the CPU:
- Current Instruction (CI)
- Present Instruction (PI)
- Accumulator
The current instruction is the modern day equivalent of the program counter. This contains the address of the instruction currently executing. CI is incremented before the instruction is fetched from memory. At startup, CI is loaded with the value 0. This means that the first instruction fetched from memory for execution is the instruction in storage line 1.
The present instruction (PI) is the actual instruction that is currently being executed.
As with modern architecture, the accumulator is used as a working store containing the results of any calculations.
Python Emulator
A small Python application has been developed in order to verify my understanding of the architecture of the Manchester Baby. The application is a console application with the following brief:
- Read a program from a file and setup the store lines
- Display the store lines and registers before the program starts
- Execute the program displaying the instructions as they are executed
- Display the store lines and registers at the end of the program run
The application was broken down into four distinct parts:
- Register.py – implement a class containing a value in a register or storage line
- StoreLines.py – Number of store lines containing the application and data
- CPU.py – Implement the logic of the CPU
- ManchesterBaby.py – Main program logic, reading a program from file and executing the program
The source code for the above along with several samples and test programs can be fount on Github.
Register.py
A register is defined as a 32-bit value. The Register class stores the value and has some logic for checking that the value passed does not exceed the value permitted for a 32-bit value. Note that no other checks or interpretation of the value is made.
StoreLines.py
StoreLines holds a number of Registers, the default when created is 32 registers as this maps on to the number of store lines in the original Manchester Baby. It is possible to have a larger number of store lines.
CPU.py
The CPU class executes the application held in the store lines. It is also responsible for displaying the state of the CPU and the instructions being executed.
ManchesterBaby.py
The main program file contains an assembler (a very primitive one with little error checking) for the Baby’s instruction set. It allows a file to be read and the store lines setup and finally instructs the CPU to execute the program.
SSEM Assembler Files
The assembler provided in the ManchesterBaby.py file is primitive and provides little error checking. It is still useful for loading applications into the store lines ready for execution. The file format is best explained by examining a sample file:
--
--  Test the Load and subtract functions.
--
--  At the end of the program execution the accumulator should hold the value 15.
--
00: NUM 0
01: LDN 20      -- Load accumulator with the contents of line 20 (-A)
02: SUB 21      -- Subtract the contents of line 21 from the accumulator (-A - B)
03: STO 22      -- Store the result in line 22
04: LDN 22      -- Load accumulator (negated) with line 22 (-1 * (-A - B))
05: STOP        -- End of the program.
20: NUM 10      -- A
21: NUM 5       -- B
22: NUM 0       -- Result
Two minus signs indicate an inline comment. Everything following is ignored.
An instruction line has the following form:
Store line number: Instruction Operand
The store line number is the location in the Store that will be used hold the instruction or data.
Instruction is the mnemonic for the instruction. The some of the instructions have synonyms:
| Mnemonic | Synonyms |
|---|---|
| JRP | JPR, JMR |
| CMP | SKN |
| STOP | HLT, STP |
As well as instructions a number may also be given using the NUM mnemonic.
All of the mnemonics requiring a store number (all except STOP and CMP) read the Operand field as the store line number. The NUM mnemonic stores the Operand in the store line as is.
Testing
Testing the application was going to be tricky without a reference. Part of the reason for developing the Python implementation was to check my understanding of the operation of the SSEM. Luckily, David Sharp has developed an emulator written in Java. I can use this to check the results of the Python code.
The original test program run on the Manchester Baby was a calculation of factors. This was used as it would stress the machine. This same application can be found in several online samples and will be used as the test application. The program is as follows:
--
--  Tom Kilburns Highest Common Factor for 989
--
01:   LDN 18
02:   LDN 19
03:   SUB 20
04:   CMP
05:   JRP 21
06:   SUB 22
07:   STO 24
08:   LDN 22
09:   SUB 23
10:   STO 20
11:   LDN 20
12:   STO 22
13:   LDN 24
14:   CMP
15:   JMP 25
16:   JMP 18
17:   STOP
18:   NUM 0
19:   NUM -989
20:   NUM 988
21:   NUM -3
22:   NUM -988
23:   NUM 1
24:   NUM 0
25:   NUM 16
Running on the Java Emulator
Executing the above code in David Sharps emulator gives the following output on the storage tube:
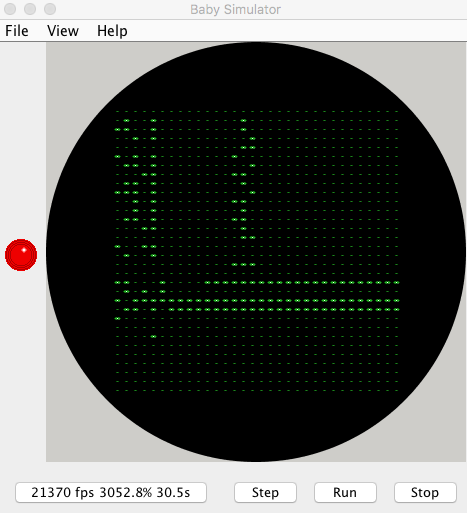
Result of the HCF application shown on the storage lines of the Java emulator.
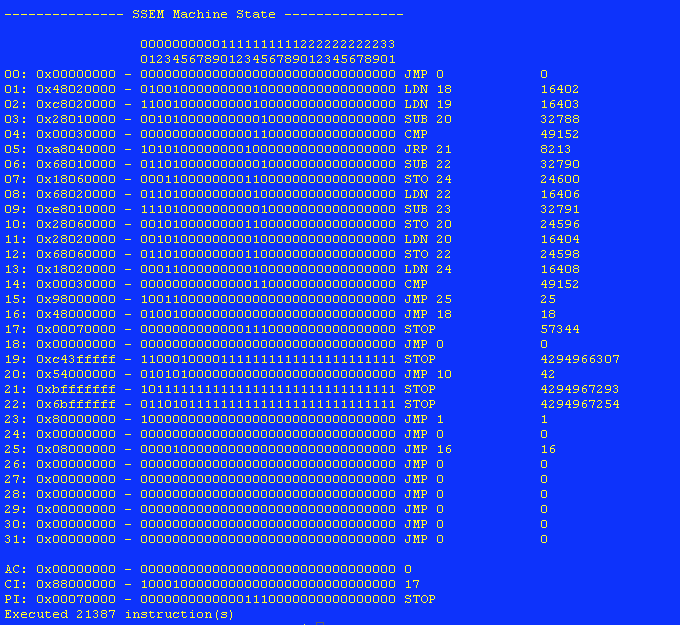
and disassembler view:
Result of the program execution disassembled in the Java emulator.
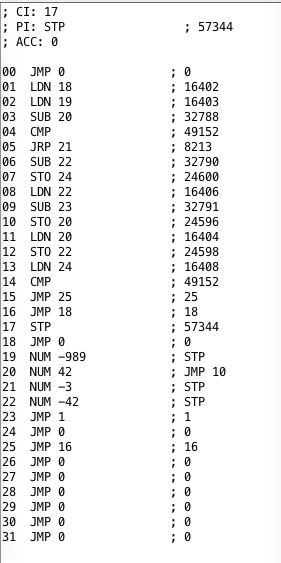
And running on the Python version of the emulator results in the following output in the console:
Final output from the Python emulator.
Examination of the output shows that the applications have resulted in the same output. Note that the slight variation in the final output of the Python code is due to the way in which numbers are extracted from the registers. Examination of the bit patterns in the store lines shows that the Java and Python emulators have resulted in the same values.
Conclusion
The Baby presented an ideal way to start to examine computer architecture due to its prmitive nature. The small storage space and simple instruction set allowed emulation in only a few lines of code.

