RSS

Posts Tagged ‘Rust’

Getting Started with Rust – Raspberry Pi VS Code Extension

Friday, November 7th, 2025

Run and Debug

The Raspberry Pi Foundation have recently announced an update to the Visual Studio Code (VS Code) extension. The update now supports developing embedded firmware for Pico using Rust or Zephyr. The announcement is timely given my current aim of learning Rust with the aim of developing on embedded platforms.

Time to give the extension a spin.

TL;DR It just works.

Updates and Pre-requisites

The post starts by giving an overview of what the extension can do as well as:

  • Overview of Rust
  • Overview of Zephyr
  • Getting (or updating) the extension
  • Installing any pre-requisites

The development platform used when researching this post is MacOS and a previous version of the VS Code extension had already been installed on the platform. Upgrading the extension was as easy as simply using the VS Code Check for Updates… menu item.

Creating a Rust Project

First step in creating an application is to activate the Raspberry Pi extension by clicking on the Pico Extension icon on the Primary Side bar:

Pico Extension Icon

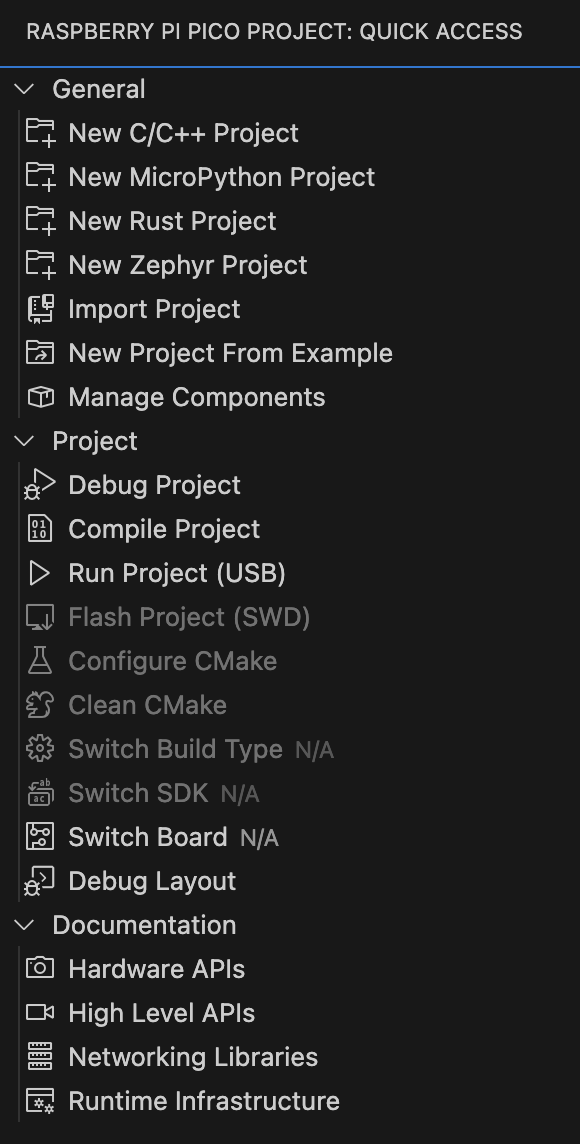
Next select the New Rust Project:

Pico Extension Options

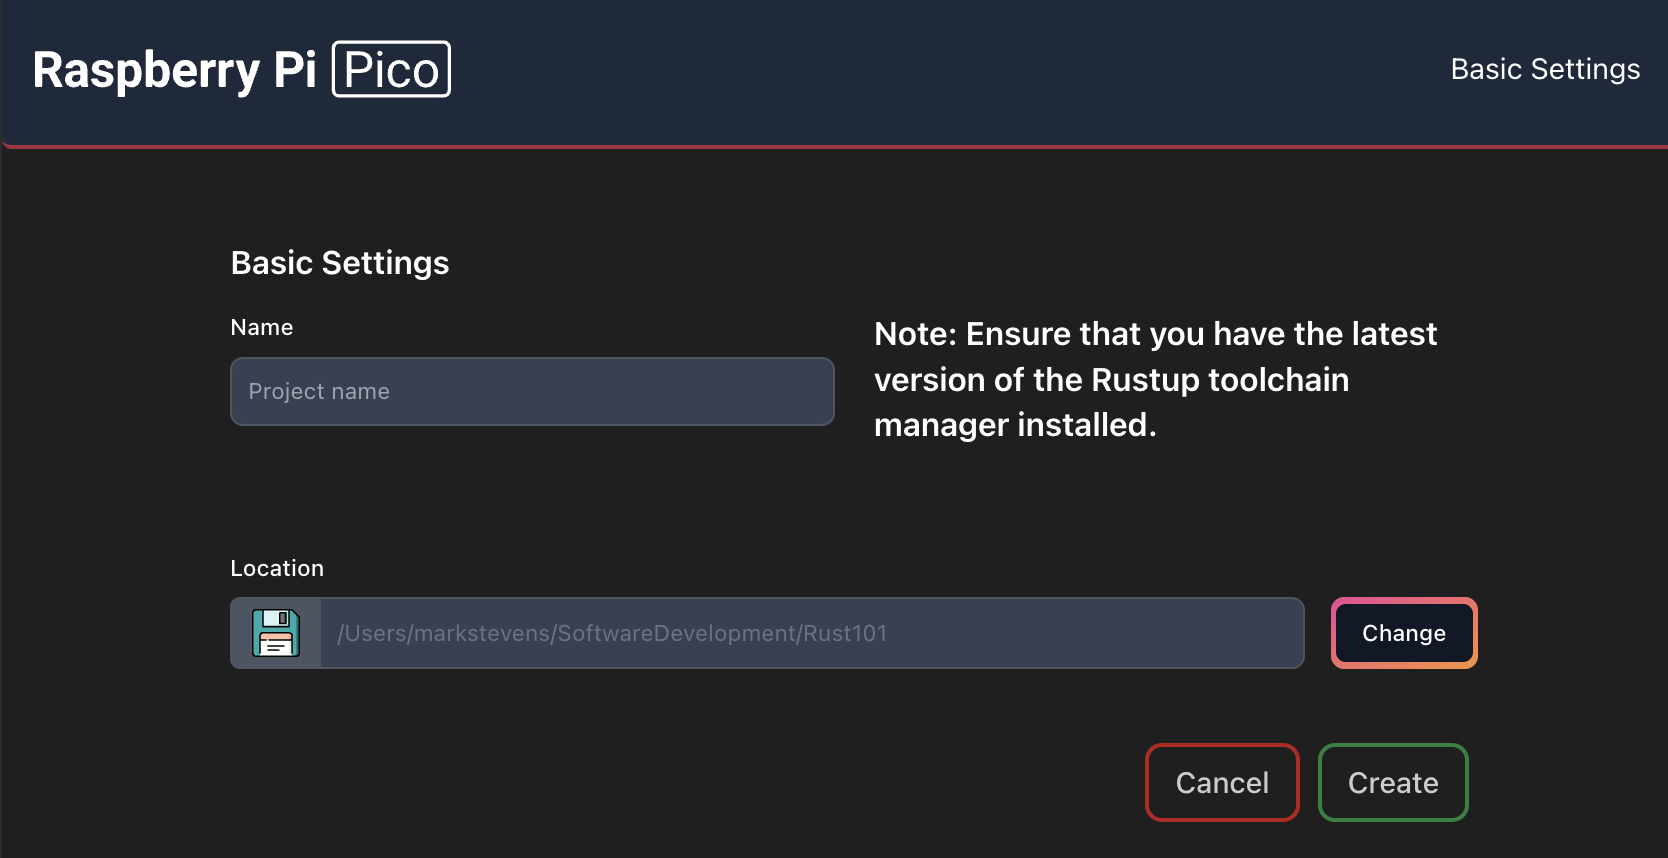
This will show the New Rust Project options:

Create New Rust Project

Here we just need to supply a name for the project and the location for the project files. One point to note is that the project name appears to be restricted:

  • Lower case letters only
  • Start with a letter
  • Numbers
  • – or _

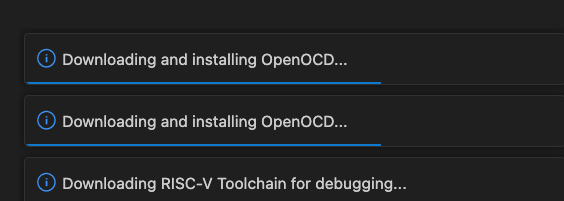
It was necessary to check and deploy the SDK when this was run for the first time and this took a minute or so.

VS Code installing Pico Rust Components

Subsequent runs took about 5 seconds to create and configure a new project.

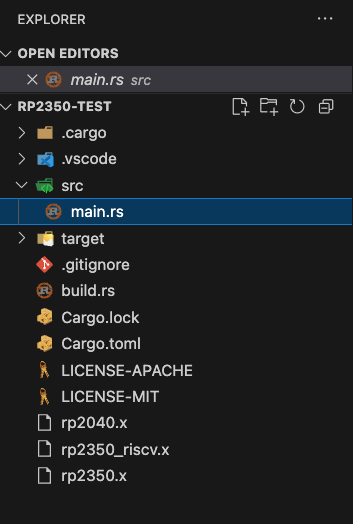
Finally, VS Code will open the Directory view which shows all of the project files:

Rust File List

Running the Application

By default the project appears to be configured as a 2350 project. The original post from Raspberry Pi states:

supports both RP2040– and RP2350-based devices — including the RISC-V target — which you can later select in the toolbar, next to the Run button.

I must admit, this took a little while to locate. The Run button appears at the far right on the bottom toolbar:

Run Button in Toolbar

Clicking on the chip name allows the target chip to be selected in the command palette:

Switch target chip

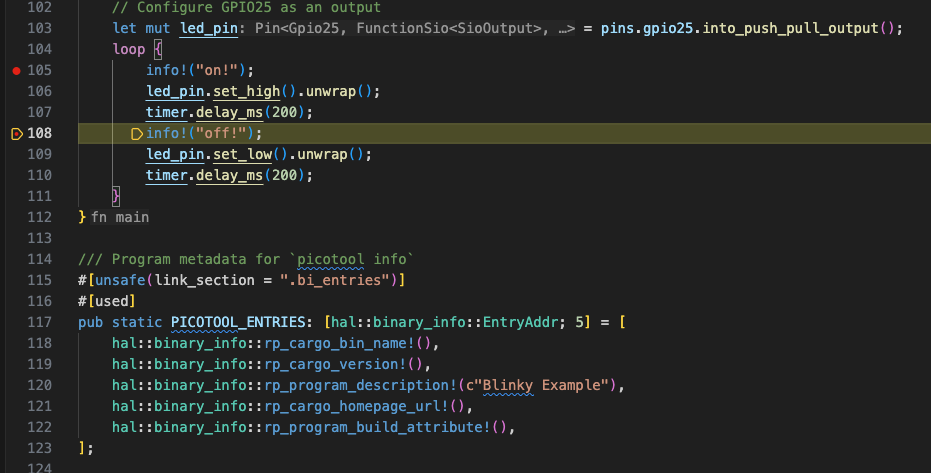
Final steps, setting some breakpoints in the application and debugging the application. This is achieved using the Debug and Run facility in Debug view (alternatively press F5):

Run and Debug

A few seconds later deployment had completed and the first breakpoint was hit:

Debugging on the Pico 2

Additional Components

The post recommends installing three optional components/extensions:

  • Probe-rs
  • Cortex Debug
  • Rust analyzer

These had already been deployed to the development machine and are simple to install.

Conclusion

There were a couple of points of confusion, one when the extensions downloaded a few components (this made the creation of the first application take a while). The second was changing the target chip type, it took a minute or so to find the Run button.

Having installed several embedded toolchains over the years I think this was the simplest and probably the best experience and is on a par with commercial toolchains such as Keil.

Getting Started with Rust – Enums

Tuesday, November 4th, 2025

Enums in Rust Banner

Enums in Rust have some properties over and above those found in C/C++

  • Data can be associated with them
  • Methods can be implemented for an enum

The final item in the list was only briefly covered in chapter 6 of The Rust Programming Language book so we will expand on this here.

Simple Enums

As with C/C++, simple enums are symbolic representations of a concept or value. You don’t necessarily need to know what the value is, you can simply use the symbolic name.

enum Message {
    MoveByOffset,
    MoveTo
}

The above code could represent an operation in a game to move a sprite/character etc. This is very much like C/C++, it becomes more interesting when we associate data to an enum.

Enums Can be Associated with Data

Enums can also have data associated with them. So the above enum could be embellished to have the offset and coordinate data associated with the move operations:

enum Message {
    MoveByOffset { x: i32, y: i32 },
    MoveTo { x: i32, y: i32 }
}

Another feature of enums is that not all of the symbolic names (variants) need to have the same data type associated with them. The Message enum could be expanded to encompass more operations:

enum Message {
    Quit,
    Move { x: i32, y: i32 },
    Write(String),
    ChangeColor(i32, i32, i32),
}

Here we have messages with different data associated with them and even one without any data. We can even have methods implemented for an enum:

impl Message {
    fn call(&self) {
        // method body would be defined here
    }
}

let m = Message::Write(String::from("hello"));
m.call();

Here, we have a call method that can be executed for a Message enum.

Differentiating Between Enums

So far everything looks pretty much like the code in chapter 6 of the Rust book.

The thing that is not covered at this point is how to access the data in the different messages and just as importantly, determine the exact variant of the enum that has been instantiated. For this we need the match statement along with the self parameter in the call method. This is best illustrated by an example:

enum Message {
    Quit,
    Move { x: i32, y: i32 },
    Write(String),
    ChangeColor(i32, i32, i32),
}

impl Message {
    fn call(&self) {
        match self {
            Message::Quit => println!("Quit message received"),
            Message::Move { x, y } => println!("Move to coordinates: ({}, {})", x, y),
            Message::Write(text) => println!("Write message: {}", text),
            Message::ChangeColor(r, g, b) => { println!("Change color to RGB({}, {}, {})", r, g, b) }
        }
    }
}

fn main() {
    let m1 = Message::Write(String::from("Hello"));
    m1.call();

    let m2 = Message::Move { x: 10, y: 20 };
    m2.call();

    let m3 = Message::ChangeColor(255, 0, 0);
    m3.call();

    let m4 = Message::Quit;
    m4.call();
}

Running this application results in the following output:

Write message: Hello
Move to coordinates: (10, 20)
Change color to RGB(255, 0, 0)
Quit message received

Here, self is used to determine which variant of the Message is calling the method call and match ensures that the appropriate action is taken.

Conclusion

The above application is a trivial illustration of using match to work with enums with different variants but it was not covered very well in the text. A little investigation was required.

Next Up

Project Structure.

Getting Started with Rust – Ownership, Borrowing and References

Wednesday, October 29th, 2025

Ownership Banner

In the words of Connor MacLeod from Highlander

There can be only one.

Every value in a Rust application has one owner and only one owner. When the owner of an value goes out of scope then the value is disposed of and is no longer valid.

The Rust Programming Language (Chapters 4 and 5)

These chapters cover the following topics:

  • Ownership
  • References and Borrowing
  • Slices
  • Structs and Methods

Ownership, references and borrowing determine how an object can be accessed and potentially modified. The strict rules are designed to reduce the possibility of common C/C++ issues such as use after free and general pointer access violations.

Structs and methods are the start of the journey into object orientated programming.

Scopes

Scoping rules pretty much follow the same rules as C/C++ and as such are familiar. Any pair of braces open and close a new scope. So a function introduces a new scope. A new scope can also be created with a pair of braces inside an existing scope.

Ownership, References and Borrowing

As Connor MacLeod said, “There can be only one” and in this case, there can be only one owner of a value.

Calling a function can change the ownership of a variable depending upon the type of the variable. Some types implement the copy trait which makes a copy of the variable on the stack. Types that do not implement the copy trait will have their ownership transferred to the function. The transfer of ownership means that the original variable is no longer valid when the function returns.

Consider the following code:

fn print_integer(x: i32) {
    println!("Integer value: {}", x);
}

fn print_string(s: String) {
    println!("String value: {}", s);
}

fn main() {
    let x: i32 = 42;
    println!("Original integer: {}", x);
    print_integer(x);
    println!("Original integer after function call: {}", x); // This line works fine since integers implement the Copy trait.

    let s: String = String::from("Hello, world!");
    println!("Original string: {}", s);
    print_string(s);
    println!("Original string after function call: {}", s); // This line will cause a compile-time error due to ownership rules.
}

Compiling the above code generates the following error output:

error[E0382]: borrow of moved value: `s`
  --> src/main.rs:24:57
   |
21 |     let s = String::from("Hello, world!");
   |         - move occurs because `s` has type `String`, which does not implement the `Copy` trait
22 |     println!("Original string: {}", s);
23 |     print_string(s);
   |                  - value moved here
24 |     println!("Original string after function call: {}", s); // This line will cause a compile-time error due to owne...
   |                                                         ^ value borrowed here after move
   |
note: consider changing this parameter type in function `print_string` to borrow instead if owning the value isn't necessary
  --> src/main.rs:16:20
   |
16 | fn print_string(s: String) {
   |    ------------    ^^^^^^ this parameter takes ownership of the value
   |    |
   |    in this function
   = note: this error originates in the macro `$crate::format_args_nl` which comes from the expansion of the macro `println` (in Nightly builds, run with -Z macro-backtrace for more info)
help: consider cloning the value if the performance cost is acceptable
   |
23 |     print_string(s.clone());
   |                   ++++++++

For more information about this error, try `rustc --explain E0382`.
error: could not compile `hello_world` (bin "hello_world") due to 1 previous error

An awful lot of output to digest.

Calls to print_integer work because the i32 type is simple and this implements the copy trait. This means a copy of the value in x is made on the stack. The function print_integer therefore operates on the copied value and not the variable x defined in main.

print_string works differently as it is operating on a complex value that does not implement the copy trait. Complex values are usually allocated on the heap. Calling print_string moves the ownership of s to the print_string function and the object is dropped at the end of the function making future uses of s in main invalid.

References

The compiler suggested one option for the problem in the above code, to clone the string and pass this to the print_string function. Another solution is to use references. Here the application allows the use of the object without transferring ownership. In this case the object passed is not dropped at the end of the function.

This is known as borrowing.

The above code can be modified to use references:

fn print_string(s: &String) {
    println!("String value: {}", s);
}

fn main() {
    let s: String = String::from("Hello, world!");
    println!("Original string: {}", s);
    print_string(&s);
    println!("Original string after function call: {}", s); // This line will cause a compile-time error due to ownership rules.
}

Running this code with cargo run generates the following output:

Original string: Hello, world!
String value: Hello, world!
Original string after function call: Hello, world!

No more compiler errors.

Function parameters can also be declared as mutable meaning that the original variable can be modified by the function. Modifying the above code to the following:

fn print_string(s: &mut String) {
    println!("String value: {}", s);
    s.push_str(", world!");
}

fn main() {
    let mut s = String::from("Hello");
    println!("Original string: {}", s);
    print_string(&mut s);
    println!("Original string after function call: {}", s);
 }

Running the application results in the following output:

Original string: Hello
String value: Hello
Original string after function call: Hello, world!

print_string is now able to borrow the parameter and modify the value.

I suspect that a lot of time (initially) will be spent fighting the borrow checker.

Structs and Methods

Structs provide the ability to collect together related data items and are similar to structs in C/C++. Methods are functions related to a struct giving us the basics of object orientated programming. The methods are implemented against a type:

struct Rectangle {
    width: u32,
    height: u32,
}

impl Rectangle {
    fn area(&self) -> u32 {
        self.width * self.height
    }
}

In the above code, the area method is implemented against the Rectangle structure.

Language Highlights

One stand out feature with structs is the ability to easily copy unchanged fields from one structure to a new version of the same type of structure. This is best illustrated with an example.

#[derive(Debug)]
struct Person {
    name: String,
    house_number: u16,
    street: String,         // Rest of address fields omitted for brevity.
    mobile_number: String
}

fn update_mobile(person: Person, new_mobile_number: String) -> Person {
    Person {
        mobile_number: new_mobile_number,
        ..person
    }
}

fn main() {
    let person = Person {
        name: String::from("Fred Smith"),
        house_number: 87,
        street: String::from("Main Street"),
        mobile_number: String::from("+44 7777 777777")
    };
    println!("Before update: {:?}", person);
    let updated_person = update_mobile(person, String::from("+44 8888 888888"));
    println!("After update: {:?}", updated_person);
}

Running this application with cargo run generates the following output:

Before update: Person { name: "Fred Smith", house_number: 87, street: "Main Street", mobile_number: "+44 7777 777777" }
After update: Person { name: "Fred Smith", house_number: 87, street: "Main Street", mobile_number: "+44 8888 888888" }

A contrived example maybe but it illustrates the use of ..person to copy the unchanged fields into the new new Person structure.

Another nice feature is the field initialisation for structure members. If a field has the same name as the value being used to initialise it then we can omit the field name. For instance we could modify the update_mobile function above to the following:

fn update_mobile(person: Person, mobile_number: String) -> Person {
    Person {
        mobile_number,
        ..person
    }
}

Note the change to the parameter name to mobile_number to match the field name in the Person struct.

Conclusion

The borrow checker is going to be frustrating for a while with the benefit that if the code compiles it is highly likely to be bug free. The borrow checker also aid in the safety of multithreaded applications.

New Links

Came across a new tool for code linting: Clippy.

Consider the following function:

fn print_integer_and_increment(x: &mut i32) {
    println!("Integer value: {}", x);
    *x = *x + 1;
}

This code compiles without error and works as expected. Running the command cargo clippy to lint the code results in the following output:

warning: manual implementation of an assign operation
  --> src/main.rs:18:5
   |
18 |     *x = *x + 1;
   |     ^^^^^^^^^^^ help: replace it with: `*x += 1`
   |
   = help: for further information visit https://rust-lang.github.io/rust-clippy/master/index.html#assign_op_pattern
   = note: `#[warn(clippy::assign_op_pattern)]` on by default

warning: `hello_world` (bin "hello_world") generated 1 warning (run `cargo clippy --fix --bin "hello_world"` to apply 1 suggestion)
    Finished `dev` profile [unoptimized + debuginfo] target(s) in 0.11s

Running the command cargo clippy –fix –bin “hello_world” –allow-dirty makes the suggested change automatically.

Next Up

Enums, Pattern Matching, Modules and Project structure.

Getting Started with Rust – Variables, Functions and Loops

Wednesday, October 15th, 2025

Getting Started with Rust (Week One) Banner

With the tools installed it is time to start learning some language basics:

  • Variables
  • Functions
  • Control structures (if and loops)

The above are covered in the first three chapters of The Rust Programming Language.

Installing the Tools (Update)

Installation of the tools went pretty smoothly and took only a few hours. The Rust in Visual Studio Code page proved to be a nice addition to the links in the blog post.

The page provides information on:

  • Intellisense
  • Linting
  • Refactoring
  • Debugging

plus more.

The Rust Programming Language (Chapters 1 through 3)

The initial chapters of the The Rust Programming Language covers the basics of Rust:

  • Variables
  • Immutability and mutability
  • Functions
  • Control flow

It was interesting to discover that Rust has a greater degree of distinction between expressions and statements:

Function bodies are made up of a series of statements optionally ending in an expression. So far, the functions we’ve covered haven’t included an ending expression, but you have seen an expression as part of a statement. Because Rust is an expression-based language, this is an important distinction to understand. Other languages don’t have the same distinctions, so let’s look at what statements and expressions are and how their differences affect the bodies of functions.

This difference means that there is no analogy to the following C code:

int x, y;
x = y = 1024;

The basic rule is statements perform actions and expressions return a result. So functions that return a result must return an expression. The general rule being that a statement also ends with a semicolon and an expression does not need one.

Now consider this simple (and admittedly contrived example):

fn add_or_multiply(value : i32) -> i32 {
    if value > 5 {
        return value * 2;
    }
    //  Maybe do some other stuff...
    value + 1
}

fn main() {
    for number in 0..10 {
        let result = add_or_multiply(number);
        println!("Number: {number}, Result: {result}");
    }
}

Running the above generates the following output:

     Running `target/debug/hello_world`
Number: 0, Result: 1
Number: 1, Result: 2
Number: 2, Result: 3
Number: 3, Result: 4
Number: 4, Result: 5
Number: 5, Result: 6
Number: 6, Result: 12
Number: 7, Result: 14
Number: 8, Result: 16
Number: 9, Result: 18

The line return value * 2; can be changed to:

return value * 2

Note the semicolon has been removed. Running the resultant application also generates the same output. Further investigation is required to determine why this works and also what is considered best practice amongst the Rust community.

Language Highlights

From a C/C++ programmers perspective, two Rust constructs are appealing due to their convenience and ability to make code tidier:

  • Using if statements in assignments
  • Labelled loops

The first construct is alien to the C/C++ developer but should be familiar to Python developers. This is the ability to use an if statement in an assignment operation:

let x = if y <= MAXIMUM { MAXIMUM } else { y };

This means the trivial function add_or_multiply in the above application could have been written as:

const MAXIMUM: i32  = 5;

fn add_or_multiply(value : i32) -> i32 {
    let result = if value > MAXIMUM { value * 2 } else { value + 1 };
    result
}

Nice little feature that can make code more compact and readable.

The second nice feature is the ability to label loops. This allows the application to break in an inner loop to also break an outer loop.

'outer_loop: loop {
    //  Setup for the inner loop...
    loop {
        if remaining == MAXIMUM {
            break;
        }
        if (count % 2) == 0 {
            break 'outer_loop;  // Ignore even numbers.
        }
        // More inner loop processing...
    }
    // More outer loop processing...
}

The inner loop may be a contrived version of a while loop but it serves to illustrate the language feature. The break ‘outer_loop allows the inner loop to skip even numbers without the need run unnecessary nested if statements.

Conclusion

A slow start but some interesting language features:

  • Immutability by default
  • Using if statements in assignments
  • Labelled loops

Next up is ownership.

Rust – Installing the Tools

Sunday, October 5th, 2025

Bacon running in a terminal

This week was a gentle start with Rust just installing the toolchain and some browsing for possibly useful tools.

Installing Rust

First step, install the compiler so lets head over to the Getting Started page. According to the page we just need to execute the command:

curl --proto '=https' --tlsv1.2 -sSf https://sh.rustup.rs | sh

Which generates the following output:

info: downloading installer

Welcome to Rust!

This will download and install the official compiler for the Rust
programming language, and its package manager, Cargo.

Rustup metadata and toolchains will be installed into the Rustup
home directory, located at:

  /home/tester/.rustup

This can be modified with the RUSTUP_HOME environment variable.

The Cargo home directory is located at:

  /home/tester/.cargo

This can be modified with the CARGO_HOME environment variable.

The cargo, rustc, rustup and other commands will be added to
Cargo's bin directory, located at:

  /home/tester/.cargo/bin

This path will then be added to your PATH environment variable by
modifying the profile files located at:

  /home/tester/.profile
  /home/tester/.bashrc
  /home/tester/.zshenv

You can uninstall at any time with rustup self uninstall and
these changes will be reverted.

Current installation options:


   default host triple: aarch64-unknown-linux-gnu
     default toolchain: stable (default)
               profile: default
  modify PATH variable: yes

1) Proceed with standard installation (default - just press enter)
2) Customize installation
3) Cancel installation
>

Lets go with option 1, the default install:

info: profile set to 'default'
info: default host triple is aarch64-unknown-linux-gnu
info: syncing channel updates for 'stable-aarch64-unknown-linux-gnu'
info: latest update on 2025-09-18, rust version 1.90.0 (1159e78c4 2025-09-14)
info: downloading component 'cargo'
info: downloading component 'clippy'
info: downloading component 'rust-docs'
info: downloading component 'rust-std'
info: downloading component 'rustc'
info: downloading component 'rustfmt'
info: installing component 'cargo'
info: installing component 'clippy'
info: installing component 'rust-docs'
 20.5 MiB /  20.5 MiB (100 %)   8.3 MiB/s in  2s         
info: installing component 'rust-std'
 29.1 MiB /  29.1 MiB (100 %)  14.0 MiB/s in  2s         
info: installing component 'rustc'
 58.5 MiB /  58.5 MiB (100 %)  14.1 MiB/s in  4s         
info: installing component 'rustfmt'
info: default toolchain set to 'stable-aarch64-unknown-linux-gnu'

  stable-aarch64-unknown-linux-gnu installed - rustc 1.90.0 (1159e78c4 2025-09-14)


Rust is installed now. Great!

To get started you may need to restart your current shell.
This would reload your PATH environment variable to include
Cargo's bin directory ($HOME/.cargo/bin).

To configure your current shell, you need to source
the corresponding env file under $HOME/.cargo.

This is usually done by running one of the following (note the leading DOT):
. "$HOME/.cargo/env"            # For sh/bash/zsh/ash/dash/pdksh
source "$HOME/.cargo/env.fish"  # For fish
source $"($nu.home-path)/.cargo/env.nu"  # For nushell

Following the instructions to add rust to the PATH:

. "$HOME/.cargo/env"

Checking that the compiler has been installed:

$ rustup
rustup 1.28.2 (e4f3ad6f8 2025-04-28)

First Application – Hello, World

The classic way to test a new toolchain is to write Hello, world. The cargo build system has a simple way to do this:

cargo new hello_world

    Creating binary (application) `hello_world` package
note: see more `Cargo.toml` keys and their definitions at https://doc.rust-lang.org/cargo/reference/manifest.html

cargo should have created a new directory with the name hello_world along with any necessary support files for a Rust project, including default git files.

cd hello_world
total 16
drwxr-xr-x 5 tester tester 4.0K Oct  1 10:11 .
drwxr-xr-x 3 tester tester 4.0K Oct  1 10:10 ..
-rw-r--r-- 1 tester tester   82 Oct  1 10:10 Cargo.toml
drwxr-xr-x 6 tester tester 4.0K Oct  1 10:11 .git
-rw-r--r-- 1 tester tester    8 Oct  1 10:10 .gitignore
drwxr-xr-x 2 tester tester 4.0K Oct  1 10:10 src

The source file for the project is in the src directory with the entry point to the application in the src/main.rs file:

cat < src/main.rs

fn main() {
    println!("Hello, world!");
}

The application can be run with the cargo run command:

cargo run

   Compiling hello_world v0.1.0 (/home/tester/Rust101/hello_world)
    Finished `dev` profile [unoptimized + debuginfo] target(s) in 0.24s
     Running `target/debug/hello_world`
Hello, world!

Supplementary Tools

A little web browsing highlighted a couple of tools that might prove useful:

  • Bacon – Background Analyser
  • Visual Studio Code Extension – rust-analyzer

Let’s install these tools.

Bacon – Background Analyser

Bacon runs in a terminal and it scans the file system for any changes. It then runs cargo and checks the project source code for any errors. These are then displayed in the terminal. This means that the developer gets fast feedback of any issues throughout the development cycle.

Installation is simple:

cargo install --locked bacon

To run the application simply open a new terminal and run the command:

bacon --all-features

Visual Studio Code: rust-analyzer

Rust-analyzer is a popular extension for Visual Studio Code providing features such as:

  • Syntax highlighting
  • Code completion
  • Hints when hovering over variables, types etc.
  • Goto definition

The extension can be installed from the Visual Studio Marketplace or through Visual Studio Code itself.

Project

The best way to learn a new language is to reproduce an application / project that you have developed. This makes writing the application a little simpler as the problem is already understood, the only new element to the project is the new language.

  • Command line application
  • Process the command line
  • Using a directory passed through the command line, generate a list of all files in the directory
  • If a directory is found add to a list and recurse through the directory structure list all the files found

Short, simple problem maybe but it should be enough to get started.

Getting Started with Rust

Wednesday, October 1st, 2025

Rusty Bolts

Last year saw the push towards using safer programming languages. Languages such as C# and Rust, languages that help the developer avoid mistakes common to C and C++ (although there is a movement to make C++ safer to use).

It is time to take a look at Rust as a language and more specifically how easy it is to develop code that will run on a micrcontroller.

General Rust

The usual place to start is the The Rust Programming Language (Rust 2021) book.

There are also a number of online resources:

Only time will tell how good these resources are.

Microcontroller Specific

Initial learning will be laptop based as it will be easier to gain familiarity with the language. It will certainly be quicker than the usual develop, deploy and debug cycle that slows down firmware development.

The eventual aim is to move over to development for microcontrollers, likely the ESP32 variants or Raspberry Pi Pico boards. With this in mind the following Rust and micrcontroller resources are looking like they will be useful:

The microcontroller part of the journey will look at using the ESP32C6 microcontroller as this is on the supported list for both the bare metal and IDF versions of the HALL (see below).

ESP Hardware Abstraction Layer (HAL)

Espressif have released two versions of the HAL one supporting the IDF framework and one for bare metal applications:

Installation and use is covered in the Rust on the ESP Book.

Let’s get started and see where this takes us.