RSS

Posts Tagged ‘Tips’

Installing Mosquitto MQTT Server

Sunday, April 13th, 2025

Steampunk Mosquito

Recently came across a customer problem which needed access to a MQTT server. Here is how it went.

Requirement

The aim is to provide a cross platform way of providing a MQTT server for testing with the following characteristics:

It should be stressed that this is a disposable test environment running on a local network. The system will not be exposed to the Internet and so security and robustness are not going to be an issue.

  • Cross platform, running on Mac and Raspberry Pi
  • Persistence of data is not necessary as the system will be started and stopped as needed
  • Running on a local network with no access to the Internet (reduced need for security)
  • Simple to configure across platforms

Looking at the above it is apparent that a full installation should not be required. In fact it may be overkill. as would a dedicated server. In fact this use case points in the direction of a docker container with some shared configuration.

Installation and Configuration

Mosquitto is a lightweight MQTT server available as a native application for the target platforms and also as a docker image. Using docker will ensure a consistent deployment across multiple platforms and the Eclipse image will be the one used there.

The docker image can be installed with the command:

docker pull eclipse-mosquitto

The download only takes a few seconds with a moderate speed connection.

The Mosquitto client tools are also required for testing. These are installed with the following commands, for Raspberry Pi:

sudo apt update && sudo apt upgrade
sudo apt install mosquitto-clients

and for Mac (assumes Homebrew is already installed, if not, Homebrew installation instructions can be found here):

brew install mosquitto

Note that on a Mac this installs both the client and the server components although we will only need the client applications for testing the system setup.

The Eclipse image page for the docker container describes a simple directory structure for configuration:

/mosquitto/config
/mosquitto/data
/mosquitto/log

This can be replicated by creating a local directory structure and then mapping this when we start the docker container. The local structure will look like this (note the missing / at the start of the directory names):

mosquitto/config
mosquitto/data
mosquitto/log

Time to run and test the server.

Testing

The client tools will allow the installation to be tested. The server will be installed on a Raspberry Pi with the name testserver500.local. The server is started by logging on to the Raspberry Pi and executing the following command:

docker run -it -p 1883:1883 -v "$PWD/mosquitto/config:/mosquitto/config" -v "$PWD/mosquitto/data:/mosquitto/data" -v "$PWD/mosquitto/log:/mosquitto/log" eclipse-mosquitto

This will start the downloaded image and register the config, data and log directories with the image.

First problem, we also need a configuration file (mosquitto.conf) in the mosquitto/config. A quick scan suggests that the following is all that is required:

persistence true
persistence_location /mosquitto/data/
log_dest file /mosquitto/log/mosquitto.log

Two open shells are required for testing, one for receiving MQTT messages (subscription) and one for sending MQTT messages (publishing). In the first shell we subscribe to notifications with the command:

mosquitto_sub -h testserver500.local -t test/debug

Second problem, we get an error message Error: Connection refused. Some googling suggests that anonymous login is also required. The configuration file needs a couple more options adding to the file:

persistence true
persistence_location /mosquitto/data/
log_dest file /mosquitto/log/mosquitto.log
allow_anonymous true
listener 1883 0.0.0.0

Stopping the docker container and then restarting it applies the changes. Subscribing again is successful.

Time to try and publish some data. In a third terminal enter the command:

mosquitto_pub -h testserver500.local -t test/debug -m "Hello, world" -d

The subscription terminal should now display the message just sent:

clusteruser@TestServer500:~ $ mosquitto_sub -h testserver500.local -t test/debug
Hello, world

Success!

One final test, publish / subscribe from a remote machine.

Conclusion

Using a docker image makes it possible to use a standardised setup on any platform, including Windows (although this is not in scope here). The only additional set up required is to supply any specialised configuration and possibly data and log directories should data retention be required.

It should also be remembered that the configuration here is really only suitable for a low risk network (i.e. isolated testing systems) and should not be used in production.

KiCAD Relative Positioning

Sunday, March 10th, 2024

KiCAD Positioning Banner

Most of the PCBs I make have mounting holes in the final layout to allow the boards to be firmly attached to 3D printed cases or mounts. When I first started using KiCAD I found it difficult to position the arc edge cuts around the mounting holes accurately. This was not too critical but it was a little annoying. The error in positioning the arcs was minor and is difficult to see but it would be good to fix the problem.

This was something I finally worked out in the last design I sent to manufacture and thought it would be something others might want to know about.

Board Layout

Most of my designs usually result in a square or rectangular board. The boards are simple and don’t really need to fis an irregularly shaped case. So most of the time I am trying to place a hole at the corner of say a square and then place an edge cut around the hole, something like this:

PCB with two mounting holes

PCB with two mounting holes

Placing the mounting holes is a simple case of editing the x and y positions of the mounting hole and ensuring that the holes are lined up correctly. The edge cuts are a little more difficult to position consistently when placing them by hand.

Accurate Edge Cuts

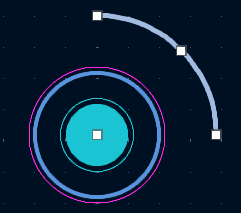
As noted above, the first stage is to place the mounting holes on a rectangular grid and using the x and y positions to place the holes. Next step is to create an arc centred on one of the mounting holes with the appropriate radius. This can be done in using the centre of the mounting holes as the starting point and then sweeping an arc through 90 degrees around the hole:

Arc and Hole

Arc and Hole

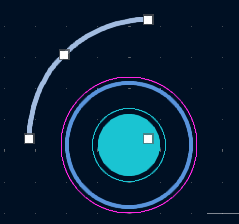
Next up we duplicate the arc, rotate it through 90 degrees and move to one of the opposite mounting holes:

Duplicated arcs

Duplicated arcs

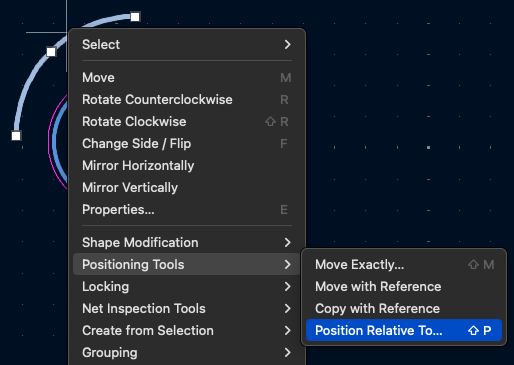
As you can see, the duplicated arc is not centred on the opposite mounting hole. We now use the positioning tools to align the arc with the mounting hole. Start by selecting the arc and then right click to bring up the context menu and select Position Relative To… from the context menu:

Positioning context menu

Positioning context menu

From the positioning dialog click on the Select Item button:

Select item button

Select item button

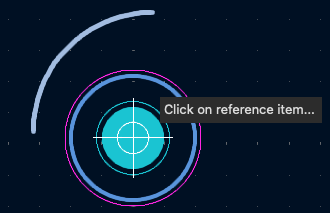
Next, select the reference item, in this case it is the mounting hole:

Select the reference item

Select the reference item

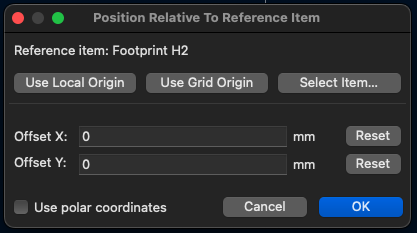
The positioning dialog will now reappear with the reference item selected. Ensure that the Offset X and Offset Y are both set to 0 and click OK.

Position dialog box

Position dialog box

The arc should now move and be centred on the mounting hole.

Final arc position

Final arc position

Finally, repeat for the remaining 2 mounting holes.

Conclusion

This method allows for the board outline to be defined more accurately then lining up the arcs by eye. It is simple to do and only takes a few minutes to complete. The arcs can then be used as the anchors for the linear edges of the board.

This technique is also useful for positioning other parts on any design.

Photo to Pencil Drawing With Affinity Photo

Sunday, February 11th, 2024

Pencil Drawing Banner

Another aide memoir, how to convert a photo into a pencil sketch using Affinity Photo. I don’t do this often and so I always forget the steps.

In the following I will refer to the Mac keystrokes which use the CMD key, on the PC use the CTRL key.

Starting Point

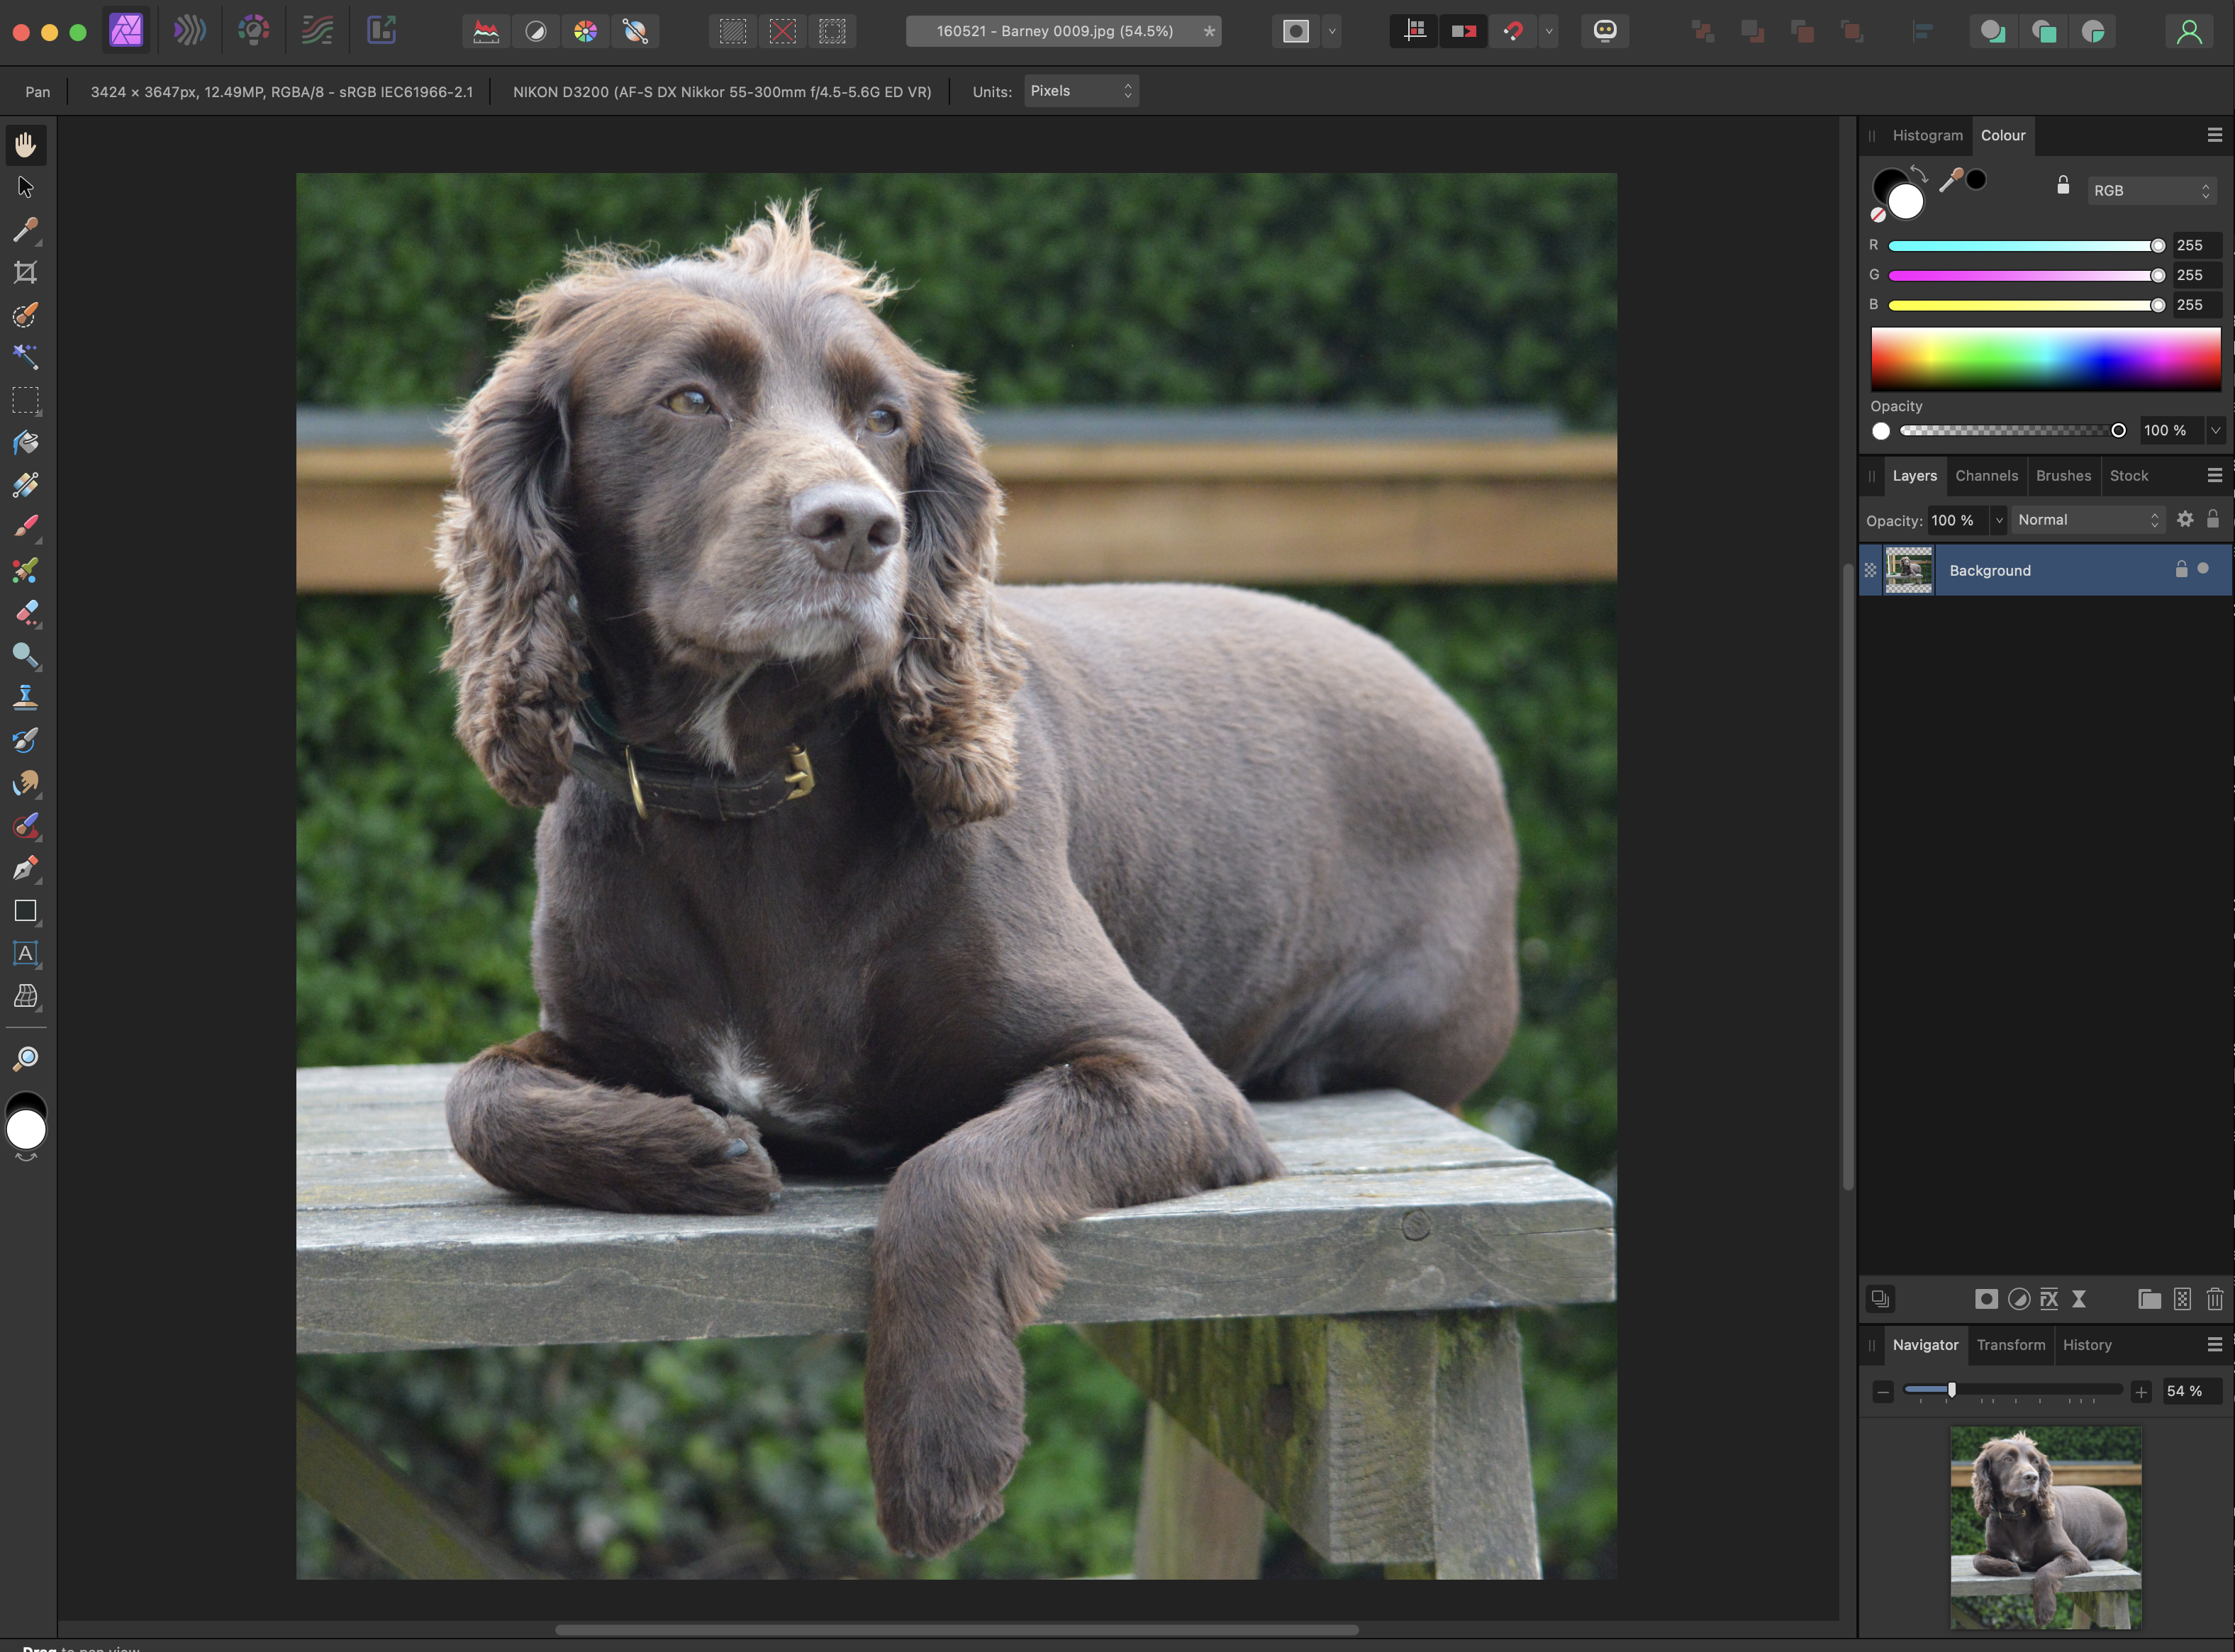
This example will use a photo of a working cocker spaniel:

Original Image

Original Image

The image has a reasonable amount of detail and will be a challenge.

Essential Steps

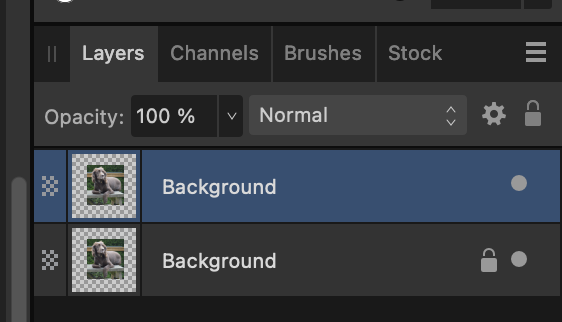
Form me, the first step when working with any photograph it to create a duplicate of the original and make sure that the original is locked.

Shortcut: CMD+J

Duplicate Layer

Duplicate Layer

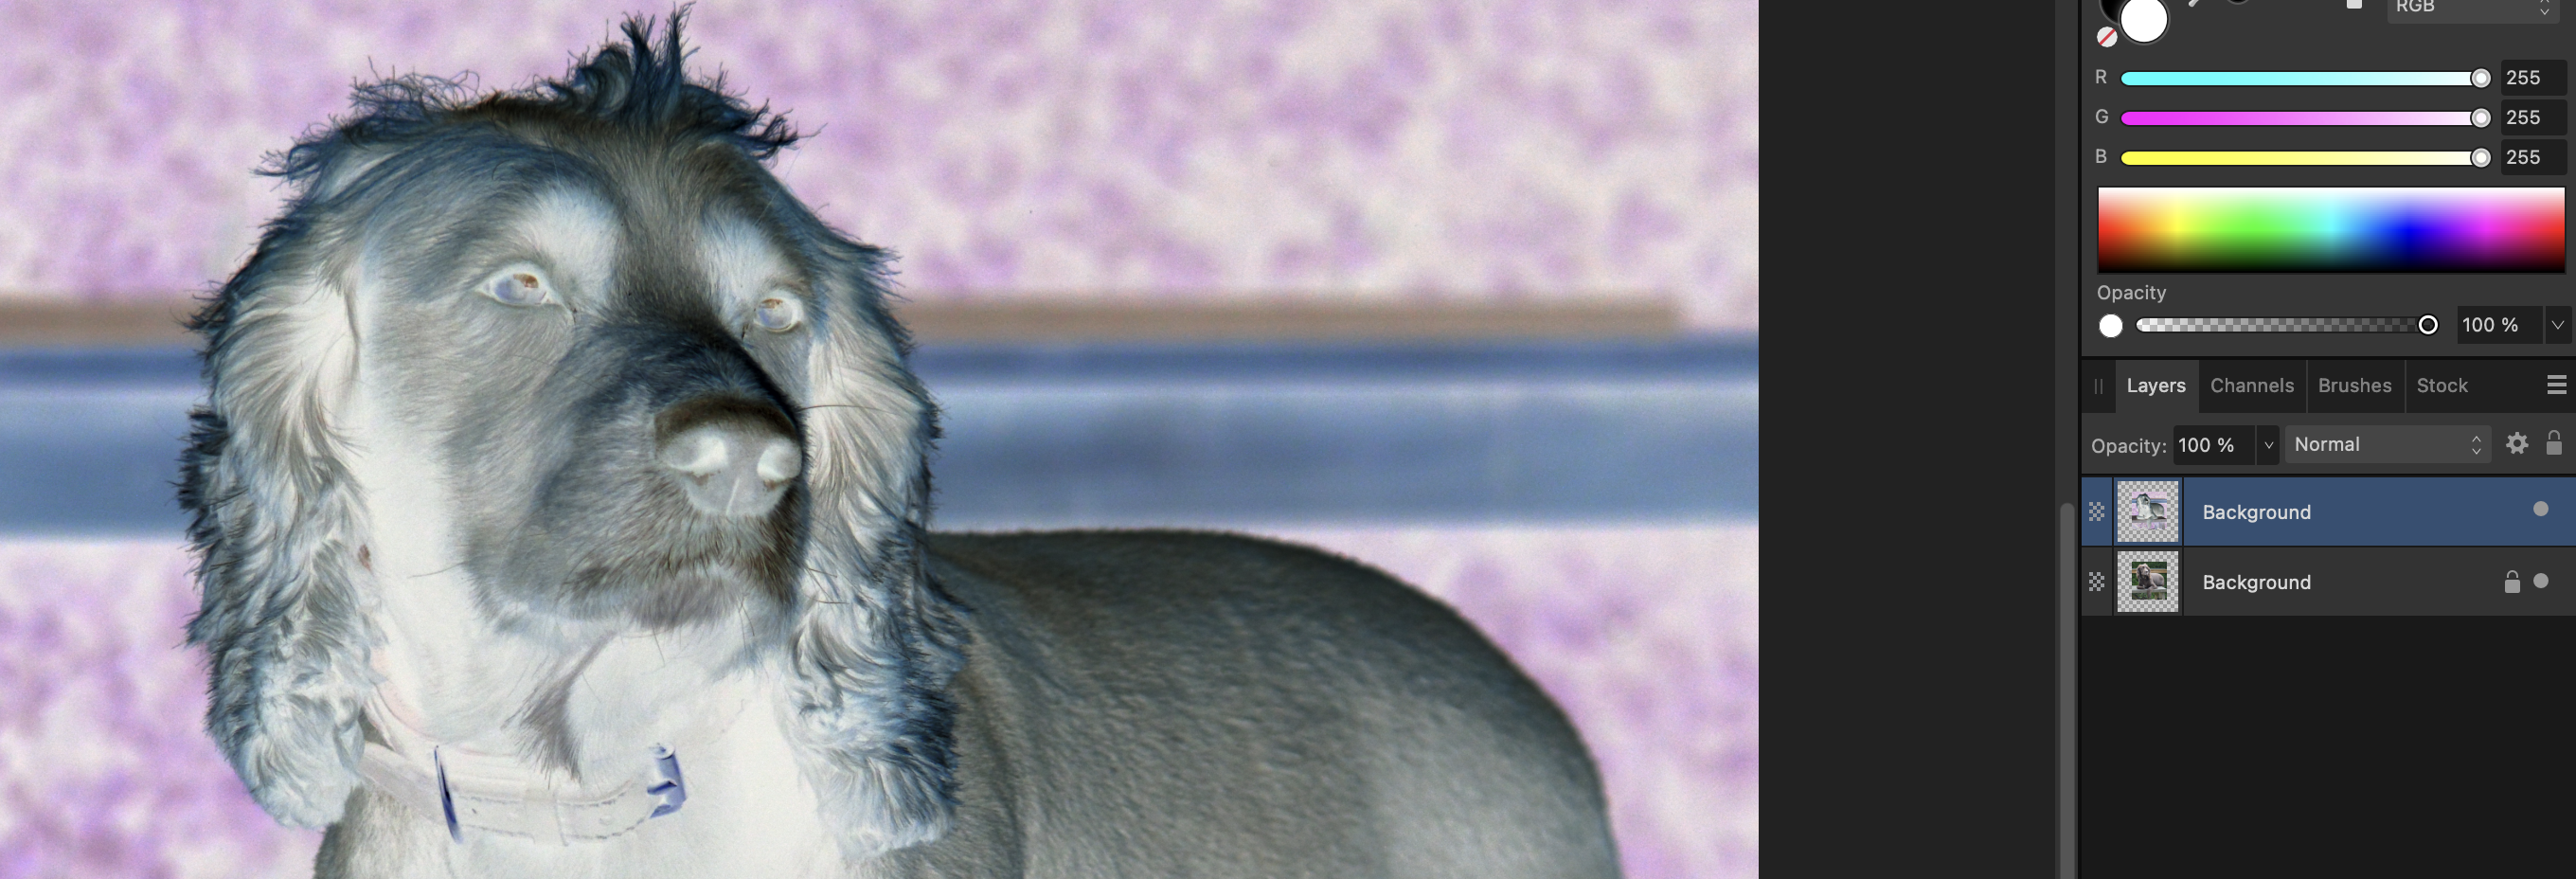
Next step, invert the image on the duplicate layer.

Shortcut: CMD+I

Invert duplicate layer

Invert duplicate layer

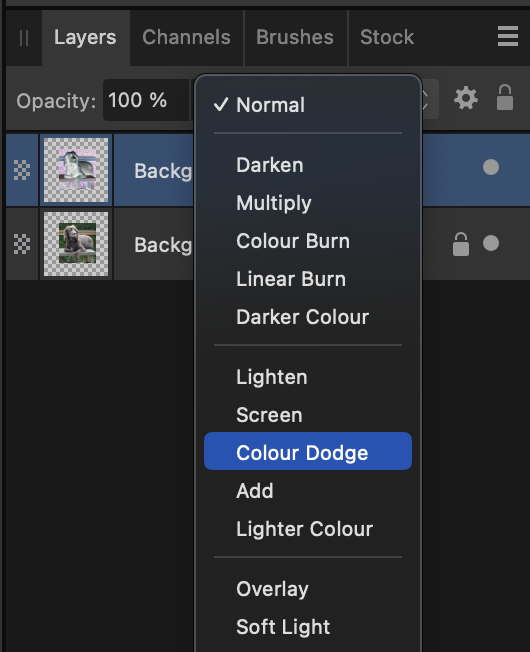
Next up, change the blend mode of the duplicate layer to colour dodge.

Colour Dodge

Colour Dodge

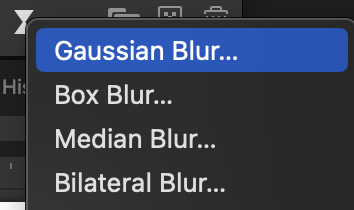
The image should now turn white. Now add a Gaussian blur to the duplicate layer.

Gaussian Blur

Gaussian Blur

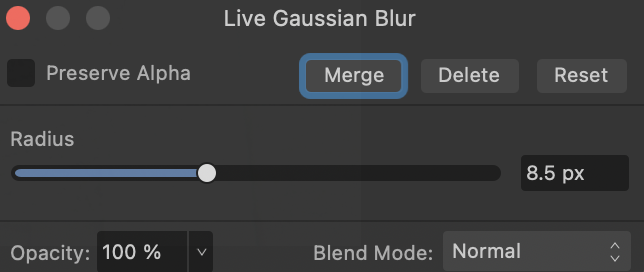
Use the slider to change the radius until you are happy with the effect.

Change Blur Radius

Change Blur Radius

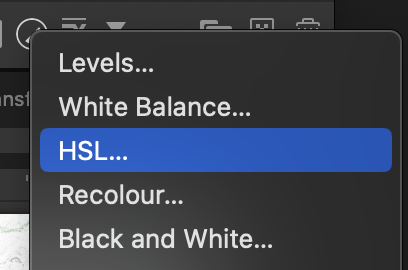
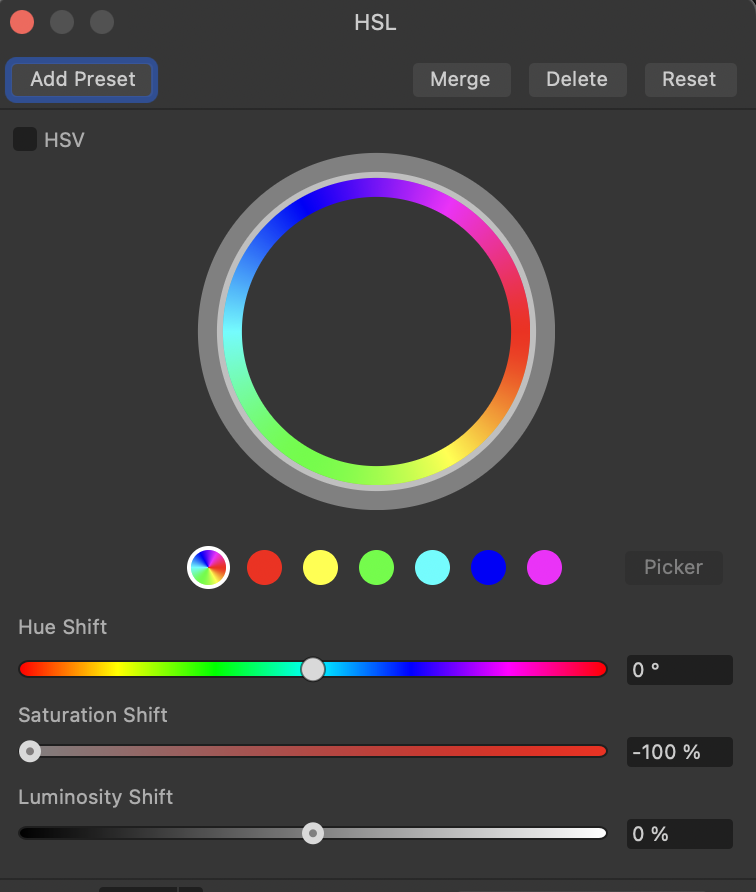
At this point the image still has some colour in it. Adding a HSL adjustment and reducing the saturation to 0% will remove the colour.

Add HSL Adjustment

Add HSL Adjustment

Set saturation to 0%

Set saturation to 0%

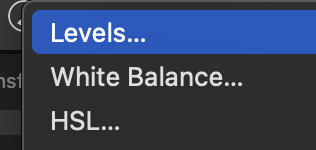
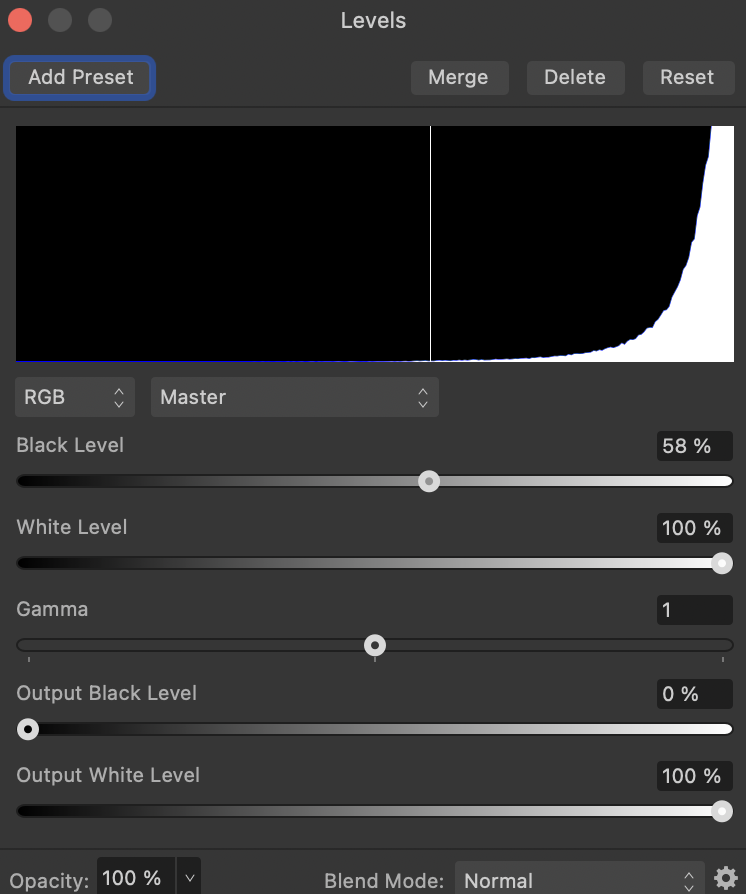
The final step is to add a Levels Adjustment:

Adjust Levels

Adjust Levels

and adjust the black level:

Change the Black Level

Change the Black Level

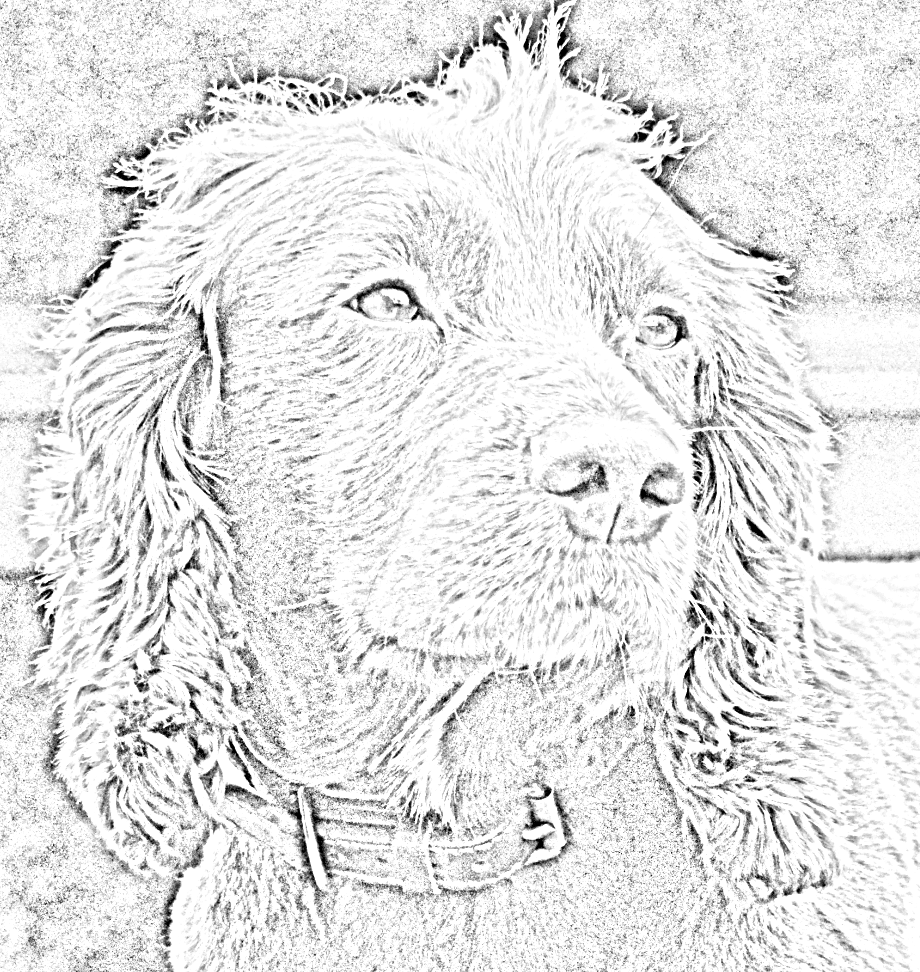
Here is a zoomed in section of the final image:

Image post levels adjustment

Image post levels adjustment

Optional Additional Adjustments

There are some additional adjustments that can be made to give the image the appearance of an actual pencil drawing:

  • Add a paper like canvas to the image
  • Use a mask layer to paint out some of the background around the edges giving a blurred edge
  • If the edge of the image is predominantly white then maybe use the inpainting tool to remove any slightly grey areas in the background

Conclusion

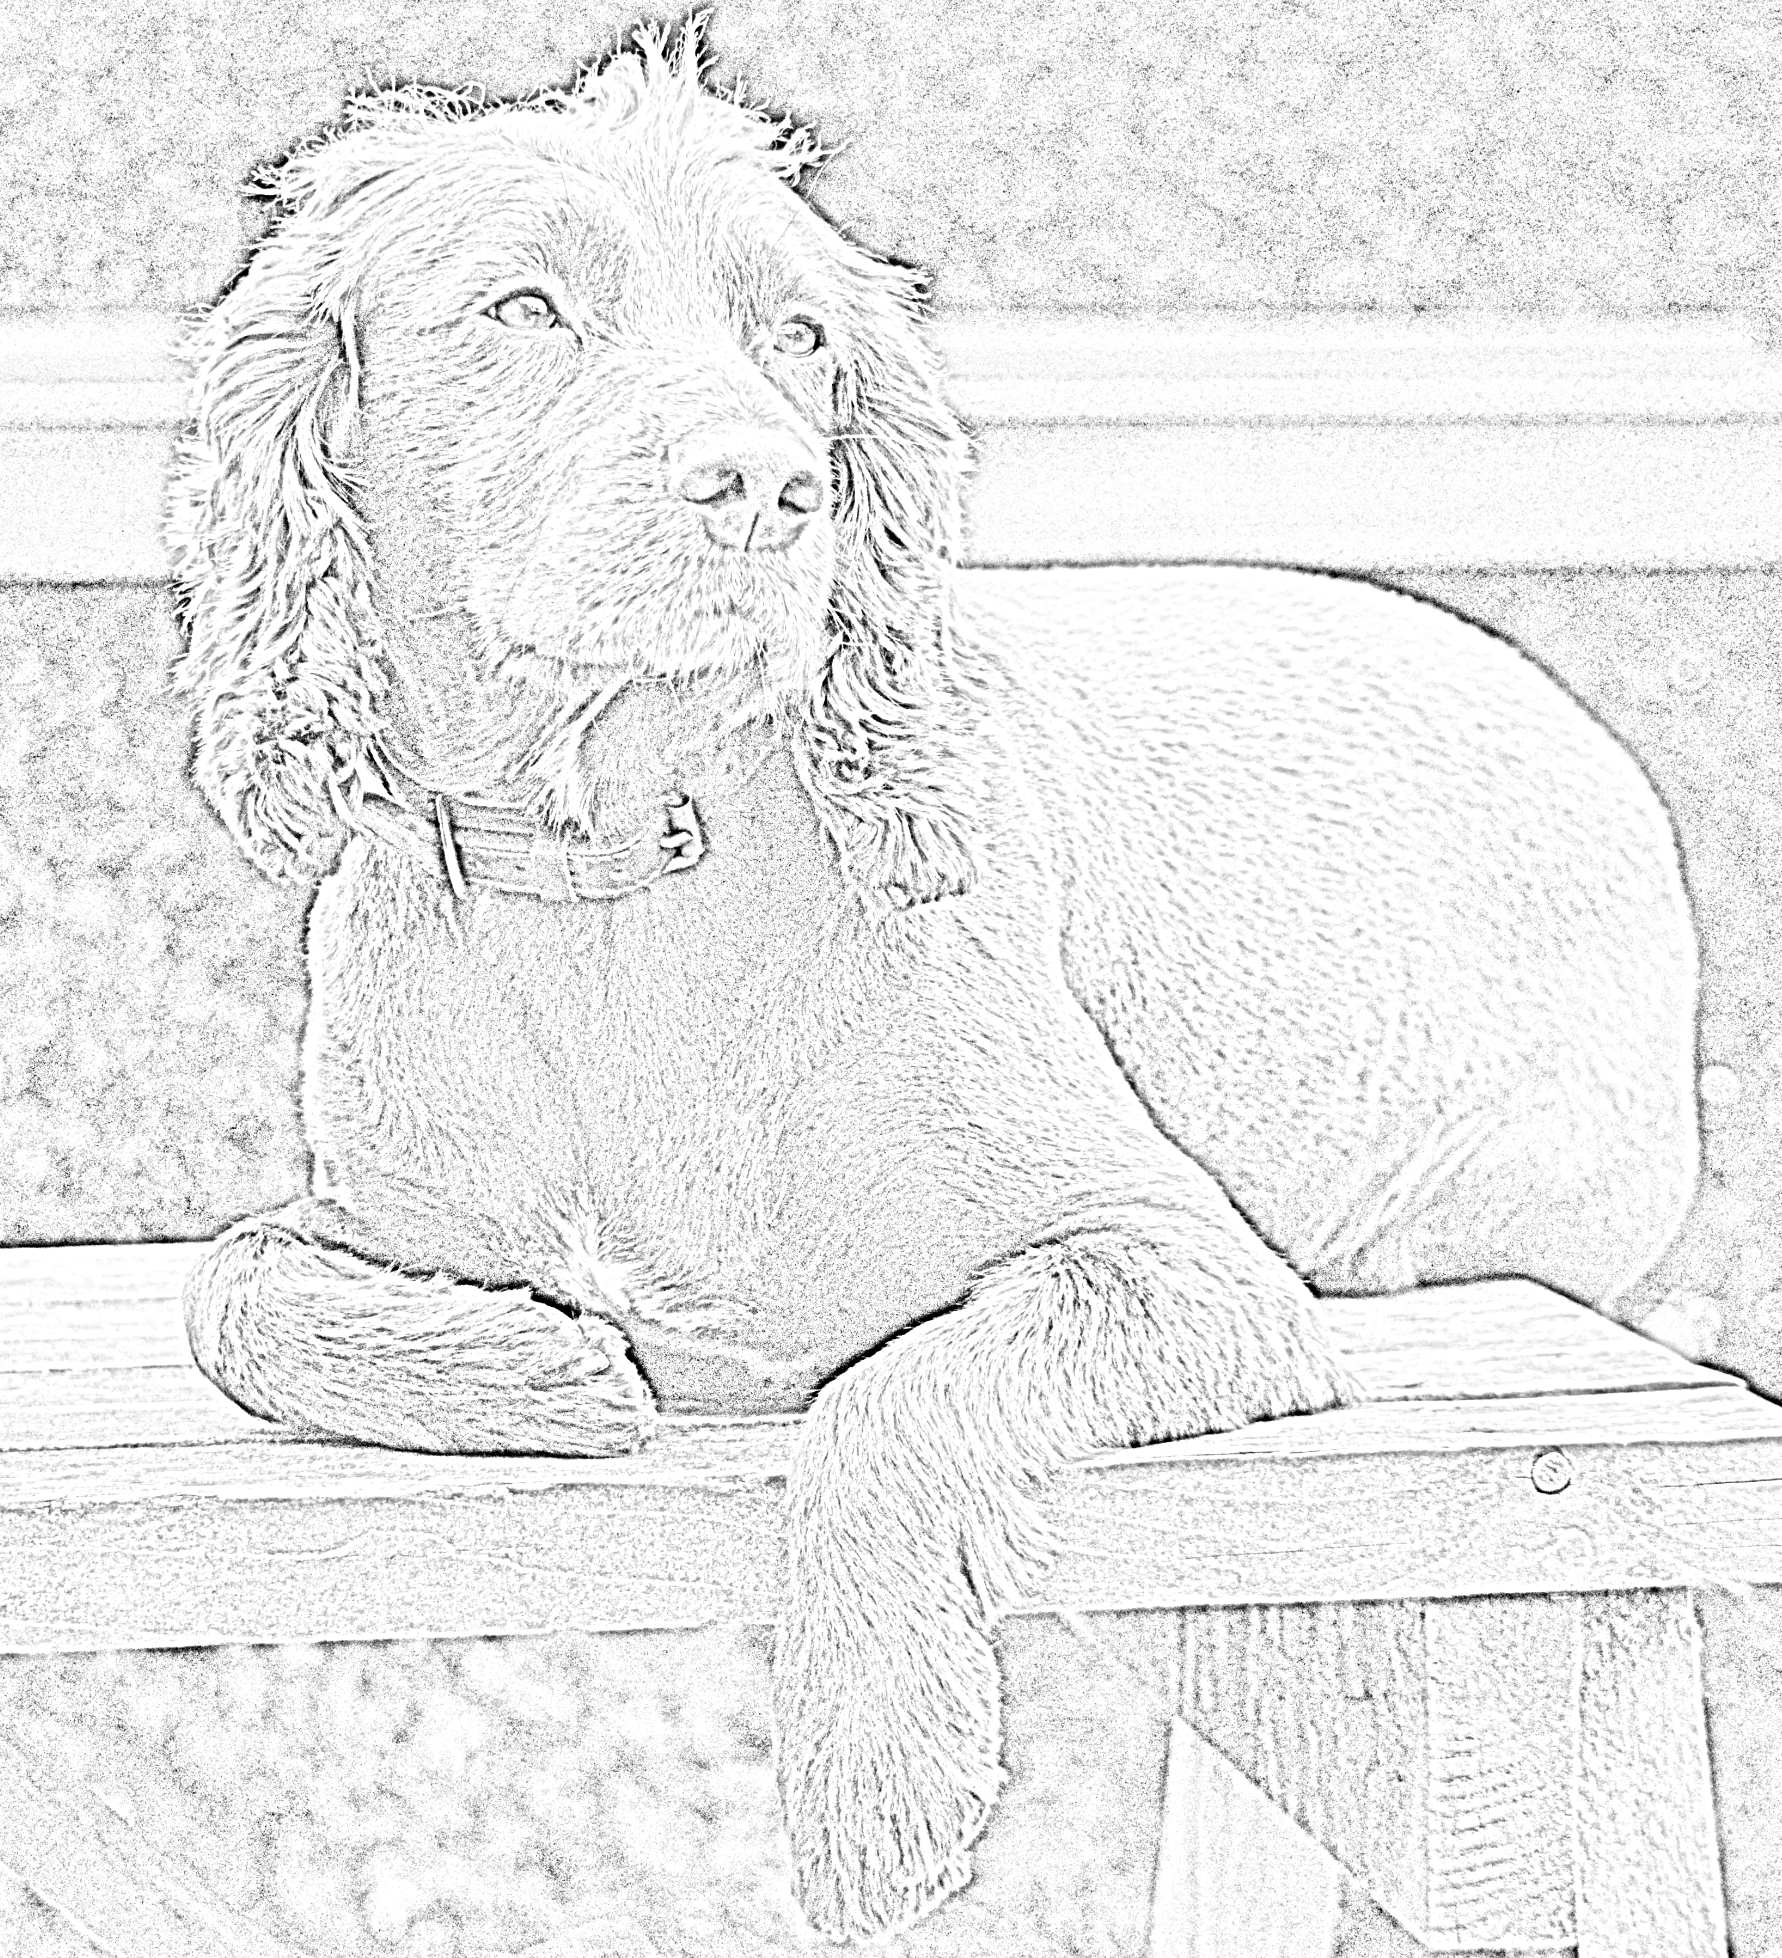
Here is the full image with just the essential adjustments:

Final Image

Final Image

Dell 1320c on Mac OS

Wednesday, November 15th, 2023

Add Dell 1320c Header

Upgrading machines is always an interesting experience, reinstalling software and drivers. The latest update from an Intel Mac to Apple silicon was no exception. The majority of the process went to plan with the only major issue being the installation of the Dell 1320c printer driver.

Some History

The Dell 1320c printer is a fairly old colour laser printer and this device is about 12 years old but it has seen very light service. Replacing a such a lightly used machine is not only environmentally unfriendly but also an unnecessary expense.

Driver support for this printer has always been patchy on newer machines which is understandable. The trick with this printer is not to install it as a Dell 1320c printer but instead use the Xerox C525 driver.

This year has seen several failed attempts to install the driver on Apple silicon machine with the latest attempt working, hence this post in case it helps others (and also my future self).

Installing the Driver

The driver can be installed by following these steps:

1 – Open the Printer and Scanner Settings

Open the Printer and Scanner settings and click the Add Printer, Scanner or Fax.. button.

Add New Printer

Add New Printer

2 – Add Printer Properties

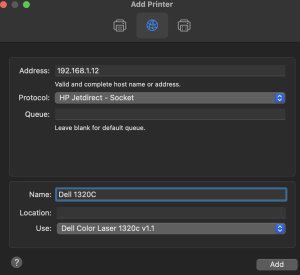
The printer being installed in a network printer and completing the IP address allows the computer to find the printer and complete some of the printer properties.

Add Printer Dialog

Add Printer Dialog

Two setting need to be changed. The first is the Protocol, this should be set to HP Jetdirect – socket.

The second setting that needs to be changed is the driver. Click the Use drop down and select Select Software…. This will present you with the Printer Software dialog.

3 – Install the Xerox Driver

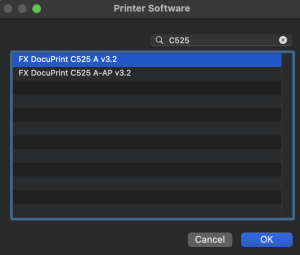
In the Printer Software dialog, search for C525 and select the Xerox C525 A v3.2 driver.

Printer Software Dialog

Printer Software Dialog

Click the OK button to add the printer.

The only thing is to test the installation by printing a test page.

Conclusion

Getting the Dell 1320c driver installed is not difficult, it is simply a case of knowing the tricks to get it working. This is something that is only performed every few years and hopefully this will help the next time this driver need to be installed on a new machine.