RSS

Archive for the ‘Aide-memoir’ Category

Installing an Email Server

Saturday, May 31st, 2025

Mailhog Banner

The last post looked at Installing Mosquitto MQTT Server in a test environment, namely a Raspberry Pi. This post looks at a new server into the environment, an email server, again into the same Raspberry Pi environment.

Lightweight Mail Server

The requirement is to provide a portable SMTP email server to accept email from a test application. It is also desirable to provide a mechanism for checking if the email has been sent correctly. A quick search resulted in a docker container for Mailhog, a simple SMTP server that also exposes a web interface to show the messages that have been received. Let’s give it a go.

Building the image is simple, run the command:

docker run --platform linux/amd64 -d -p 1025:1025 -p 8025:8025 --rm --name MailhogEmailServer mailhog/mailhog

This should pull the necessary components and build the local image and run the server.

So far everything looks good. Starting a web browser on the local machine and navigating to localhost:8025 shows a simple web mail page.

Next step, move to a Raspberry Pi and try to start the server and check the service using the same docker command as used above:

docker run --platform linux/amd64 -d -p 1025:1025 -p 8025:8025 --rm --name MailhogEmailServer mailhog/mailhog

This command above results in the following output:

WARNING: The requested image's platform (linux/amd64) does not match the detected host platform (linux/arm64/v8) and no specific platform was requested
d28ed1f93bdcf656f27843014f37b65ab12b5ad510f8d50faec96a57fc090056

This makes sense, the image will be referring to an amd64 image and docker is running on a Raspberry Pi, so arm64. This appears odd as original test was performed on an Apple Silicon Mac which is also arm64. At first glance it does look like the image may be running as we have a UUID for the container. Checking the status of the containers with:

docker ps -a

Shows the following information about the container:

CONTAINER ID   IMAGE             COMMAND     CREATED         STATUS                       PORTS     NAMES
d28ed1f93bdc   mailhog/mailhog   "MailHog"   5 seconds ago   Exited (255) 4 seconds ago             mailhog

Looks like we have a problem as the container is not running correctly.

Solution

The solution is to build a new Dockerfile and create a new image. The new docker file is based upon the Dockerfile in docker hub:

FROM --platform=${BUILDPLATFORM} golang:1.18-alpine AS builder

RUN set -x \
  && apk add --update git musl-dev gcc \
  && GOPATH=/tmp/gocode go install github.com/mailhog/MailHog@latest

FROM --platform=${BUILDPLATFORM} alpine:latest
WORKDIR /bin
COPY --from=builder tmp/gocode/bin/MailHog /bin/MailHog
EXPOSE 1025 8025
ENTRYPOINT ["MailHog"]

The container is built using the docker command above:

docker run --platform linux/amd64 -d -p 1025:1025 -p 8025:8025 --rm --name MailhogEmailServer mailhog-local

No errors, time to check the container status:

docker ps -a

shows:

CONTAINER ID   IMAGE           COMMAND     CREATED         STATUS         PORTS                                            NAMES
dc9e943b7097   mailhog-local   "MailHog"   4 seconds ago   Up 3 seconds   0.0.0.0:1025->1025/tcp, 0.0.0.0:8025->8025/tcp   MailhogEmailServer

Time for some testing.

Testing

Two features of the server need to be checked out:

  • Ability to receive email from a client
  • Verify that the email has been received by the server

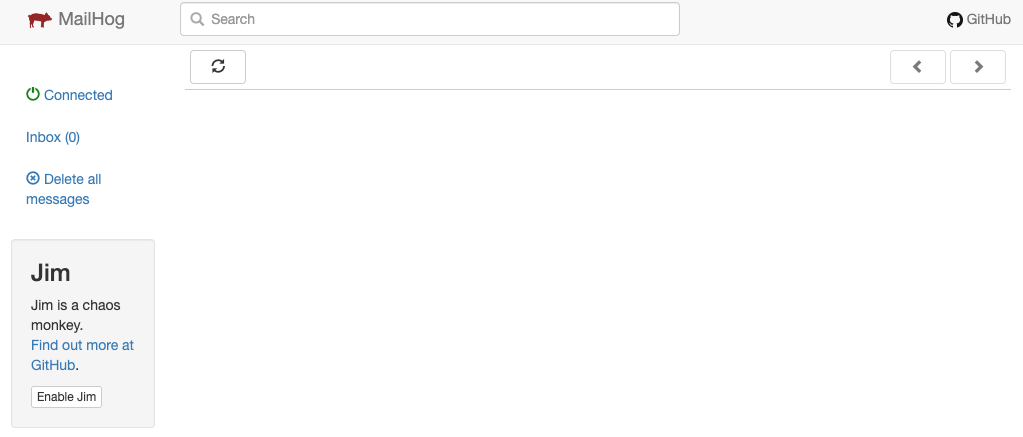
The status of the email server can be tested using the web interface by browsing to testserver500.local:8025 (replace testserver500.local with the address/name of your Raspberry Pi), this time we see the simple web interface:

Mailhog Wemail interface showing empty mailbox

Sending email can be tested using telnet, issuing the command:

telnet raspberrypi.local 1025

should result in something like the following response:

Trying fe80::........
Connected to raspberrypi.local.
Escape character is '^]'.
220 mailhog.example ESMTP MailHog

A basic email message can be put together using the following command/response sequence:

Trying 172.17.0.1...
Connected to testserver500.local.
Escape character is '^]'.
220 mailhog.example ESMTP MailHog
HELO testserver500.local
250 Hello testserver500.local
mail from:<tester@testserver500.local> 
250 Sender tester@testserver500.local ok
rcpt to:<user@testserver500.local>
250 Recipient user@testserver500.local ok
data
354 End data with <CR><LF>.<CR><LF>
From: "Tester" <tester@testserver500.local>
To: "User" <user@testserver500.local>
Date: Thu, 1 May 2025 09:45:01 +0100
Subject: Testing the local mail server

Hello,

This is a quick message to test the local SMTP server (Mailhog) running on a Raspberry Pi.

Regards,
Tester
.
250 Ok: queued as mlsU6a9iplWWgg1RILcbGWP6NphswR26_64Pdf98WBo=@mailhog.example
quit
221 Bye
Connection closed by foreign host.

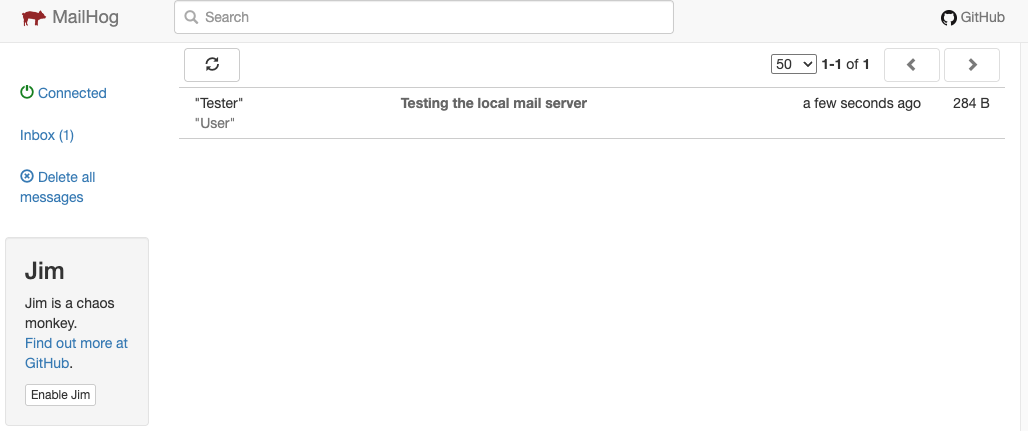
Over to the web interface to see if the email has been received correctly:

Mailhog Wemail interface showing one email in mailbox

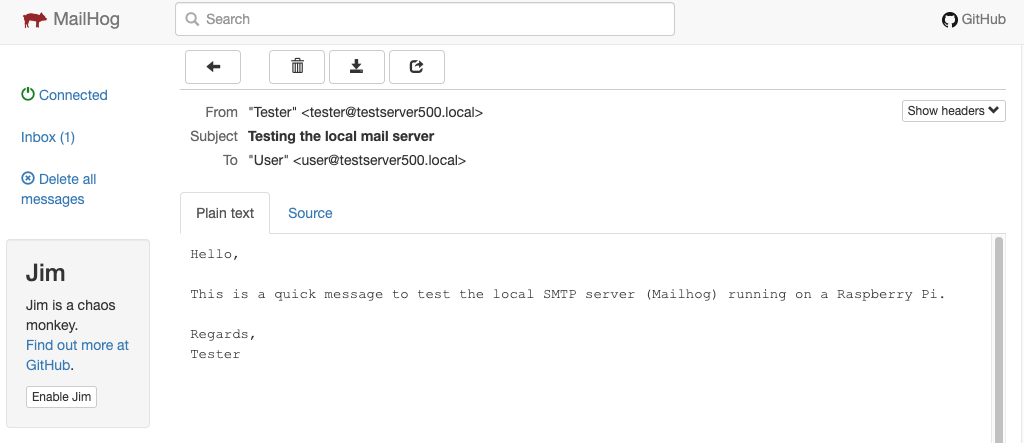
And clicking on the message we see the message contents…

Mailhog webmail showing message

The last step is to verify that the container can be stopped and restarted to allow for the system to be automated. The following commands remove the container and allow the container name, MailhogEmailServer to be reused:

docker container stop MailhogEmailServer
docker remove MailhogEmailServer

Following this, the docker run command was executed once more and the container restarted as expected.

Conclusion

There is probably a better way to solve this problem using native docker command line arguments but lack of docker knowledge hindered any investigation. However, the solution presented works and allows for testing to continue.

Final step is to automate the deployment of this solution using ansible.

Docker File Sharing

Tuesday, June 11th, 2024

Docker File Sharing Banner

I use Docker fairly often for a number of projects. I find it useful for getting access to tools that are not available on my host system (Mac running on Apple silicon) and also for duplicating the environments I use for CI on GitHub. I also use it to access some legacy tools that I can no longer install locally on my system but where the vendor has provided a Docker image containing those tools.

Docker Image

The docker containers I use most often are the espressif/idf containers, specifically the espressif/idf:release-v4.2 container. This is used to access the development tools for the ESP-IDF release 4.2 tools and libraries to support maintenance of legacy code whilst it is being ported to a newer version of the SDK.

Access to the tools is through the docker command:

docker run --platform linux/amd64 --rm -it -v $PWD:/project -w /project espressif/idf:release-v4.2

Running this command starts the container and sets the PATH etc allowing interactive access to the tools.

Detecting the Python interpreter
Checking "python" ...
Python 3.6.9
"python" has been detected
Adding ESP-IDF tools to PATH...
Using Python interpreter in /opt/esp/python_env/idf4.2_py3.6_env/bin/python
Checking if Python packages are up to date...
Python requirements from /opt/esp/idf/requirements.txt are satisfied.
Added the following directories to PATH:
  /opt/esp/idf/components/esptool_py/esptool
  /opt/esp/idf/components/espcoredump
  /opt/esp/idf/components/partition_table
  /opt/esp/idf/components/app_update
  /opt/esp/tools/xtensa-esp32-elf/esp-2020r3-8.4.0/xtensa-esp32-elf/bin
  /opt/esp/tools/xtensa-esp32s2-elf/esp-2020r3-8.4.0/xtensa-esp32s2-elf/bin
  /opt/esp/tools/esp32ulp-elf/2.28.51-esp-20191205/esp32ulp-elf-binutils/bin
  /opt/esp/tools/esp32s2ulp-elf/2.28.51-esp-20191205/esp32s2ulp-elf-binutils/bin
  /opt/esp/tools/cmake/3.16.4/bin
  /opt/esp/tools/openocd-esp32/v0.11.0-esp32-20220706/openocd-esp32/bin
  /opt/esp/python_env/idf4.2_py3.6_env/bin
  /opt/esp/idf/tools
Done! You can now compile ESP-IDF projects.
Go to the project directory and run:

  idf.py build

root@a76f973ca31c:/project#

It is now possible to use all of the usual Espressif tools from the command prompt with the usual caveats for USB port access on Mac systems. Still, development remains possible even if deployment requires some additional steps.

Workflow

For a while now the working workflow has been as follows:

  • Edit the code, build scripts in VS Code on Mac
  • Build the code in the docker container running in a terminal session
  • Deploy the code from a second terminal session where the latest libraries are installed and configured

This worked flawlessly for several months.

Until the last few days.

The Problem

A recent requirement change necessitated the modification of the source code for the application built using the workflow described above. All seemed to start well, the code was edited, the docker container started and the code hit the first compilation of the day for a syntax check.

This was closely followed by come code changes and a second compilation. All seemed well and the code was committed to source control and rebuilt. At this point I noticed something odd, the automatically generated build number did not increase. The system used for this repository changes the build number based upon the number of commits. The first two compilations would not have increased the build number as there was no commit. The build after the commit would normally generate an increment in the build number and it clearly was not doing so.

Let’s introduce a syntax error, deleting a semicolon should do it, and try rebuilding. The code compiled with no errors. How strange.

Investigating further using more to check the contents of the files on the host machine against the docker container revealed that the changes on the host system were not being reflected in the docker image.

Docker File System Access

Something odd is happening to the file system. Changes on the host are clearly not being reflected in the mounted volume in the docker container. Time to try a few things with the syntax error still in place:

  • Exit the docker container and restart it and build the code – no change, the code still compiles
  • Exit the docker container and run it none interactively – still no change
  • Change the mount method from a volume to a mount option – the code still compiles
  • Delete the docker image and restart (this will rebuild from scratch) – compilation gives a syntax error

So finally, the code change is reflected in the docker volume. Now we need to remove the syntax error by reverting the file change and we can recompile and move on. Doing this resulted in a compilation failure, the change had once again not been applied to the mounted volume.

At this point a colleague checked on their system that they could change files and see the changes reflected in the mounted volume and yes they could. Time for a comparison of the system settings and the obvious one to pick up is the File System settings. A quick check showed a difference between the two systems. Changing my system to match theirs and restarting everything resolved the issue.

The difference was in the File sharing implementation for your containers.

File Sharing Selection

File Sharing Selection

My local system had this configured for gRPC FUSE. Changing to the above setting, VirtioFS, and restarting Docker Desktop and the docker container seems to have fixed the issue.

Conclusion

I still do not know why the change to the way the file system was accessed changed or why the system stopped reflecting changes to the files in the mounted volume. I don’t think I will ever find out but maybe the note will help others (maybe even myself in the future).