RSS

Archive for November, 2025

Getting Started with Rust – Raspberry Pi VS Code Extension

Friday, November 7th, 2025

Run and Debug

The Raspberry Pi Foundation have recently announced an update to the Visual Studio Code (VS Code) extension. The update now supports developing embedded firmware for Pico using Rust or Zephyr. The announcement is timely given my current aim of learning Rust with the aim of developing on embedded platforms.

Time to give the extension a spin.

TL;DR It just works.

Updates and Pre-requisites

The post starts by giving an overview of what the extension can do as well as:

  • Overview of Rust
  • Overview of Zephyr
  • Getting (or updating) the extension
  • Installing any pre-requisites

The development platform used when researching this post is MacOS and a previous version of the VS Code extension had already been installed on the platform. Upgrading the extension was as easy as simply using the VS Code Check for Updates… menu item.

Creating a Rust Project

First step in creating an application is to activate the Raspberry Pi extension by clicking on the Pico Extension icon on the Primary Side bar:

Pico Extension Icon

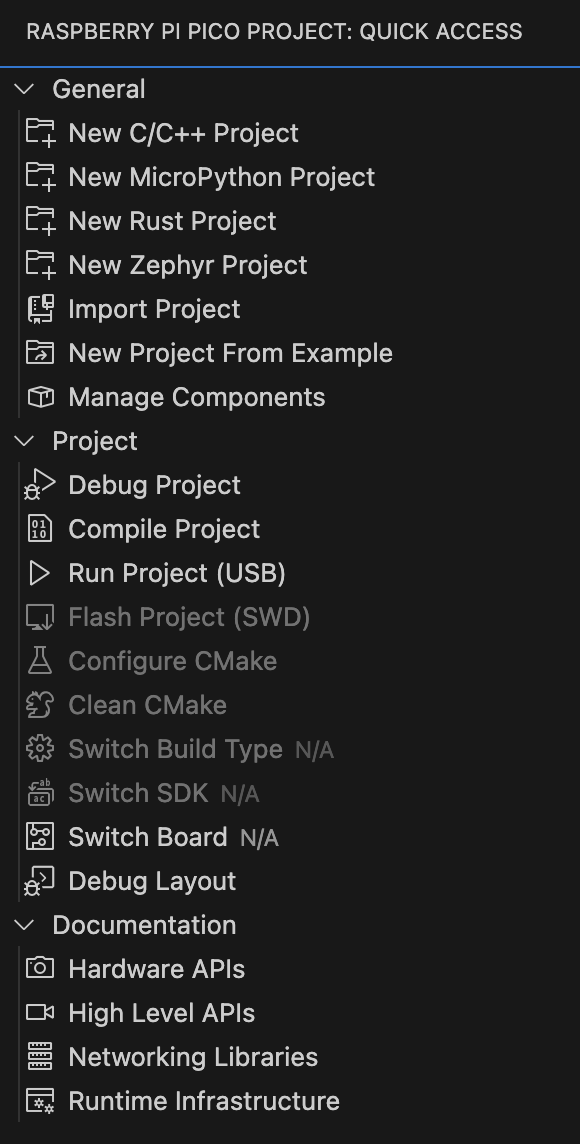
Next select the New Rust Project:

Pico Extension Options

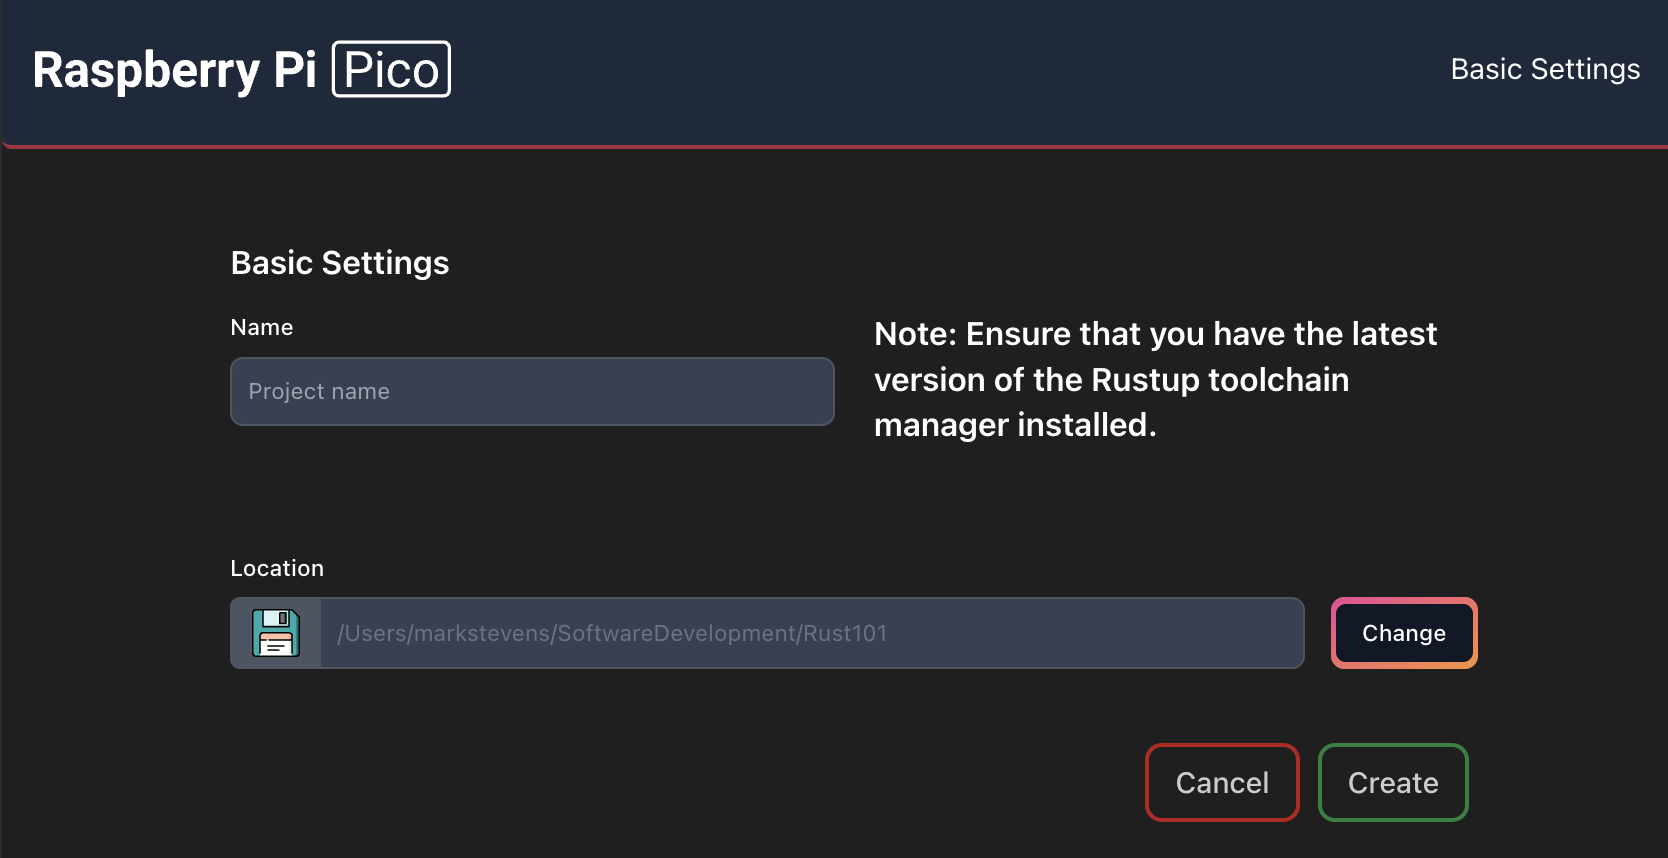
This will show the New Rust Project options:

Create New Rust Project

Here we just need to supply a name for the project and the location for the project files. One point to note is that the project name appears to be restricted:

  • Lower case letters only
  • Start with a letter
  • Numbers
  • – or _

It was necessary to check and deploy the SDK when this was run for the first time and this took a minute or so.

VS Code installing Pico Rust Components

Subsequent runs took about 5 seconds to create and configure a new project.

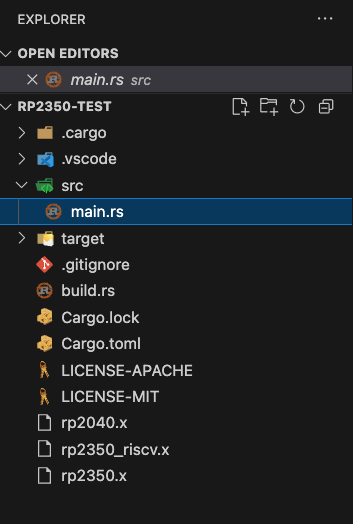
Finally, VS Code will open the Directory view which shows all of the project files:

Rust File List

Running the Application

By default the project appears to be configured as a 2350 project. The original post from Raspberry Pi states:

supports both RP2040– and RP2350-based devices — including the RISC-V target — which you can later select in the toolbar, next to the Run button.

I must admit, this took a little while to locate. The Run button appears at the far right on the bottom toolbar:

Run Button in Toolbar

Clicking on the chip name allows the target chip to be selected in the command palette:

Switch target chip

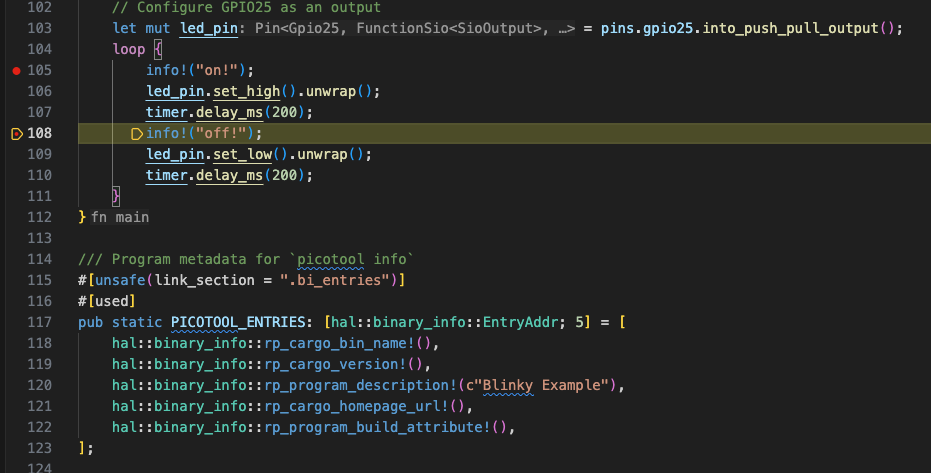
Final steps, setting some breakpoints in the application and debugging the application. This is achieved using the Debug and Run facility in Debug view (alternatively press F5):

Run and Debug

A few seconds later deployment had completed and the first breakpoint was hit:

Debugging on the Pico 2

Additional Components

The post recommends installing three optional components/extensions:

  • Probe-rs
  • Cortex Debug
  • Rust analyzer

These had already been deployed to the development machine and are simple to install.

Conclusion

There were a couple of points of confusion, one when the extensions downloaded a few components (this made the creation of the first application take a while). The second was changing the target chip type, it took a minute or so to find the Run button.

Having installed several embedded toolchains over the years I think this was the simplest and probably the best experience and is on a par with commercial toolchains such as Keil.
Getting Started with Rust – Enums

Tuesday, November 4th, 2025

Enums in Rust Banner

Enums in Rust have some properties over and above those found in C/C++

  • Data can be associated with them
  • Methods can be implemented for an enum

The final item in the list was only briefly covered in chapter 6 of The Rust Programming Language book so we will expand on this here.

Simple Enums

As with C/C++, simple enums are symbolic representations of a concept or value. You don’t necessarily need to know what the value is, you can simply use the symbolic name.

enum Message {
    MoveByOffset,
    MoveTo
}

The above code could represent an operation in a game to move a sprite/character etc. This is very much like C/C++, it becomes more interesting when we associate data to an enum.

Enums Can be Associated with Data

Enums can also have data associated with them. So the above enum could be embellished to have the offset and coordinate data associated with the move operations:

enum Message {
    MoveByOffset { x: i32, y: i32 },
    MoveTo { x: i32, y: i32 }
}

Another feature of enums is that not all of the symbolic names (variants) need to have the same data type associated with them. The Message enum could be expanded to encompass more operations:

enum Message {
    Quit,
    Move { x: i32, y: i32 },
    Write(String),
    ChangeColor(i32, i32, i32),
}

Here we have messages with different data associated with them and even one without any data. We can even have methods implemented for an enum:

impl Message {
    fn call(&self) {
        // method body would be defined here
    }
}

let m = Message::Write(String::from("hello"));
m.call();

Here, we have a call method that can be executed for a Message enum.

Differentiating Between Enums

So far everything looks pretty much like the code in chapter 6 of the Rust book.

The thing that is not covered at this point is how to access the data in the different messages and just as importantly, determine the exact variant of the enum that has been instantiated. For this we need the match statement along with the self parameter in the call method. This is best illustrated by an example:

enum Message {
    Quit,
    Move { x: i32, y: i32 },
    Write(String),
    ChangeColor(i32, i32, i32),
}

impl Message {
    fn call(&self) {
        match self {
            Message::Quit => println!("Quit message received"),
            Message::Move { x, y } => println!("Move to coordinates: ({}, {})", x, y),
            Message::Write(text) => println!("Write message: {}", text),
            Message::ChangeColor(r, g, b) => { println!("Change color to RGB({}, {}, {})", r, g, b) }
        }
    }
}

fn main() {
    let m1 = Message::Write(String::from("Hello"));
    m1.call();

    let m2 = Message::Move { x: 10, y: 20 };
    m2.call();

    let m3 = Message::ChangeColor(255, 0, 0);
    m3.call();

    let m4 = Message::Quit;
    m4.call();
}

Running this application results in the following output:

Write message: Hello
Move to coordinates: (10, 20)
Change color to RGB(255, 0, 0)
Quit message received

Here, self is used to determine which variant of the Message is calling the method call and match ensures that the appropriate action is taken.

Conclusion

The above application is a trivial illustration of using match to work with enums with different variants but it was not covered very well in the text. A little investigation was required.

Next Up

Project Structure.

C/C++ Constness

Saturday, November 1st, 2025

Constness Post Banner

An aide-memoire post about using the const keyword in function declarations in C/C++. This keyword can have two meanings for pointers depending upon where it is placed:

  • The pointer is constant and cannot be changed
  • The data pointed to by the pointer is constant and cannot be changed

The following application will be used to illustrate the various cases:

#include <stdio.h>
#include <stdlib.h>
#include <string.h>

void func(char *string)
{
    printf("%s\n", string);
    printf("%s\n", ++string);
    *string = 's';
    printf("%s\n", string);
}

int main(int argc, char**argv)
{
    char *str = strdup("Hello, World!");
    func(str);
    
    free(str);
    return(0);
}

The focus on the definition for func to illustrates the differences. The code fragments that follow will focus on just the definition of func as the rest of the code remains unchanged.

Simple Cases – No const, All const

There are two simple cases:

  • No const – both pointers and data can be changed
  • Both parameters are const – both data and pointer cannot be changed

In the first case, no const, we have the following code:

void func(char *string)
{
    printf("%s\n", string);
    printf("%s\n", ++string);
    *string = 's';
    printf("%s\n", string);
}

Compiling and running this application results in the following output:

Hello, World!
ello, World!
sllo, World!

As we can see, the pointer string and the data pointed to by string can both be changed.

Modifying the code to make make both the pointer and the data pointed to by the pointer string constant, the function definition becomes:

void func(const char * const string)
{
    printf("%s\n", string);
    printf("%s\n", ++string);
    *string = 's';
    printf("%s\n", string);
}

Compiling the application generates the following output:

Const.c:8:20: error: cannot assign to variable 'string' with const-qualified type 'const char *const'
    8 |     printf("%s\n", ++string);
      |                    ^ ~~~~~~
Const.c:5:30: note: variable 'string' declared const here
    5 | void func(const char * const string)
      |           ~~~~~~~~~~~~~~~~~~~^~~~~~
Const.c:9:13: error: read-only variable is not assignable
    9 |     *string = 's';
      |     ~~~~~~~ ^
2 errors generated.

This shows that these lines contain logic errors:

printf("%s\n", ++string);
*string = 's';

This is expected as printf(“%s\n”, ++string); attempts to modify the pointer and *string = ‘s’; attempts to modify the data.

Making the Pointer Constant

The definition of func can be modified to make just the pointer constant and allow the data to be modified:

void func(char * const string)

Compiling the application generates the following output from the compiler:

Const.c:8:20: error: cannot assign to variable 'string' with const-qualified type 'char *const'
    8 |     printf("%s\n", ++string);
      |                    ^ ~~~~~~
Const.c:5:24: note: variable 'string' declared const here
    5 | void func(char * const string)
      |           ~~~~~~~~~~~~~^~~~~~
1 error generated.

Making the Data Constant

There are two ways of allowing the pointer to change wile maintaining the integrity of the data:

void func(const char *string)

and

void func(char const *string)

Compiling an application with either of these function definitions generates and error such as:

Const.c:9:13: error: read-only variable is not assignable
    9 |     *string = 's';
      |     ~~~~~~~ ^
1 error generated.

Function definitions such as the above are useful for functions such as strlen where we want to walk through an array of data in a read-only mode.

Conclusion

This post aims to clear up the confusion about what is constant given that const can appear on both the left and right side of a variable in a function definition. The following table summaraises what is constant for the various options for const:

Definition Description
void func(char *string) Both the data and the data pointed to by string can be changed.
void func(const char * const string)
void func(char const * const string)
The pointer string and the data pointed to by void func(char const * const string) are both constant.
void func(char * const string) The pointer is constant and cannot be changed.
void func(const char *string)
void func(char const *string)
The data pointed to by string is constant.

So the general rule is the item to the left of the const key word is the item that cannot be changed. With one exception and that is when a variables type is prefixed by const. In which case the const applies to the type and not any pointer definition.