Reading I2C Sensor Data with the Oak
The weather station project will be bringing together a number of sensors, light, ultraviolet light, air pressure, humidity, wind speed, wind direction and rain fall. This collection of sensors falls into three groups:
- Electronic sensors on an I2C bus
- Mechanical sensors using switches
- Analog sensors
The current plan is for the weather station to use the Oak as the microcontroller running the show. The data from the sensors can then be uploaded to the cloud, destination to be determined, but let’s start with Sparkfun’s data service.
The I2C sensors will require the least amount of work to get up and running so let’s start with those. The two sensors operating on the I2C bus are:
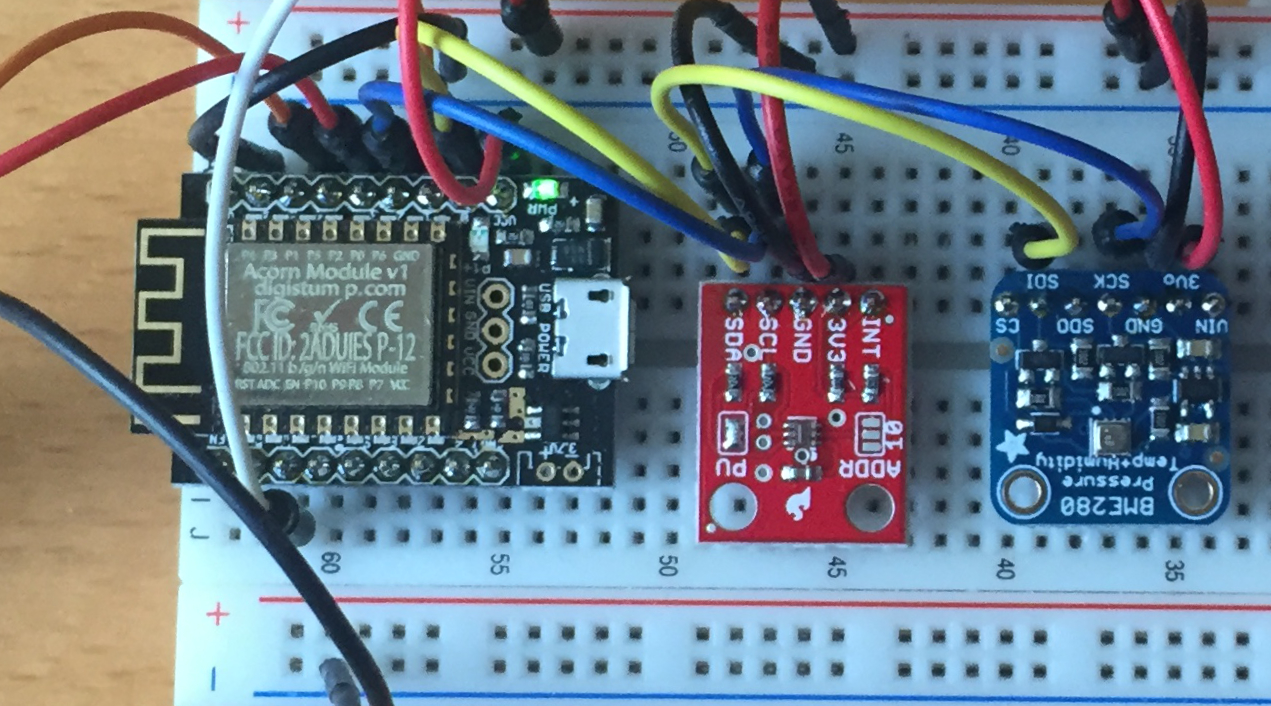
Oak and 2C Sensors on Breadboard
One of the great things about working with these two sensors is the fact that there are prebuilt drivers and example code for both breakout boards available from Github. What could be simpler, well head over to the Sketch – Include Library – Board Manager… menu in the Arduino IDE and you can download the library and have the IDE install it for you.
TSL2561 – Luminosity Sensor
This sensor allows the radiance of the light to be calculated in a way that approximates the response of the human eye. It does this by combining the input from two photodiodes, one infra-red only and one visible light and infra-red light combined. The output from the two sensors can be used to luminous emittance in lux (lumens per square metre).
The following table gives an idea of the lux values for typical scenarios:
| Lux | Typical Environment |
| 0.0001 | Moonless, overcast night sky |
| 0.002 | Moonless clear night sky |
| 0.27–1.0 | Full moon on a clear night |
| 80 | Office building hallway |
| 320–500 | Office lighting |
| 1000 | Overcast day |
| 10000–25000 | Daylight |
As you can see from the table above, the lux values for a “normal” human day can vary dramatically. The sensor copes with this by allowing the use of a variable time window and sensitivity when taking a reading. Effectively the sensor accumulates the readings over the time window (integration interval) into a single 16-bit number which can then be used to calculate the lux reading.
BME280 – Air Pressure, Temperature and Humidity Sensor
This sensor is produced by Bosch and is packaged in both I2C and SPI configuration on the same board. The accuracy of the sensor appears good, pressure and temperature both to 1% and humidity to 3%.
Libraries
Both Sparkfun and Adafruit have provided libraries and example code for the boards. These were easy to add to the development environment.
One caveat, the BME280 requires the addition of the Adafruit sensor library as well as the BME280 library.
Once added it was a simple case of wiring up the sensor to 3.3V and the I2C bus and running the example code.
They both worked first time.
Some Code Modifications (for later)
The light sensor has been show to work in low light conditions but not to any degree of precision. A possible modification to the example code is to look at the sensitivity and integration window settings to see if the precision can be adjusted to make the sensor return better readings in low light.
Some of the values when calculated use the fractional part of a floating-point number, temperature and humidity spring to mind. This meant adding a method to convert a double into it’s string representation for debugging purposes. Trivially solved but an annoying omission from the implementation of sprintf.
Posting to Particle Dashboard
The Oak can also post to the Particle dashboard providing a second method of debugging your application. Statements such as Particle.publish(“Debug”, “Temperature data…”); will cause the string Temperature data… to be posted in a group/attribute Debug
So the readings from the office look like this:
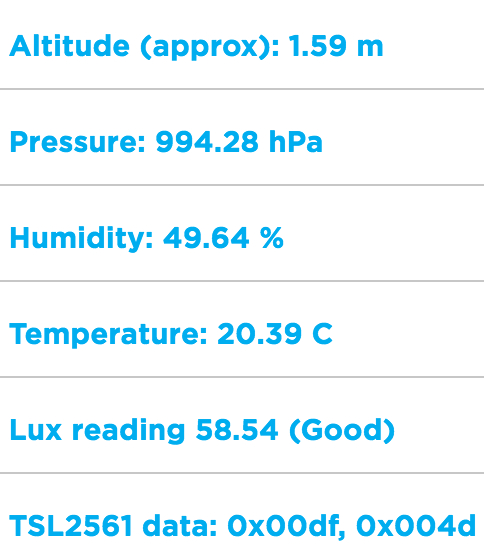
Some Weather Data
Conclusion
Two simple to use sensors with good supported class libraries make these sensors quick and easy to hook up to the Oak. Merging the two examples was simple and sensor data is now appearing over the serial output from the Arduino.
Compiling the code gives some warnings about the I2C library being compiled for the ESP8266 whilst the target board is defined as an Oak. This can be ignored as the Oak is really a convenient wrapper around an ESP8266 module.
Next up, some analog sensors to measure ultraviolet light and wind and rain properties.
Tags: Electronics, ESP8266, Internet of Things, Software Development
Friday, April 1st, 2016 at 4:01 am • Electronics, ESP8266, Internet of Things, Software Development • RSS 2.0 feed Both comments and pings are currently closed.

[…] Last time we looked at the I2C Sensors that are part of the weather station. At the end of the article it was noted that these were working and able to log data to the Particle ecosystem. […]
[…] Next up, talking to sensors. […]