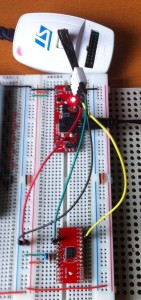
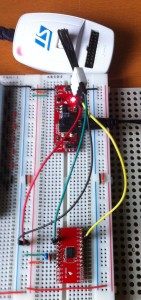
The last few weeks I’ve been getting things together to start to look at developing a smart module for the Netduino GO!. This post looks at the first steps and ends up with some working code on a STM8S003 chip.
STM8S Discovery
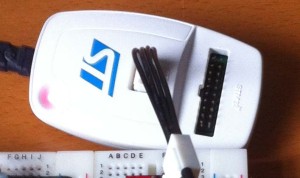
My starting point was to get the software tools installed and working. In order to verify this I purchased the STM8S Discovery board. This has the STLink module and a STM8S105 microcontroller built into a convenient package for less than £7.00. This board itself was easy to set up and worked straight out of the box.
Development Environment
Having the board is one thing but we need a development environment to work with. I tried several environments and in the end I found I was happiest with the IAR environment so for the moment I’m sticking with it whilst I find my feet. Set up was easy and it found the STM8S Discovery straight away.
Start With Something Simple
I wanted to start with a really simple project which would not require any additional hardware other than a scope to check that the application was working. That way I could transfer the program to a microcontroller on a breadboard and know that I had as few possible points of failure as possible. To this end I decided that I would put the microcontroller clock pulses out on one of the pins. I could verify that everything was working but uploading a new program which changed the clock scaler and if all was well I would see a different trace on the scope.
This choice of application was no accident as the data sheet for the chip shows that it has a pin labelled CCO. You can configure this pin to output the controller’s clock signal. Not only that but you can also use the microcontroller’s internal clock generator as the clock signal. So in theory, all I needed to do was add a few discrete components to the breadboard along with the STM8S and I should have a small, simple, self contained system to test the tool set.
Creating a New Project
First thing to do is create a new workspace and project using IAR. Simple enough, enter a name for both and a new main.c is presented to you. Good game but not much use as it stands.
Luckily ST provide a standard library of drivers for the various features available on their chip sets. I downloaded version 2.1.0 of the library and this contained the drivers and some sample applications. The trick is to understand the way in which you access the libraries. It’s really simple and basic. In effect, you add the C source files for the library to your application and compile your application and the libraries at the same time. Both of these are then deployed as a single binary to the microcontroller. Basic but it works. The source files are broken down by microcontroller feature. So, all of the routines etc. for timer 2 are in the header file stm8s_tim2.h and the source code is in the file stm8s_tim2.c.
To make things easier (well, easier for me anyway) I have taken to copying the source and include files from the standard library provided into each project directory I create. That way you simply need to add the source file for a feature as you need it. In this case the only feature I’m going to be using is the clock and so I need to make sure I add the stm8s_clk.c file to the project.
The stm8s.h file contains definitions for a whole range of controllers. It is therefore necessary to define a preprocessor macro for the type of controller the application is targeting. This can be done in one of two ways, either in the stm8s.h file itself (as this in included in the other standard library files) or as a macro in the project. I personally prefer to do this in the project as it makes updating the library code easier.
So Let’s Get Started
First thing to do is to get a workspace and project created. So open IAR and create a new workspace. Next, go to the Project Menu and create a new project. The following dialog should appear:
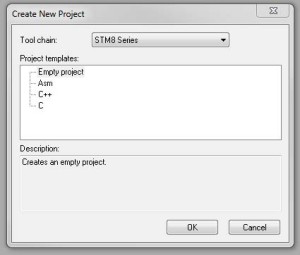
Select a C project and click OK. The next dialog asks you to select a name and location for the project. So decide on a location and name. Being very creative, I went for Test as the project name. Once completed I had a project which looked like this:
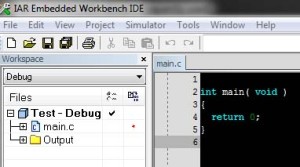
The next job is to add the include and source files for the standard peripheral library. So copy the include and source files from the library and add them to the directory containing your project. I normally put the include files in the inc directory and the sources in the src directory. The next thing to do is add these files to the project. So right click on the project name (in this case Test – Debug and select Add – Add Group. Enter the name STD Peripheral Include
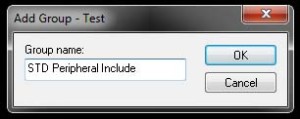
Repeat this to add the source file group with the name STD Peripheral Source. Your project should now look like this:
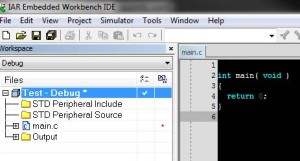
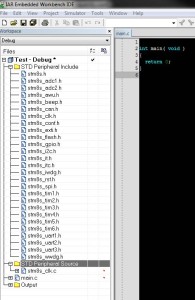
Now we need to add the files to the groups. For the include files I add all of the files. For the source files I only add the ones I will be using. To do this you right click on one of the file groups we have created, say the STD Peripheral Include group and select Add – Add Files…. For the include files navigate to the directory containing the copied files and select them all.
Repeat for the source files but this time we only select the files we will be using. In this case the clock file stm8s_clk.c. Your project should now look something like this:
There are still a few extra steps before we can write some code. The STM8S include files require that the type of chip is defined before any code will compile so we will need to define a preprocessor macro indicating which chip we are using. Next we need to tell the compiler about the location of the include files. Finally, we need to tell the system how to deploy and debug the application.
So let’s start off with the chip family. Firstly we want to tell the compiler about the target family. So right click on the project name and this time select Options. Under General options, select the chip family to be targeted. For the Discovery board the family is STM8S105, for the final module we will be targeting the STM8S003.
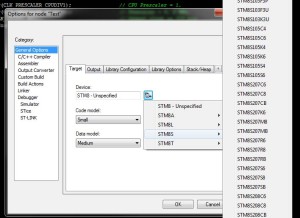
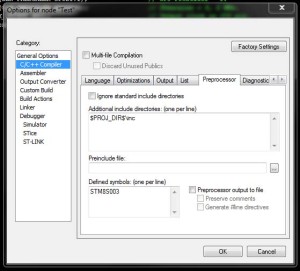
The next step is to tell the preprocessor about the chip family and the location of the include files. From the same dialog as above, select the C/C++ compiler and the Preprocessor tab. Add the entry $PROJ_DIR$inc to the include files and define a symbol for the chip set. Define STM8S105 for the Discovery board and STM8S003 for the final module.
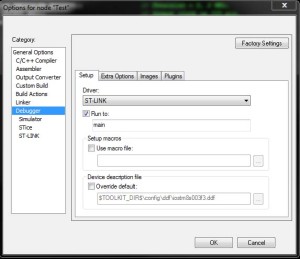
The final step is to tell the IDE how to deploy and debug the application. From the Options dialog select the Debugger category and set the Driver to ST-LINK.
Now click on OK to set the options. We can now start to write some code.
Let’s Write Some Code
Replace the code in the main.c file with the following:
#include "stm8s.h"
#include "stm8s_clk.h"

int main(void)
{
    CLK_DeInit();
    CLK_SYSCLKConfig(CLK_PRESCALER_CPUDIV1);                // CPU Prescaler = 1.
    CLK_SYSCLKConfig(CLK_PRESCALER_HSIDIV8);                // Prescaler = 8, 2 MHz.
    CLK_CCOConfig(CLK_OUTPUT_HSI);                          // Output clock on CCO pin.
    CLK_ClockSwitchConfig(CLK_SWITCHMODE_AUTO,              // Automatically switch
                          CLK_SOURCE_HSE,                   // Switch to internal timer.
                          DISABLE,                          // Disable the clock switch interrupt.
                          CLK_CURRENTCLOCKSTATE_DISABLE);   // Disable the previous clock.
}
Connect up board/chip and hit Ctrl-D. This will compile and deploy the application. The debugger should start with the first line of main highlighted. Press F5 and the application should start. Hooking up the oscilloscope gave the following trace:
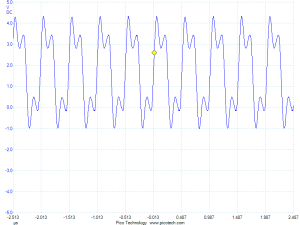
The clock frequency of the chip using the internal high speed oscillator is 16 MHz. Diving this by 8 should give a 2 MHz signal (as indeed the above trace shows). Just to check if this is a coincidence, change to CLK_PRESCALER_HSIDIV8 to say CLK_PRESCALER_HSIDIV4 and the scope output should change to show the new clock frequency and sure enough it does.
