CooCox – ARM Development Environment For the Beginner
A few weeks ago I published two articles on development environments for the STM32F4 Doscovery Board. Since then I have become aware of CooCox IDE. This is a small development environment for a number of Microcontrollers including some of the STM32 range of processors.
The IDE promises to be free, unrestricted and simple offering the ability to develop high-quality software solutions in a timely and cost effective manner.
Too good to be true?
Let’s find out.
Web Site
I must admit, it took me a long time to take this tool seriously. I found the web site in the very early days in my search for a reasonable cost development environment for the STM32F4 Discovery board. The look and feel of the site left me a little cold. The design looks like it was put together in the early 1990s.
My only hope was that the tools were better.
Clicking through to the CoIDE page promised to show a video instead I found myself presented with a large amount of white space where the video should be. Maybe this works with IE or Firefox but not with Chrome. If you do see the white spave please take the time to scroll to the bottom of the page. There you will find tables detailing the supported chips/boards along with some download links.
On the whole this web site left me feeling nervous and I must admit that the first time I came across this tool I dismissed it purely based upon the look and feel of the web site.
So what made me come back, a comment made by a colleague, i.e. it worked and was simple to use.
Software
In order to use this IDE to develop applications for your board you also need to download the ARM GCC 4.7 toolchain. This is the same toolchain I used when setting us Eclipse to work with the STM32F4 Discovery board (see Setting up GCC for the STM32F4 Discovery Board). I was lucky enough to have this toolchain already installed making one less task to perform.
Downloading the IDE is simple although you do need to register on the site.
Installation was painless and the initial setup was also simple.
I’m starting to get over the feeling of unease I experienced when I first visited the web site.
Starting the IDE present you with a very familiar look and feel:
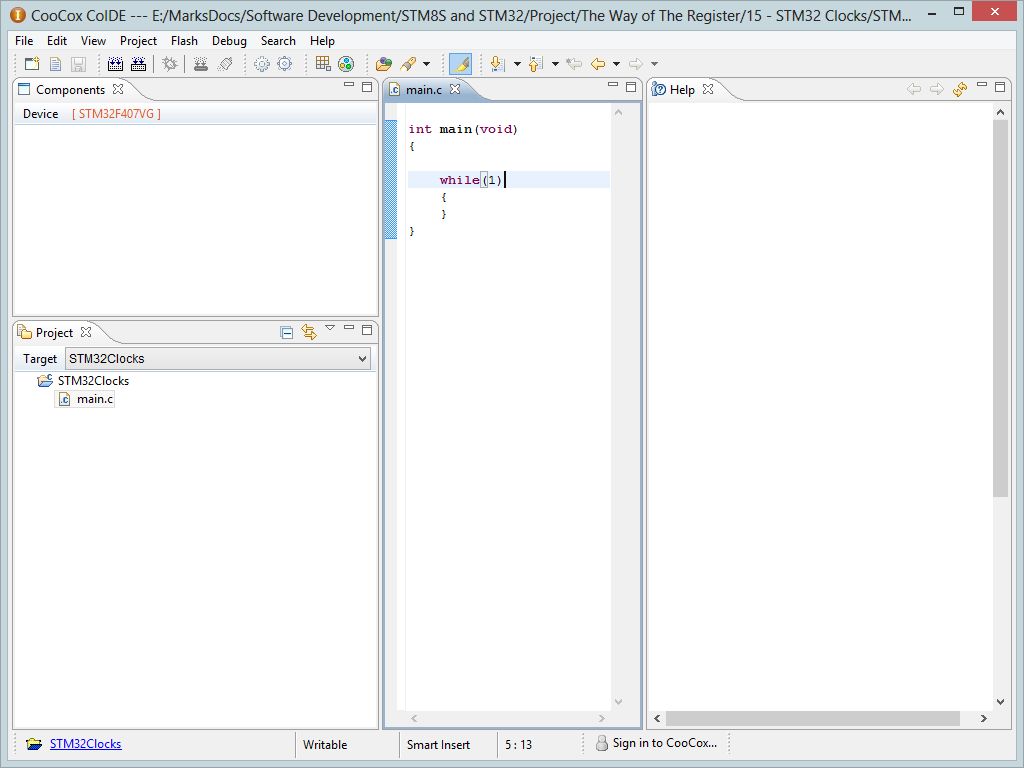
New Project
It feels like Eclipse.
Creating a Project
Let’s see how good the environment is by taking the code from STM32 – Simple GPIO and Some Flashing LEDs post.
Creating a new project is simple, just head over to the Project->New Project menu item. Doing this will present you with a wizard which will take you through the steps required to select your board and create an empty project.
Some hints:
- When creating a new project you need to untick the Use default path option if you want your code to be put anywhere other than under the installation directory.
- The select board or chip does not have an option for the STM32F4 Discovery Board (or any for the Discovery boards for that matter). To use this board select Chip and then locate the STM32F407VG chip.
Upon completion of the wizard you will be presented with the component selection tab in the IDE:
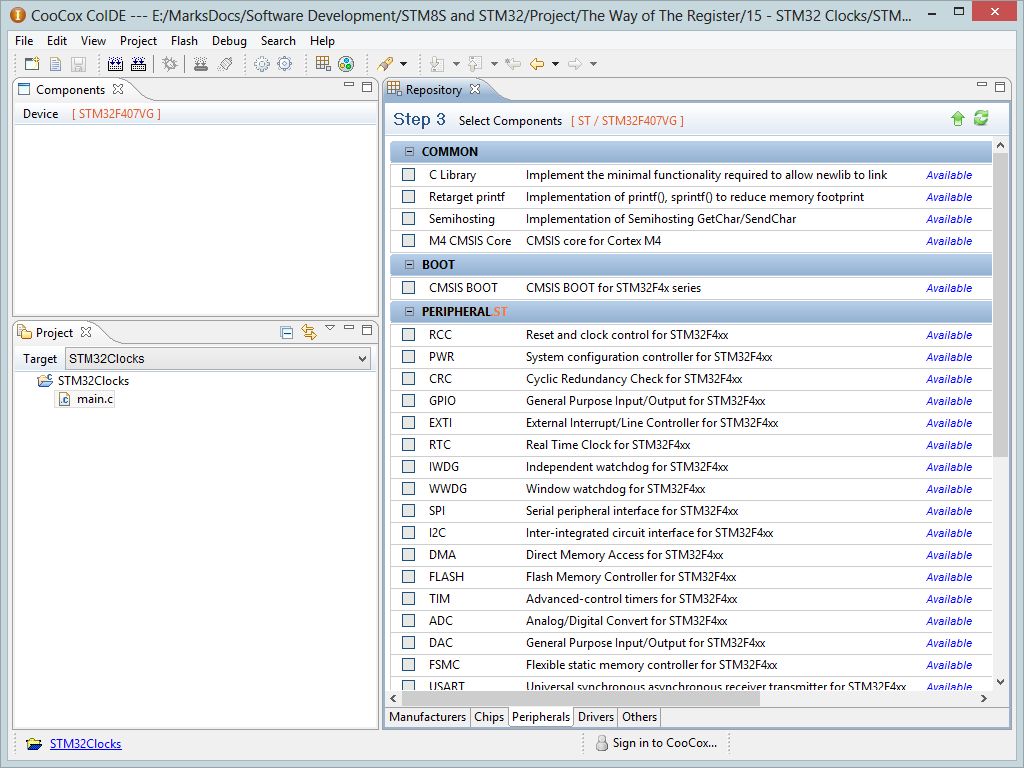
Component Selection
This tab is really powerful and makes it easy for the new comer to this board to get off the ground. In the previous example I used two sets of definitions; Reset and clock control and GPIO. Ticking the RCC option in the component tab automatically adds the headers and source files needed to use the RCC library to the project. It also adds any dependencies, in this case the CMSIS core system startup files. After selecting the RCC and GPIO components the IDE looks as follows:

Initial Component Selection
Opening file explorer on the PC showed that the directory structure had been modified and the files put in place. So what happens if you untick and option? Removing components removes the files from the project and it also removes them from file store as well.
Now this feature may seem simple but for the beginner it is really powerful. It ensures that all of the source and header files required are added to the project. This is something which whilst not difficult can trip up the beginner. It is also a little tedious to do with IAR and Eclipse.
One downside of the component selection tab is that it does not easily allow you to remove the source code for the components you have added without also removing the header files as well. I am following the principle of The Way of the Register and not using the Standard Peripheral Library. This requires the header files but not the source code for the library itself. We can only hope the linker is smart enough to remove unused code from the final object executable.
Building the project is as simple as clicking on the Build icon (or using the Project->Build menu item). A few seconds later I have the default applicaiton and the library files compiled.
Debugging
An IDE is really nothing without a reasonable debugger. I remember from the work I did setting up Eclipse (see Setting up GCC for the STM32F4 Discovery Board) that Eclipse needed the OpenOCD library in order to be able to debug an application using ST-Link. There is no mention of OpenOCD when using CooCox. The only additional software required for debugging appears to be the ST-Link USB driver. Again, I already have this installed but you may need to visit ST’s web site for the latest version.
In order to debug we need some code so let’s borrow the code from the Simple GPIO example:
#include "stm32f4xx_rcc.h"
#include "stm32f4xx_gpio.h"

int main()
{
    //
    //  Initialise the peripheral clock.
    //
    RCC->AHB1ENR |= RCC_AHB1Periph_GPIOD;
    //
    //  Initialise the GPIO port.
    //
    GPIOD->MODER |= GPIO_Mode_OUT;
    GPIOD->OSPEEDR |= GPIO_Speed_25MHz;
    GPIOD->OTYPER |= GPIO_OType_PP;
    GPIOD->PUPDR |= GPIO_PuPd_NOPULL;
    //
    //  Toggle Port D, pin 0 indefinitely.
    //
    while (1)
    {
        GPIOD->BSRRL = GPIO_Pin_0;
        GPIOD->BSRRH = GPIO_Pin_0;
    }
}
Starting the debugger (Ctrl-F5) changes the IDE context and presents the debugging interface with the application stopped at the first line of code:
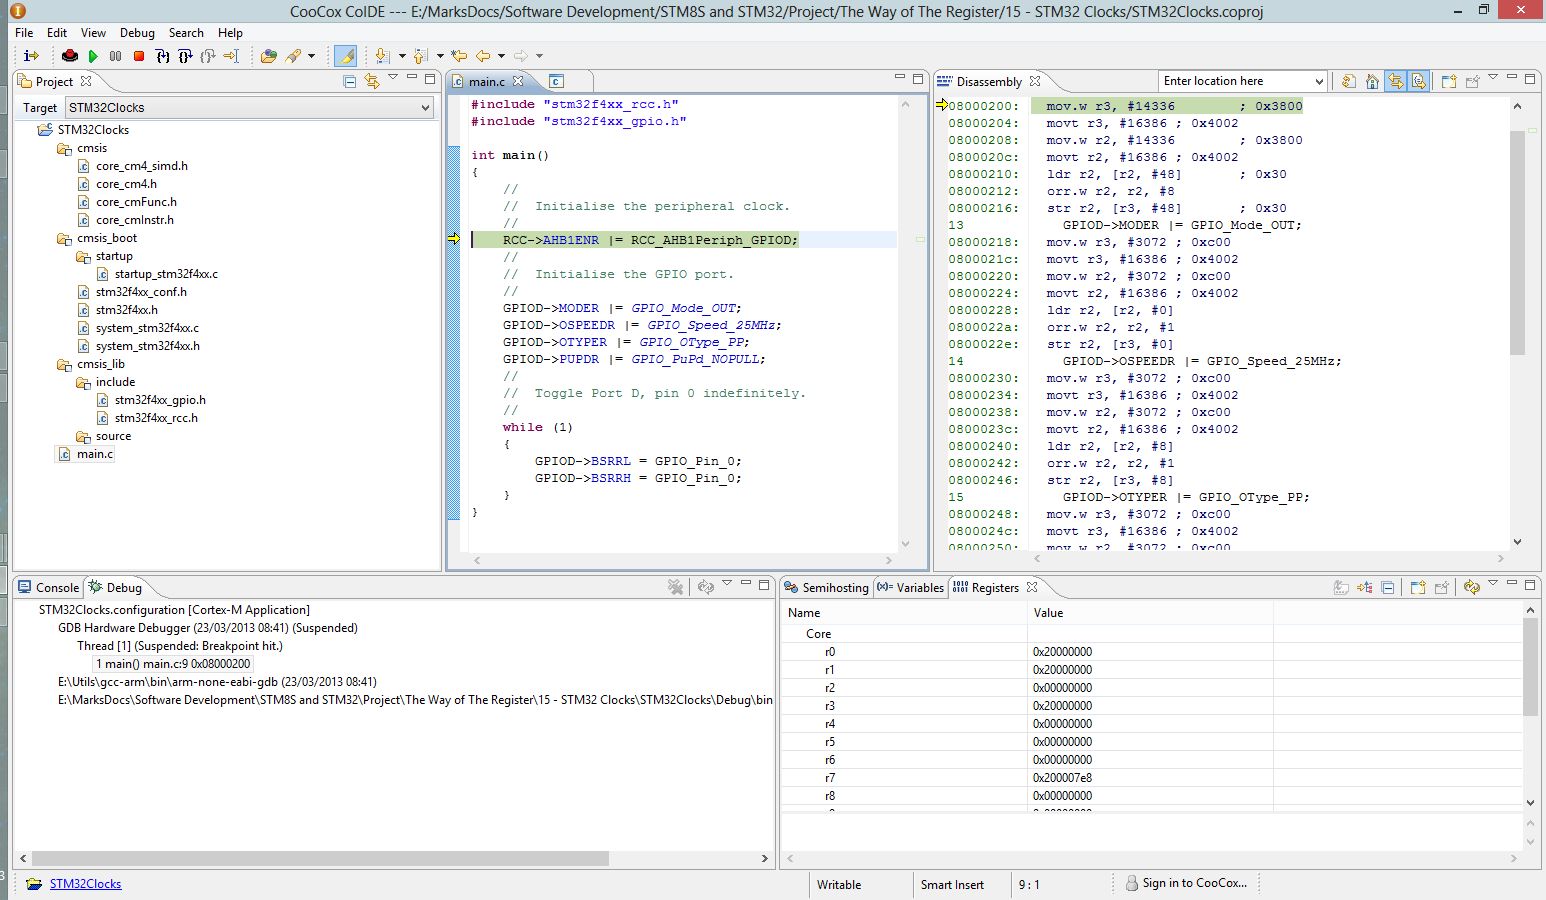
CooCox debugging aspect
Warning – the above image is large
Pressing F5 runs the application to the next breakpoint. As I have not set any breakpoints this should run the application indefinitely and indeed it does. Hooking up the scope to pin 0 of port D shows the following output:

Scope output
Single stepping is achieved using F10 and F11. So re-running the application and pressing F10 should single step over the current line of code and indeed it does. The registers window also highlights the ARM registers that were changed by executing the last instruction:
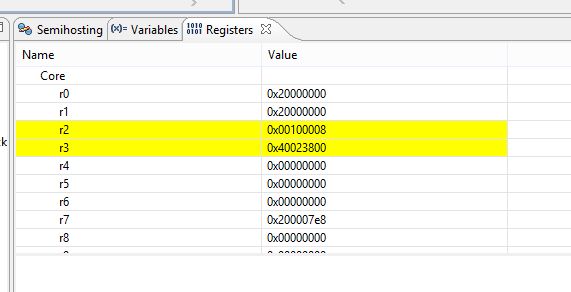
Register View
One thing that I have found missing which I really appreciate with IAR is the ability to view the state of the peripheral registers (as opposed to the microcontroller registers). This is a really useful feature as it means you do not have to locate the registers in memory and decode them yourself.
Conclusion
CooCox IDE is a simple way to get into working with the STM32F4 Discovery board. The power and simplicity of the tool is only let down by the dated look of the web site.
A cracking tool; well worth looking at.
Tags: Electronics, Software Development, STM32
Saturday, March 23rd, 2013 at 9:24 am • Electronics, Software Development, STM32 • RSS 2.0 feed Both comments and pings are currently closed.