NE555 Calculator and Data Logger
A while ago I wrote about my renewed relationship with the NE555 when I produced a simple astable circuit. The experience of trying to work out the values lead me to think about writing a calculator application. This lead me to wonder how I could validate the results given that I do not have an oscilloscope – simple add a data logger to the Netduino and use that. The following shows how I did it and provides some information about how the code works.
Objective
Write application which provides the functionality:
- Given a set of components and/or the frequency of the circuit calculate the missing value for the components or frequency
- Present the results to the user
- Capture data on the Netduino on one of the analog pins
- Transfer the data from the Netduino and plot the results
This will require two applications, one to interact with the user and perform the calculations and data plotting and one application to capture the data on the Netduino.
Netduino Application
This application is an extension to the Silverlight application which I documented here. This has the core functionality required to allow the Netduino Plus to communicate with a Silverlight application. A few slight changes were required, namely:
- Make the web server understand the commands which would be issued by the Silverlight application
- Implement a data logger.
For the first of the changes we simply need to add some additional variables to store the configuration and modify the ProcessCommand method. The system uses the Command.html special file (as before) to receive commands/requests from the user. The valid actions implemented are as follows:
| Action | Parameters | Description |
| t | Test the connection. This simply returns a Hello string to the calling application. | |
| g | Get the preconfigured file and send this back to the caller. | |
| c | SampleRate and FileName | Configure the Netduino data logger. The system will configure the Netduino to log data every SampleRate milliseconds and store the results in the specified file. |
The last part of the change to the web server is to provide a mechanism to communicate the change to the data logging component. This done using an event as the data logger and the web server are executing in different threads.
The next change required is to implement the data logging functionality. The data logging runs in the main thread. The on board switch was used to trigger data collection rather than having the Netduino log data permanently. The on board LED was also used to indicate if the board is collecting data. A Timer was used to trigger the collection of data from the analog pin. This meant that the board can capture at most 1000 samples per second.
private static void onBoardButton_OnInterrupt(uint data1, uint data2, DateTime time)
{
    if (data2 == 0)
    {
        if (_logging)
        {
            _timer = null;
            _onBoardLED.Write(false);
            _logging = false;
        }
        else
        {
            using (TextWriter tw = new StreamWriter(@"SD" + _fileName, false))
            {
                tw.WriteLine("Ticks,Data");
                tw.Close();
            }
            _startTime = Utility.GetMachineTime().Ticks;
            _timer = new Timer(new TimerCallback(CollectData), null, 0, _sampleRate);
            _onBoardLED.Write(true);
            _logging = true;
        }
    }
}
This code is tied to the on board switches interrupt. It starts and stops the logging depending upon the current state. A logging start request opens the specified file and puts the header into the file. This effectively deletes and results already stored in the file. The timer is created and tied to the CollectData callback. This callback simply reads the pin and writes the number of ticks since the start of the logging session along with the reading from the pin.
private static void CollectData(object o)
{
    string data;

    data = Utility.GetMachineTime().Ticks - _startTime + "," + _analogInput.Read();
    using (TextWriter tw = new StreamWriter(@"SD" + _fileName, true))
    {
        tw.WriteLine(data);
        tw.Close();
    }
}
Silverlight Application
This is where the project began to take on a life of it’s own. The code discussed here consumed the majority of the time spent on the project. The code is fairly well commented and so the main features will be discussed here.
The project uses MVVM to implement a calculator for the NE555. This results in little code in the code behind for the main page. What code there is simply creates a new instance of the View Model class and calls methods in the class when buttons on the interface are clicked. The remaining communication is achieved using data binding in Silverlight.
The calculator can be used to calculate one of the following (given the remaining three values):
- R1
- R2
- C1
- F
The system takes three of the specified values and calculates the remaining. The values for the components can come from three sources, a standard component, a user specified value or a range of values.
If single component values are used (either standard components or user values) then a single result set is generated. If a range of values are selected for one or more of the components then the system will generate a table of values with one line for each of the requested values.
So much for discussing the application, it is probably just as easy to try the application which can be found here.
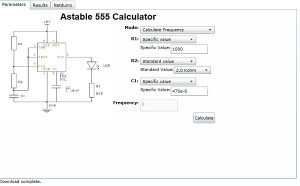
The first tab (Parameters on the application collects the parameters for the calculations and allows the user to request that the results are calculated.
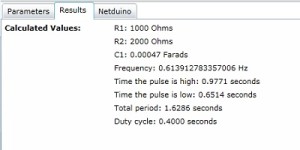
The next tab (Results) presents the results of the calculation.
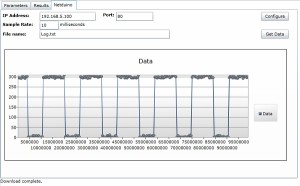
The final tab (Netduino) allows the application to communicate with a Netduino Plus.
Although the Silverlight application is hosted on my web site, you can still use this to communicate with your Netduino Plus if it is connected to your network.
Results
The resulting application is more or less complete. There are a few things which could be done to make it more robust or more useful, namely:
- Add data validation to the properties in the NE555Calculator class.
- Make the data logger work with multiple files.
- Allow the configuration of the pin used to collect data.
- Use the date and time to record when the sample was taken
- Collect multiple samples at the same time
- Allow the user to enter the reference voltage and scale the data items plotted accordingly
- Convert the ticks into milliseconds
These are left as an exercise for the reader.
Source Files
The source files for this project can be found here:
Astable NE555 Silverlight Calculator
As usual, these sources are provided as is and without warranty. They are used at your own risk.
Setting This Up
The Silverlight application can be run from a web site or from Visual Studio. The web server needs a little more than just running the project on the Netduino. You will also have to place the clientaccess.xml policy file on the SD card as Silverlight requests this file in order to determine if it allowed to talk to the web server.
Tags: Electronics, Netduino, Silverlight
Saturday, March 5th, 2011 at 5:01 pm • Electronics, Netduino, Silverlight • RSS 2.0 feed Both comments and pings are currently closed.


